Everything You Need to Know About the Modern Hair Perm

Gone are the days when perms were synonymous with tight, frizzy curls of the 80s. Today’s perms have evolved, offering a wide range of styles from loose waves to defined curls, tailored to suit every hair type and preference. This transformation has debunked many misconceptions about perms being damaging or limiting in style. The modern perm is here to offer versatility, minimal upkeep, and long-lasting texture.

Everything You Need To Know About The Modern Hairperm


Understanding the Perm Process

The perm process involves using chemicals to break down and then reform the hair’s disulfide bonds, which determine its shape. The solution’s composition and the neutralizer play pivotal roles in this transformation, ensuring the desired curl is achieved without compromising hair health.

Types of Perms

Today’s market offers a variety of perms:

Cold perms give traditional tight curls, while hot perms create softer, more natural waves.
Digital and ceramic perms use advanced technology to offer more defined curls with less damage.
Root and partial perms add volume and texture to specific areas, catering to individual style needs.
Choosing the Right Perm for Your Hair Type

Selecting the correct perm type is crucial for achieving the desired outcome without damaging the hair. Factors like hair texture, health, and personal maintenance capabilities should guide your choice, in consultation with a professional stylist.

Pre-Perm Preparation

Proper preparation involves assessing hair health and preparing it for the chemical process. Understanding the commitment perms require in terms of lifestyle and maintenance is also crucial at this stage.

The Perm Procedure Explained

The perm process varies slightly between types but generally follows a similar pattern. Understanding the steps involved can help set realistic expectations for the duration and results of the salon visit.

Post-Perm Hair Care

Maintaining a perm involves adopting a hair care routine that includes hydrating and curl-defining products. Proper care can significantly extend the lifespan of your perm.

Common Perm Myths Debunked

Modern perms are designed to minimize damage and offer a range of styling options. Addressing common myths can help alleviate concerns related to hair health and versatility.

Perm Maintenance and Troubleshooting

Even with the best care, perms can encounter issues like frizz or loss of definition. Knowing how to manage these problems or when to seek professional advice is key to maintaining your perm.

Modern Perm Inspirations

Looking to celebrities and trendsetters can provide inspiration for your perm. Adapting these styles to fit your personal look can make your perm truly unique.


DIY Perms vs. Professional Perms

While at-home perm kits are available, professional perms are recommended for their expertise and access to higher-quality products. The risks associated with DIY perms often outweigh the benefits.

Everything You Need To Know About The Modern Hair Perm


The Future of Perms

Innovations in perm technology continue to emerge, promising more sustainable and hair-friendly options. The future of perms looks bright, with a focus on health and environmental awareness.

Embracing the modern perm means enjoying a versatile, low-maintenance hairstyle that can enhance your natural beauty. With the right preparation, care, and mindset, anyone can rock a perm tailored to their unique style.

  • Can perms damage my hair? Modern perms have come a long way in terms of chemical advancements and techniques, significantly reducing potential damage. When performed by a professional using quality products, perms can be safe for most hair types. However, the key to minimizing damage is proper hair assessment before the perm and following a tailored post-perm care routine.
  • How long does a perm last? The longevity of a perm can vary based on the hair type, the curl tightness, and how well you maintain it. On average, a perm can last anywhere from 3 to 6 months. As your hair grows, the roots will begin to show their natural texture, which may require a touch-up.
  • Can I perm colored or bleached hair? Perming colored or bleached hair requires caution, as these processes can weaken your hair. It’s essential to wait several weeks between chemical treatments and consult with a stylist to assess your hair’s condition. In some cases, a gentle perm solution may be used on previously treated hair, but it’s crucial to prioritize hair health to avoid damage.
  • What should I do before getting a perm? Preparing your hair for a perm involves ensuring it’s in good condition. Avoid heavy styling or heat treatments prior to your appointment and consider a moisturizing treatment to strengthen your hair. Additionally, have a consultation with your stylist to discuss your desired outcome and any concerns you might have.
  • How do I take care of my perm? Post-perm care is vital for maintaining the health and appearance of your curls. Use sulfate-free shampoos and conditioners designed for curly or chemically treated hair. Incorporate deep conditioning treatments weekly, and avoid washing your hair too frequently to preserve the curls and prevent dryness. Minimize heat styling and, if necessary, use a diffuser on a low heat setting when blow-drying.
  • Can I get a perm if I have short hair? Yes, perms can be done on short hair to add volume, texture, and waves or curls. The technique and rod size will be adjusted to suit your hair length and desired style. Short hair perms can offer a refreshing and modern look, with options ranging from tight curls to loose waves.
  • What is the difference between a cold perm and a hot perm? A cold perm uses traditional perm solutions at room temperature to reshape the hair, typically resulting in tighter, more defined curls. A hot perm, also known as a digital or thermal perm, involves applying a milder solution to the hair, then using heated rods to process the curls. Hot perms generally offer softer, looser curls or waves with more natural movement.
  • Can perms work on very fine or very thick hair? Perms can be adapted to work on most hair types, including very fine or thick hair. Fine hair can gain volume and texture, while thick hair can achieve more defined curls or waves. The key is to select the right type of perm and rod size for your hair’s texture and density. A skilled stylist can customize the perm process to achieve the best results for your specific hair type.
  • How soon can I wash my hair after getting a perm? It’s recommended to wait at least 48 hours before washing your hair after a perm. This waiting period allows the disulfide bonds in your hair to fully set into their new shape. Washing your hair too soon can disrupt the curl pattern and lessen the perm’s longevity.
  • Will a perm make my hair frizzy? While perms can sometimes lead to increased frizz, especially in humid conditions, choosing the right type of perm and following a proper hair care routine can significantly reduce this risk. Using products designed for curly or treated hair can help maintain moisture and define curls, minimizing frizz. Regular trims and deep conditioning treatments also contribute to keeping frizz at bay.


Enhance Your Winter Workout 5 Essential Tips
Enhance Your Winter Workout: 5 Essential Tips

Winter’s allure may tempt us to abandon exercise; but remaining physically active throughout this cold spell is imperative if you hope to maintain fitness regimens, combat seasonal cold and flu outbreaks, support mental wellbeing, or maintain physical and emotional well-being. At Fitness Superstore we have five useful tips that will keep your workout on track during this frigid spell – be it indoor strength training sessions or taking outdoor adventures! Take your time when warming up:Winter workouts require extra attention and care in terms of warming up when exposed to the cold climate, particularly dynamic stretching and indoor cardio warm-up activities such as dynamic stretching. A thorough warm-up routine can ensure both safety and effectiveness during cold climate exercise, where muscles may stiffen up due to inflexibility in cold climate. By starting earlier and allocating extra time for warm-up activities like dynamic stretching or indoor cardio warm-ups such as dynamic stretching/cardio, dynamic stretching, as well as energy boost from dynamic stretching/cardio can better prepare you and energize and motivate during workout sessions in cold climate environments! As winter days shorten and temperatures fall, maintaining an outdoor fitness regimen becomes more of a struggle than before – this is where combining indoor and outdoor workouts comes into play. Indoor exercise options like treadmill sessions, yoga or weightlifting provide welcome respite from winter’s chill. Their flexibility ensures a continual fitness regimen even in less than ideal outdoor weather. Outdoor activities, like running, hiking and cycling have their own set of unique advantages in wintertime. Colder temperatures help the heart work more effectively, and natural lighting plays a pivotal role in getting our daily dose of vitamin D. Layering up correctly and investing in thermal-wicking gear are critical elements to enjoy these outdoor workouts in comfort and performance. Prioritize Pre-Workout Nutrition: With winter workouts potentially increasing in intensity and duration, nutrition before workouts becomes essential to optimal performance and recovery. Your pre-workout snack serves two important roles – supporting energy levels while raising body heat during outdoor and indoor workouts performed under cold conditions. Meals rich in carbohydrates, proteins and healthy fats such as protein porridge with stewed fruit or eggs on toast provide sustained energy throughout your session while contributing to increasing your core temperature for winter workouts. Keep Hydrated: Staying hydrated should not only be considered important in summer; it should also be addressed during winter. Even though you might not experience thirst as much, your body still loses fluid through respiration and sweat, which contributes to dehydration that reduces performance and muscle soreness. Therefore, making an active effort to drink water before, during, and after workouts is imperative to maintaining performance and minimizing muscle soreness; try flavoring plain water with fruit such as berries or citrus to add an interesting twist; alternatively hot beverages like herbal tea or lemon water can provide comforting warmth as well as hydration all at the same time! Listen and Rest: Consistency is vital when it comes to fitness success; however, knowing when and how much resting you need to take can also play a vital role….

The Importance Of Different Moisturizers For Day And Night: Here's Why
The Importance of Different Moisturizers for Day and Night: Here’s Why

Moisturizers are an essential part of any skincare routine, providing hydration and nourishment to the skin. However, have you ever wondered why there are separate moisturizers designed specifically for daytime and nighttime use? The answer lies in the different needs of our skin throughout the day and night. In this article, we will explore the importance of using different moisturizers for day and night, and how these specialized products can optimize your skincare routine for healthy and glowing skin. Daytime Moisturizer: Protection and HydrationDuring the day, our skin is exposed to various external aggressors, such as pollution, UV rays, and environmental stressors. A daytime moisturizer serves as a protective barrier, shielding the skin from these harmful elements. It often contains ingredients like antioxidants, SPF, and lightweight hydrating agents to combat free radicals and lock in moisture without feeling heavy or greasy. a. SPF Protection: Many daytime moisturizers include sun protection factor (SPF) to shield the skin from UV radiation. SPF protects against premature aging, sunburn, and reduces the risk of skin cancer. Applying a moisturizer with SPF every morning helps maintain a youthful complexion and prevents sun-induced damage. b. Lightweight Texture: Daytime moisturizers are designed to be absorbed quickly, providing a smooth canvas for makeup application and preventing excessive shine throughout the day. They are often oil-free or have a light, non-greasy texture suitable for wearing under makeup. c. Antioxidants: To combat free radicals produced by pollution and UV exposure, daytime moisturizers frequently contain antioxidants like vitamin C and E. These powerful ingredients neutralize harmful molecules, helping to maintain the skin’s elasticity and reducing the signs of aging. Nighttime Moisturizer: Repair and RenewalNighttime is when the skin’s natural repair and renewal processes are most active. During sleep, the body focuses on cellular regeneration and healing. A nighttime moisturizer is specially formulated to support these processes, providing nourishment and moisture to aid in skin recovery and revitalization.a. Richer Formulas: Nighttime moisturizers typically have richer and more emollient formulas to deeply nourish and replenish the skin. They may contain ingredients like hyaluronic acid, peptides, and retinoids to promote collagen production, reduce fine lines, and improve skin texture. b. No SPF: Unlike daytime moisturizers, nighttime products do not include SPF, as they are not exposed to direct sunlight. This allows the skin to fully absorb and utilize the beneficial ingredients without interference from UV filters. c. Repairing Ingredients: Nighttime moisturizers often include ingredients like ceramides, niacinamide, and plant extracts, which work to strengthen the skin’s barrier, fade hyperpigmentation, and soothe inflammation. Addressing Different Skin Concerns:Using different moisturizers for day and night allows you to target specific skin concerns effectively. During the day, your focus is on protecting the skin from external damage, whereas, at night, you can concentrate on repairing and improving its overall health.a. Daytime: If you have oily or combination skin, a lightweight, oil-free moisturizer with SPF will prevent excess sebum production and provide sun protection without clogging pores. For dry skin, opt for a hydrating moisturizer with added antioxidants to combat environmental stressors. b. Nighttime: A night cream that is more substantial…

The Astonishing Reality Could Lip Balm Be Deteriorating Your Chapped Lips 2
The Astonishing Reality: Could Lip Balm Be Deteriorating Your Chapped Lips?

Turning to lip balm for immediate solace from chapped lips is a common practice, yet there’s growing curiosity about whether these comforting tubes may actually be perpetuating a cycle of lip dryness and dependence. This article investigates the composition of lip balms, their influence on lip health, and strategies for judiciously choosing and utilizing lip care products. Deciphering Lip Balm and Its ConstituentsActing as a moisture-locking barrier, lip balm shields lips from harsh external conditions like cold climates and dry environments. Key components typically encompass occlusives such as petroleum jelly, humectants including hyaluronic acid, and emollients like shea butter. Although these constituents are mainly beneficial, some lip balm formulas may incorporate potential irritants, for instance, fragrances or menthol, aggravating sensitivity and intensifying dryness. The Phenomenon of Lip Balm DependenceThe notion of becoming reliant on lip balm is not unfounded. Such dependence arises when lips start relying on artificial moisture, diminishing their innate hydrating capabilities. Indications of excessive use involve constant reapplication needs and experiencing a sense of tightness or aridity sans balm. Evaluating Ingredients’ Effects on Lip WellnessIngredients vary significantly in their impact on lip health. While substances like lanolin and beeswax offer profound moisturization and protection, certain essential oils and synthetic additives might irritate the lips, further exacerbating chapped conditions. Contrasting Balms, Salves, and OintmentsComprehending the distinctions among these products aids in making informed choices. Balms provide a balanced mix of occlusion and hydration, salves focus on healing with their denser consistencies, and ointments are ideal for extreme dryness, offering substantial protective layers. Hydration’s Role in Lip CareBoth internal and external hydration are pivotal for lip health. Adequate water intake fosters natural moisture, whereas applying products enriched with aloe vera and glycerin enhances the lips’ moisture retention. Debunking Lip Balm Myths and TruthsMisconceptions abound, such as the belief in lip balms causing addictive dryness or the superiority of all-natural ingredients. The essence lies in identifying products that are meticulously formulated to meet individual lip requirements. Dermatologists’ Insights on Lip Balm ApplicationExperts advocate for balms devoid of allergenic or irritating substances, recommending those with straightforward, hydrating ingredients. The preference between natural versus synthetic components often comes down to personal sensitivity and skin reactivity. Optimizing Personal Lip Care PracticesAn effective daily lip care regimen should encompass gentle exfoliation, adequate hydration, and protection against environmental elements. Tailoring care according to weather conditions, like applying SPF-infused balms in sunny settings, can mitigate damage. Assessing the Dilemma: Does Lip Balm Aggravate Chapped Lips?The response is nuanced. For the majority, a carefully selected lip balm delivers vital moisture and protection. Yet, for individuals with sensitive skin or allergies to certain substances, some balms might indeed worsen dryness. Tailoring Lip Care to Individual NeedsIdentifying personal lip types and issues is crucial for customized care. Those with a predisposition to dryness might find solace in more occlusive formulas, whereas individuals with sensitive lips might seek hypoallergenic and unscented options. The Mental Aspect of Lip Balm UseBeyond physical dependency, the habitual use of lip balm can encompass an emotional dimension, with some developing a psychological attachment to their lip care…

Face Tonic: The Unsung Hero Of Skincare – What It Is And How To Make It Shine
Face Tonic: The Unsung Hero of Skincare – What It Is and How to Make It Shine

In the ever-expanding world of skincare, one product often overshadowed by its more glamorous counterparts is the humble face tonic. While cleansers, moisturizers, and serums bask in the limelight, face tonics quietly work behind the scenes to balance, hydrate, and rejuvenate the skin. In this comprehensive guide, we will unveil the secrets of face tonics, exploring what they are, their essential components, their benefits for different skin types, and, most importantly, how to use them effectively to achieve a radiant complexion. Whether you’re a skincare novice or an enthusiast, understanding face tonics can be the key to unlocking the full potential of your skincare routine. Chapter 1: Demystifying Face Tonics We’ll start by demystifying face tonics, shedding light on: Chapter 2: The Key Components of Face Tonics Face tonics often consist of a variety of ingredients that provide different benefits to the skin. In this chapter, we’ll explore: Chapter 3: Benefits of Using Face Tonics Face tonics offer a range of benefits for the skin. We’ll delve into these advantages, including: Chapter 4: Choosing the Right Face Tonic for Your Skin Type Not all face tonics are created equal, and choosing the right one for your skin type is essential. We’ll provide guidance on selecting the perfect tonic for: Chapter 5: Incorporating Face Tonic into Your Skincare Routine Using a face tonic effectively requires proper integration into your skincare routine. We’ll cover: Chapter 6: DIY Face Tonics: Crafting Your Customized Elixir For those who enjoy a more personalized touch, we’ll explore the world of DIY face tonics. We’ll discuss: Chapter 7: Face Tonics for Specialized Concerns Certain face tonics cater to specific skincare concerns. We’ll look at tonics designed for: Chapter 8: Common Myths and Misconceptions About Face Tonics In this chapter, we’ll debunk some common myths and misconceptions surrounding face tonics, such as: Chapter 9: The Future of Face Tonics As the skincare industry continues to innovate, we’ll speculate on the future of face tonics and potential advancements in their formulation and application. Chapter 10: Conclusion We’ll wrap up our journey through the world of face tonics by summarizing the key takeaways and emphasizing the significance of this often-overlooked skincare product. Whether you’re seeking balance, hydration, clarity, or simply an extra layer of care for your skin, a well-chosen face tonic can be a game-changer in your skincare routine. By understanding their benefits and how to use them effectively, you’ll be on your way to achieving a radiant, healthy complexion with the support of this unsung hero of skincare.

Diy Haircut Guide: How To Cut Your Own Hair At Home
DIY Haircut Guide: How to Cut Your Own Hair at Home

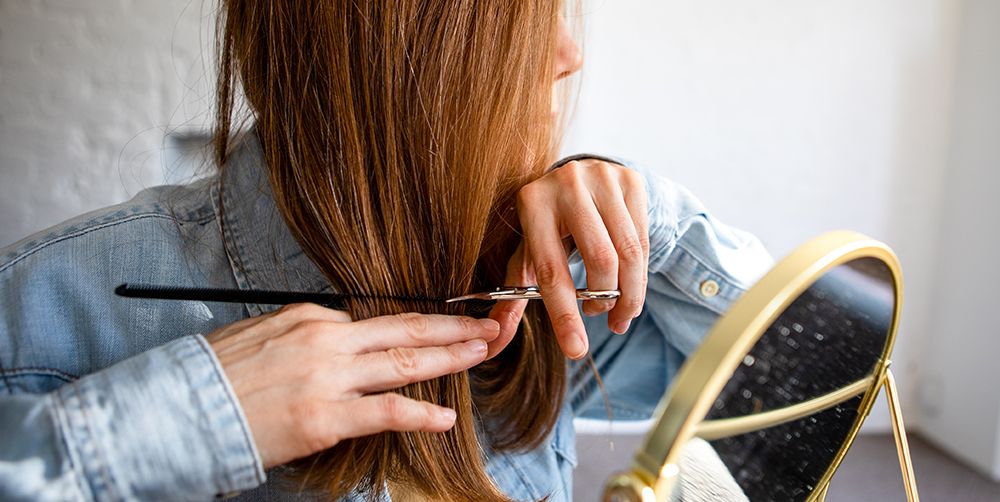
Whether you’re looking to save time and money or simply prefer the convenience of a DIY approach, cutting your own hair at home is a practical skill to have. While leaving major hair transformations to professional stylists is advisable, trimming your hair or giving yourself a simple haircut can be achieved with the right tools and techniques. In this comprehensive guide, we will walk you through step-by-step instructions on how to cut your own hair, along with helpful tips to ensure a successful and satisfying outcome. Gather the Right Tools:Before you start cutting your hair, gather the necessary tools to ensure a smooth process. You will need:Sharp haircutting scissors: Invest in a good pair of professional scissors designed for hair cutting. Using regular scissors can lead to uneven cuts and split ends. Hair clips or elastics: These will help you section your hair for easier cutting. Comb: A fine-toothed comb will assist in detangling and parting your hair. Mirror: A large, handheld mirror and a stationary mirror will allow you to see your hair from different angles during the cutting process. Spray bottle with water: Mist your hair with water to dampen it slightly before cutting. This makes the hair more manageable and prevents excessive flyaways. Decide on the Haircut:Decide on the type of haircut you want before you begin. For simple trims or maintaining your current hairstyle, follow your previous cut as a reference. If you plan to make significant changes to your hair, it’s best to seek guidance from a professional stylist to avoid potential mishaps. Start with Clean, Dry Hair:Cutting your hair when it’s clean and dry ensures more accurate results. Wash and dry your hair thoroughly before starting the haircutting process. Section Your Hair:Divide your hair into manageable sections using hair clips or elastics. Start by parting your hair down the center and then create additional sections horizontally. Pin each section securely to keep the hair you’re not cutting out of the way. Trim the Ends:For a simple trim, work with one section at a time. Take a small subsection of hair and comb it straight down. Hold the hair between your fingers and trim the ends evenly, following your desired length. Make small, cautious cuts to avoid removing too much hair at once. Create Layers (Optional):If you desire layers, you can achieve them at home with careful technique. To create face-framing layers, take a section of hair from the front and hold it at a 45-degree angle away from your face. Trim the hair diagonally, working from the shortest point to the longest point. Repeat this process on both sides of your face for balanced layers. Check for Evenness:After cutting each section, release the hair and check for evenness and balance. Use your mirror to view your hair from different angles, making any necessary adjustments to ensure a uniform cut. Tackle Bangs (Optional):If you have bangs, trim them carefully by combing them straight down over your forehead. Hold the scissors vertically and make small, gentle cuts to the desired length. Remember that it’s better to start with…

Tubing Mascara: An Innovative Approach To Luscious Lashes And Easy Removal
Tubing Mascara: An Innovative Approach to Luscious Lashes and Easy Removal

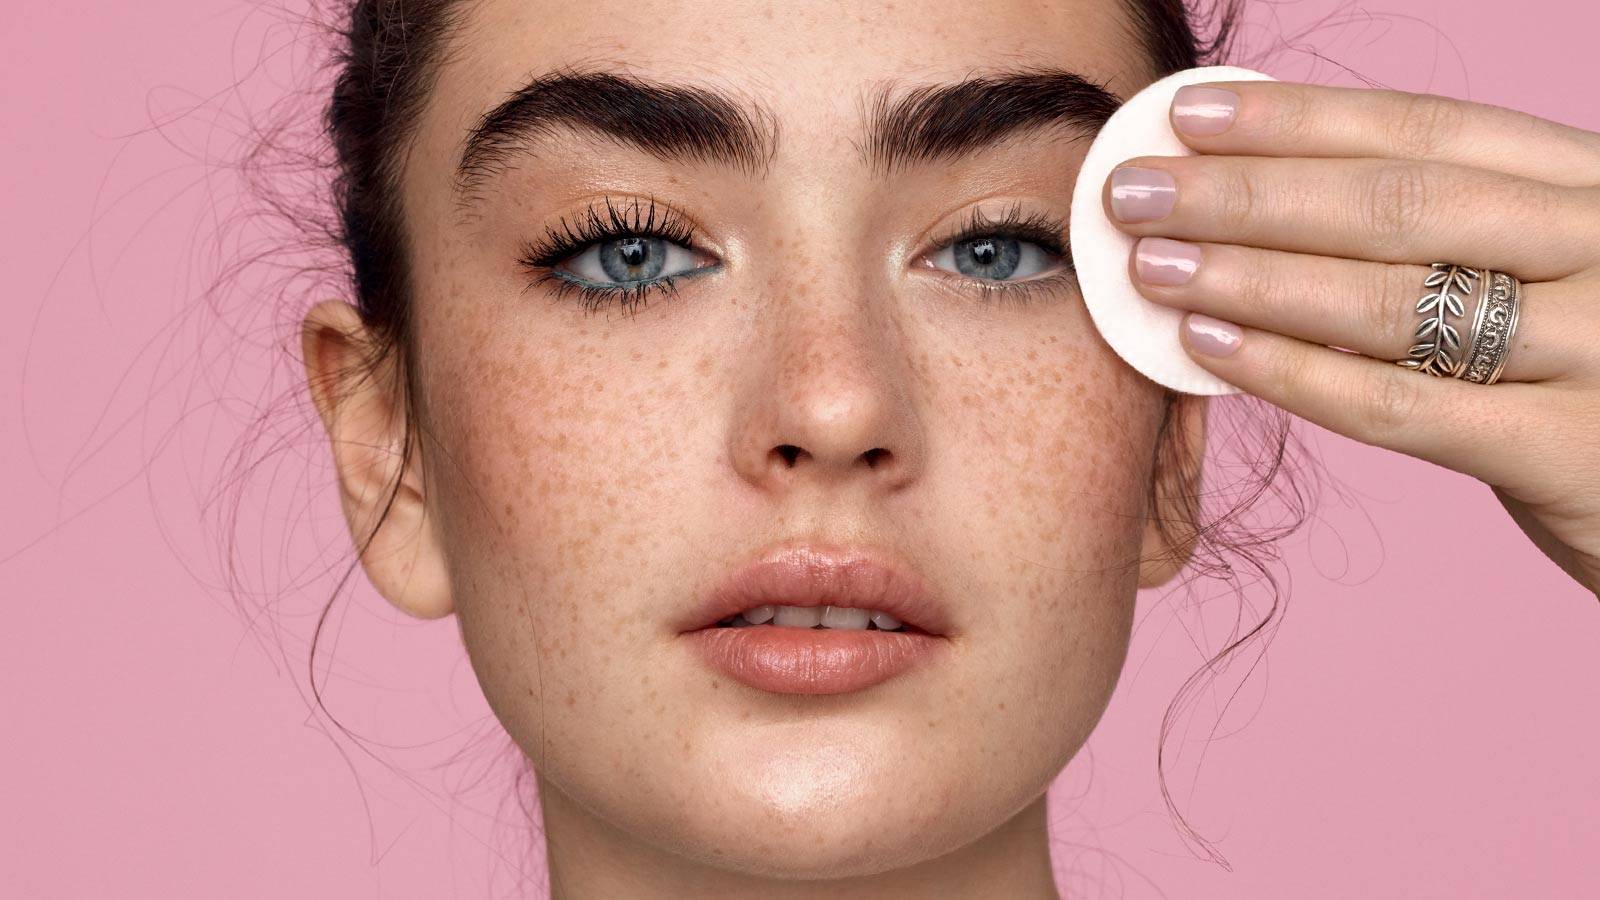
Tubing mascara has gained popularity in recent years as an innovative solution for achieving long, voluminous lashes. Unlike traditional mascaras, which rely on pigments to enhance lash appearance, tubing mascara utilizes a unique formulation that creates tiny polymer tubes around each individual lash. Not only does this provide impressive length and volume, but it also offers smudge-proof, flake-resistant, and long-lasting wear. Additionally, the removal process for tubing mascara is straightforward and gentle on the lashes. In this article, we will delve deeper into the world of tubing mascara, exploring its benefits and sharing effective techniques for its removal. Tubing mascara is a revolutionary beauty product that offers several advantages over conventional mascaras. Its formulation contains flexible polymers that wrap around each lash, creating tube-like structures that enhance length and volume. These tubes are durable and remain intact throughout the day, resisting smudging, flaking, and smearing. One of the key benefits of tubing mascara is its ability to provide a clean, clump-free application. The unique tubing formula ensures that each lash is individually coated, preventing clumping or the formation of spidery lashes. This allows for a more natural and defined look. Furthermore, tubing mascara is highly resistant to water, humidity, and oil. It remains intact even in challenging conditions, making it an excellent choice for those with oily eyelids or individuals living in humid climates. Additionally, tubing mascara is a popular choice for individuals with sensitive eyes or contact lens wearers, as it is less likely to cause irritation or discomfort. The Removal ProcessRemoving tubing mascara is a straightforward process that requires warm water and a gentle cleanser. Unlike traditional mascaras that may necessitate harsh rubbing or the use of oil-based removers, tubing mascara can be easily removed without causing damage to the lashes. Here’s a step-by-step guide on how to remove tubing mascara effectively: Begin by wetting your face with warm water. Ensure the water is comfortably warm, but not hot. Gently splash warm water onto your closed eyes, allowing the mascara to become thoroughly soaked. The warmth of the water helps loosen the tubes. Take a small amount of a gentle cleanser, such as a mild face wash or an eye makeup remover, and apply it onto your fingertips or a cotton pad. Close your eyes and use gentle circular motions to massage the cleanser onto your lashes, focusing on the roots and working your way towards the tips. This helps break down the tubes. Continue massaging for approximately 30 seconds to a minute, or until you feel the mascara starting to slide off. Be careful not to tug or pull on your lashes. Once you’re satisfied with the cleansing process, rinse your face with warm water, ensuring that all the mascara has been washed away. Gently pat your face dry with a clean towel, being careful not to rub your eyes vigorously. By following these steps, you can effectively remove tubing mascara without causing any harm or irritation to your lashes or the delicate eye area. Tips and PrecautionsWhile tubing mascara removal is generally gentle, it’s essential to keep a…

Brow Perfection At Home The Comprehensive Guide To Diy Brow Lamination
Brow Perfection at Home: The Comprehensive Guide to DIY Brow Lamination

In the realm of beauty, eyebrows are a pivotal feature, framing the face and highlighting one’s eyes. Brow lamination, a groundbreaking beauty trend, offers a solution for those seeking fuller, more defined eyebrows without daily makeup. This treatment has traditionally been a salon-exclusive, but with the right guidance, achieving salon-quality results at home is within reach. This expanded guide dives into the nuances of DIY brow lamination, covering everything from the initial prep work to the crucial aftercare, ensuring you can safely achieve and maintain impeccable brows. Deep Dive into Brow Lamination Brow lamination works by restructuring the brow hairs, giving them a uniform, desired direction and appearance. It’s particularly beneficial for those with unruly, sparse, or downward-growing hairs, providing a fuller and more even look. This section explores the technique’s origins, its rise to prominence, and how it has become a beloved alternative to more permanent treatments like microblading, offering insight into why it’s worth considering for your brow grooming routine. Advantages of Going DIY with Brow Lamination Choosing to laminate your brows at home comes with a plethora of benefits, including cost-efficiency, the comfort of your own home, and the ability to tailor the process to your specific brow needs. Here, we’ll outline the key advantages of DIY brow lamination, from the personal satisfaction of self-care to the convenience of touch-ups on your schedule, highlighting why many beauty enthusiasts are opting to take their brow treatments into their own hands. Essential Tools for At-Home Brow Lamination Successful DIY brow lamination hinges on having the right tools and products. This comprehensive checklist ensures you’re well-prepared, listing everything from reputable brow lamination kits to the specific cleansers, brushes, and aftercare serums that will make the process smooth and effective. We also include tips for selecting quality products that are safe and reliable, ensuring your DIY endeavor leads to beautiful, healthy brows. Step-by-Step Guide: Achieving Professional-Quality Lamination With the right preparation, DIY brow lamination can be straightforward and rewarding. This detailed, step-by-step guide walks you through the entire process, from conducting a patch test to applying the lamination solution, shaping, and setting your brows. Each step is broken down with precision, incorporating professional tips and visual aids to ensure clarity and ease, empowering you to achieve professional-quality results at home. Navigating Aftercare for Lasting Results The longevity and quality of your brow lamination significantly depend on proper aftercare. This section delves into the dos and don’ts following your treatment, advising on everything from how to avoid water and makeup in the initial hours to the best practices for nourishing and maintaining your newly laminated brows. Tailored advice on extending the durability of your lamination, including recommended products and routines, ensures your brows remain flawless for as long as possible. Common Pitfalls and How to Avoid Them Even with careful planning, DIY treatments can encounter hiccups. This segment addresses the most common issues encountered during home brow lamination, such as uneven application, overprocessing, or irritation, and provides expert solutions. Learning how to anticipate and remedy these challenges will bolster your confidence, ensuring a smooth…

The Magic Of Caffeine In Eye Creams 1
The Magic of Caffeine in Eye Creams

Caffeine has long been revered in skincare as an ingredient that promises rejuvenating effects; now, however, caffeine eye creams offer even greater rejuvenation for delicate eye areas. This comprehensive guide explores caffeine eye creams to reveal their many wonders from benefits, working mechanisms and transformation of eye care routine. From banishing puffiness and dark circles to creating youthful radiant looks – caffeine eye creams have what it takes to awaken inner beauty! Chapter 1: Understanding Caffeine Eye Creams Caffeine, commonly associated with coffee drinking, can serve as more than an alerter – it also plays a crucial role in skincare! Incorporating caffeine-infused eye creams works wonders by targeting various eye area concerns at once. One of caffeine’s many distinguishing characteristics is its vasoconstrictive qualities. By narrowing blood vessels and relieving congestion in them, caffeine has the ability to effectively combat puffy eyes and dark circles. Caffeine can help alleviate puffy or swollen eyes by decreasing water retention and improving blood circulation, in addition to being an antioxidant powerhouse with proven ability to neutralize free radicals that accelerate aging processes. Caffeine protects skin cells against oxidative stress and plays an integral part in maintaining youthful and vibrant eye areas. Caffeine eye creams prove its many uses – an indispensable asset when seeking to revive one’s gaze! Chapter 2 : Reducing Puffy Eyes with Caffeine Effectively Puffy eyes, often caused by lack of sleep, allergies or lifestyle factors can be an ongoing annoyance for many people. Caffeine eye cream is often recommended due to its potent vasoconstrictive action that quickly reduces puffy eye symptoms. Applying this treatment topically causes blood vessels beneath the surface to constrict, diminishing puffiness. Furthermore, improved circulation helps drain excess fluid out of the eye area to decrease swelling and puffiness. As such, caffeine-infused eye creams provide an instant and visible solution to tired, puffy eyes resulting from late nights or early mornings, leaving your appearance looking refreshed and revitalized. From late nights or early mornings alike, caffeine works tirelessly to banish under-eye puffiness and restore your refreshed, bright appearance. Chapter 3: Lighten Dark Circles With Caffeine’s Help Dark circles beneath the eyes are an all too common condition, often brought on by genetics, thinned skin or blood vessel showing through. Caffeine plays an integral part in helping combat this issue due to its vasoconstrictive properties. Caffeine applied directly to the skin can constrict blood vessels around the eyes and reduce dark circles by narrowing blood vessels and decreasing flow to that area, helping minimize shadowed looks. By narrowing blood vessels further and decreasing flow to that location, caffeine reduces shadowed shadowing. Caffeine’s anti-inflammatory properties may further diminish redness and discoloration caused by under-eye circles, making caffeine an invaluable ally in your quest to achieve brighter, younger looking eyes while banishing those persistent dark circles for good! When combined with eye creams, caffeine becomes an invaluable ally in this fight against dark circles – helping you to banish these stubborn dark circles once and for all! Chapter 4: Caffeine and Anti-Aging: Eye Rejuvenation Caffeine plays an invaluable role in eye…