A Beginner’s Guide to Filling Your Eyebrows

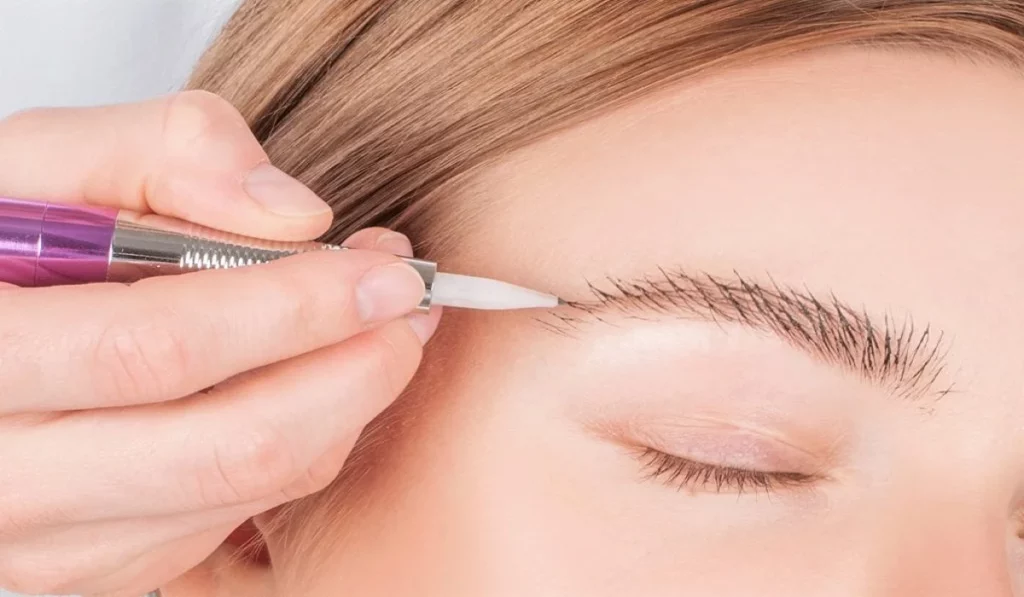
Eyebrows are a pivotal feature of your face, capable of altering your appearance by enhancing your facial symmetry and expressions. A well-defined brow can lift the face, highlight your eyes, and convey a polished look. This guide is dedicated to beginners looking to navigate the art of eyebrow filling, offering step-by-step instructions, tips, and product recommendations to achieve beautiful, natural-looking brows.
A Beginner's Guide To Filling Youreyebrows


Understanding Eyebrow Shapes

Every face comes with its unique eyebrow shape, which can dramatically influence your overall look. Identifying your natural eyebrow shape is the first step in the filling process. Whether arched, straight, rounded, or S-shaped, understanding your eyebrow’s natural line will guide you in enhancing them without altering their inherent beauty.

Tools and Products for Eyebrow Filling

Choosing the right tools and products is essential for achieving desired results. Eyebrow pencils are perfect for creating hair-like strokes, while powders offer a softer, more natural fill. Gels provide shape and hold, and pomades offer definition and drama. A spoolie brush and an angled brush are also crucial for shaping and blending.

Finding the Right Color

Selecting an eyebrow color that complements your hair and skin tone is crucial. The general rule is to go one or two shades lighter than your hair color for darker hair and one or two shades darker for lighter hair. This balance ensures your brows look natural and not overpowering.

Preparation for Eyebrow Filling

Before filling your eyebrows, ensure they are clean, groomed, and mapped out. Eyebrow mapping involves marking the start, arch, and end points of your brows to maintain symmetry. Proper grooming and mapping set the foundation for flawless eyebrow filling.

Step-by-Step Guide to Filling Eyebrows

  1. Pencil: Start with light, hair-like strokes to fill sparse areas. Pencils offer precision, making them ideal for beginners.
  2. Powder: Use an angled brush to apply powder, perfect for adding volume and filling larger gaps.
  3. Gel: Sweep gel through your brows for shape and hold, ideal for keeping unruly hairs in place.
  4. Pomade: Apply pomade with an angled brush for defined, dramatic brows. Use sparingly to avoid a heavy look.

Refining and Setting Your Look

After filling, use a spoolie to blend the product into your natural brows, creating a seamless transition. Setting spray or clear eyebrow gel can then be applied to ensure your brows stay perfect throughout the day.
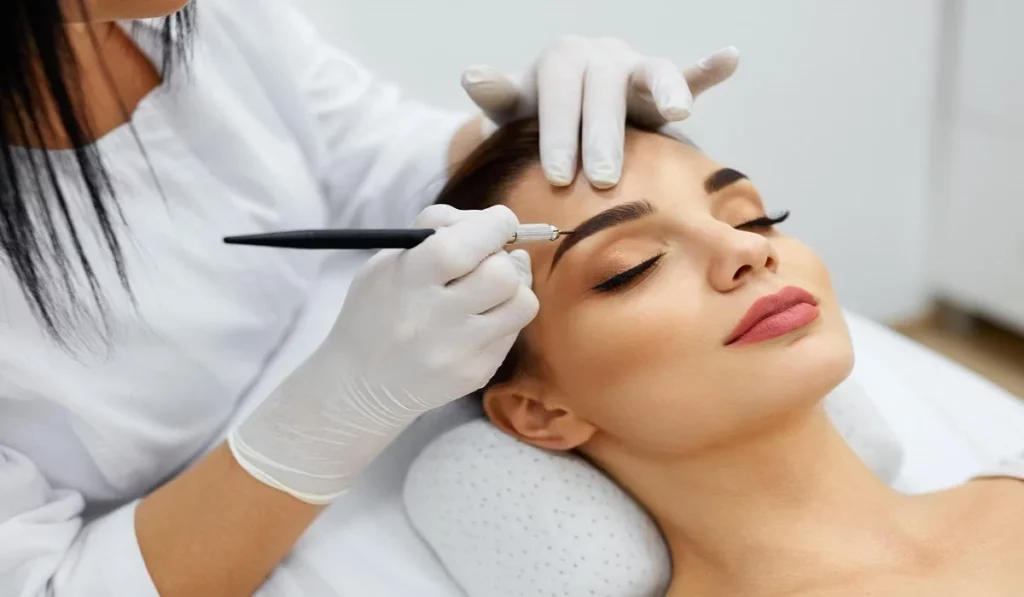
A Beginner's Guide To Filling Your Eyebrows


Common Eyebrow Filling Mistakes and How to Avoid Them

Common mistakes include overfilling, creating harsh lines, and choosing the wrong color or shape. To avoid these, use a light hand, blend thoroughly, and select products that match your natural eyebrow color and shape.

Maintenance Tips for Beautiful Eyebrows

Regular grooming and touch-ups will keep your eyebrows looking their best. Trimming long hairs and plucking stray hairs maintain the shape and cleanliness of your brows. For major changes or uncertainty about your brow shape, consulting a professional can be beneficial.

Advanced Tips for Perfect Eyebrows

For thicker-looking brows, focus on filling the arch and tail end more than the inner corners. Experiment with different shapes and thicknesses to see what enhances your facial features the best. Practice makes perfect, and with time, filling your eyebrows will become a quick and effortless part of your beauty routine.

Filling your eyebrows is a skill that enhances your facial features and complements your overall makeup look. With practice, the right tools, and an understanding of techniques and products, anyone can master the art of eyebrow filling. Don’t be afraid to experiment and find what works best for you. Remember, the goal is to enhance your natural beauty, not overshadow it.

  • Can I fill my eyebrows if I have very sparse brows? Absolutely. With the right tools and techniques, you can create the illusion of fuller brows. A combination of pencil and powder works well for adding both definition and volume.
  • How do I know if I’m overfilling my eyebrows? If your brows begin to dominate your facial features or look unnaturally dark or thick, you may be overfilling them. Aim for balance and subtlety.
  • What’s the best way to ensure my eyebrow color matches my hair? Test different shades on your eyebrows in natural light and consult with a beauty professional if unsure. It’s often best to choose a shade that complements rather than exactly matches your hair color.

Henna Vs. Regular Tattoos: An In Depth Comparison Of Body Art Forms
Henna vs. Regular Tattoos: An In-Depth Comparison of Body Art Forms

Choosing between henna and regular tattoos can be a challenging decision for anyone looking to get body art done on their skin. Both options have their unique characteristics, advantages, and considerations that can influence the final choice. In this comprehensive article, we will compare henna tattoos and regular tattoos, providing all the necessary information to help individuals make an informed decision. From the creation process to the duration, pain factor, design possibilities, and potential risks, we will explore each aspect of these body art forms. Section 1: Understanding Henna and Regular Tattoos 1.1 Henna Tattoos: Henna tattoos are temporary body art made using natural henna plant powder. The powder is mixed with water to form a paste, which is applied to the skin using a piping bag. The dye from the henna plant stains the skin temporarily, creating intricate and mesmerizing patterns. Henna tattoos are a popular choice for those seeking a temporary design without the permanence of regular tattoos. 1.2 Regular Tattoos: Regular tattoos, also known as permanent tattoos, involve using a tattoo machine gun, tattoo needles, and tattoo ink. The tattoo gun pushes the ink into the dermis layer of the skin, resulting in long-lasting body art. Regular tattoos offer a vast array of design possibilities and can be highly detailed and intricate. Section 2: Comparing Henna and Regular Tattoos 2.1 The Process of Creating: Henna tattoos rely on a henna paste that is skillfully applied to the skin’s surface. The patterns are created by the artist pushing the paste out of the piping bag. On the other hand, regular tattoos involve the use of a tattoo machine gun and needles to insert ink into the dermis, creating a permanent design. Both techniques require skilled professionals, but the application methods are vastly different. 2.2 Duration of the Tattoos: Henna tattoos are temporary and typically last between 4 and 7 days, with the possibility of lasting up to 12 days with high-quality henna paste. After this period, the dye fades away, leaving the skin clear again. Regular tattoos, however, are designed to be permanent and can last a lifetime if desired. Tattoo removal options, such as laser tattoo removal, are available for those who want to remove a regular tattoo. 2.3 The Pain Issue: Henna tattoos are pain-free as the henna paste is placed on the skin’s surface. Conversely, getting a regular tattoo involves piercing the skin with needles, causing pain and discomfort during the process. However, the pain level can vary depending on the tattoo’s location, size, and the skill of the artist. The healing process of a regular tattoo can also cause some discomfort, but proper aftercare can minimize any issues. 2.4 Design Possibilities: Henna tattoos are limited in design possibilities compared to regular tattoos. Henna’s application technique is suited for pattern work, while regular tattoos offer limitless design options with intricate details, shading, and various colors. Regular tattoos’ versatility allows for almost lifelike creations, providing a wide range of design choices. 2.5 Skin Impact and Risks: Henna tattoos, when done with natural henna plant powder, have minimal impact…

Quenching Radiance The Profound Benefits Of Water Consumption For Skin Health
Quenching Radiance: The Profound Benefits of Water Consumption for Skin Health

Water, the elixir of life, plays a vital role in our overall well-being. While its importance for bodily functions is well-known, its impact on skin health often takes a backseat. Our skin, the largest organ, requires adequate hydration to function optimally and radiate a healthy glow. In this comprehensive guide, we will dive into the world of water consumption and its profound benefits for skin health. From maintaining hydration to supporting a youthful complexion, the advantages of drinking water extend far beyond quenching our thirst. The Role of Water in Skin Health Water is essential for skin health due to several key functions it performs within the body: Benefits of Water Consumption for Skin How Much Water Should You Drink for Skin Health? While the “8×8” rule (eight 8-ounce glasses of water per day) is a commonly cited guideline, individual water needs can vary based on factors like age, activity level, climate, and overall health. A more personalized approach is to listen to your body’s signals. Thirst is an excellent indicator that your body needs water. Additionally, your urine color can offer insights into your hydration level—a light, pale yellow color indicates proper hydration. Tips for Increasing Water Consumption Expert Insights on Water and Skin Health Considerations and Additional Practices for Skin Health Water consumption isn’t just a mundane necessity; it’s a powerful tool for achieving and maintaining vibrant, healthy skin. The benefits of proper hydration extend beyond quenching your thirst, manifesting in a radiant complexion, youthful appearance, and overall skin health. By making conscious efforts to prioritize hydration through mindful consumption and complementary skincare practices, you’re laying the foundation for skin that not only looks beautiful but also functions optimally. Embrace the gift of water, and let its transformative effects illuminate your natural radiance from the inside out.

7 Best Tips For Choosing Your Next Hair Color
7 Best Tips for Choosing Your Next Hair Color

Selecting your next hair color transcends mere aesthetic preferences, incorporating an intricate analysis of skin undertones, personal style, and maintenance commitment into the decision-making process. This comprehensive guide is crafted to escort you through the selection journey, ensuring a gratifying outcome. Skin Tone Consideration The foundation of a captivating hair color lies in the harmony between the chosen hue and your skin’s undertones. Distinguishing whether your skin radiates warm, cool, or neutral undertones is pivotal. Harmonizing with Natural Hair Color Embracing your inherent hair color can yield more natural, flattering outcomes. Techniques like balayage or highlights can subtly enhance your original color. For a bolder statement, consider hues at the opposite end of your natural spectrum. Hair Color Trends for 2023/2024 Keep abreast of the latest trends to spark your hair color transformation. This season, we’re witnessing a renaissance of pastel shades, bold colors, and a nod to naturalistic hues. From the ethereal softness of lavender to the deep allure of cobalt blue, there’s a trendsetting shade awaiting your discovery. Maintenance of Color Vibrancy To preserve the luminosity and health of your colored hair, invest in products specifically formulated for color-treated hair and adhere to a schedule for touch-ups. Color Psychology A change in hair color can significantly alter perceptions and affect your mood. Grasping the psychological impact of different shades can assist in selecting a color that not only enhances your appearance but also elevates your confidence. Temporary vs. Permanent Dyes Your commitment level and willingness to experiment play crucial roles in deciding between temporary and permanent coloring options. Temporary dyes provide a risk-free avenue for exploration, whereas permanent dyes cater to those seeking enduring change. DIY vs. Professional Coloring While home dyeing kits offer a cost-effective alternative, professional salon services deliver expertise and consistently superior outcomes, especially for complex colors and techniques. Influence of Hair Texture and Type Your hair’s texture and type can affect color absorption and reflection. Coarser hair may necessitate stronger or more prolonged treatments, while finer hair might quickly become saturated with color. Selecting a Complementary Hair Color To identify a hair color that flatters, factor in your lifestyle, maintenance preferences, and seasonal changes, allowing your hair color to evolve alongside your dynamic lifestyle. Importance of Allergy and Strand Tests Conducting allergy and strand tests before dyeing is essential for ensuring safety and predicting the color outcome, preventing adverse reactions and unforeseen results. Hair Health Post-Coloring Although coloring can impact hair health, implementing deep conditioning treatments and protective styling can help maintain its vitality and vibrance. Enhancement Through Highlights and Lowlights Incorporating highlights or lowlights can introduce depth and movement, offering a spectrum of effects from subtle to dramatic. Correcting Color Mistakes While dye mishaps are rectifiable, a range of solutions from color removers to professional correction services exist to address nearly any issue. Personalizing Your Color Experimenting with shade mixing or avant-garde coloring techniques like ombré or color blocking can customize your look, imbuing it with uniqueness. Demystifying Hair Coloring Myths Addressing common misconceptions about hair coloring is crucial for setting realistic expectations and achieving…

Why Sleeping With Braided Hair Is The Better Alternative To A Bun Or Ponytail
Braided Beauty: Why Sleeping with Braided Hair is a Better Alternative to a Bun or Ponytail

When it comes to nighttime hair care, finding the right hairstyle can make a significant difference in the health and appearance of your hair. Many people opt for buns or ponytails as a convenient way to keep their hair off their face while they sleep. However, sleeping with braided hair offers several benefits that make it a superior alternative. In this article, we will explore why sleeping with braided hair is a better option for overnight hair care, from minimizing breakage and tangles to promoting healthy hair growth and maintaining effortless waves. Minimizes Breakage:One of the primary advantages of sleeping with braided hair is the reduced risk of breakage. Buns and ponytails can create tension and stress on the hair shaft, leading to breakage and split ends. Braids, on the other hand, distribute the tension more evenly along the length of the hair, reducing the risk of damage. Prevents Tangling:Braiding your hair before bed can help prevent tangles and knots that can occur when hair is left loose or tied up in a bun or ponytail. The structured nature of a braid keeps the hair strands in place and minimizes friction, reducing the chances of waking up with tangled and unruly hair. Promotes Healthy Hair Growth:Sleeping with braided hair can contribute to healthier hair growth. By keeping your hair in a braid overnight, you minimize the risk of hair breakage, which can impede hair growth progress. Additionally, braids help protect the hair from external elements, such as friction against pillows or blankets, allowing the hair to grow longer and stronger. Maintains Effortless Waves:If you desire soft, natural waves, sleeping with braided hair is an excellent option. Braids create gentle, natural-looking waves when undone in the morning. This low-maintenance hairstyle saves time and effort in styling, as you wake up with beautiful, textured waves that can last throughout the day. Reduces Frizz and Flyaways:Braiding your hair at night can help control frizz and minimize flyaways. The contained structure of the braid keeps the hair strands in place, reducing the chances of friction-induced frizz. This is particularly beneficial for those with naturally curly or textured hair that tends to be prone to frizz and flyaways. Protects Hair from Environmental Factors:Sleeping with braided hair provides a protective barrier against external factors that can damage your hair. By keeping your hair contained in a braid, you minimize exposure to friction against pillows, blankets, or rough surfaces. This protection helps maintain the integrity of the hair cuticle and reduces the risk of damage caused by environmental stressors. Versatility for Next-Day Hairstyling:Another advantage of sleeping with braided hair is the versatility it offers for next-day hairstyling. Once you undo your braids in the morning, you can experiment with different hairstyles, such as a loose updo, a half-up half-down style, or leave your hair down with natural-looking waves. The textured foundation provided by the braids can add volume and hold to your hairstyles, making it easier to achieve a variety of looks. Comfortable and Relaxing:Braiding your hair before bed can provide a comfortable and relaxing experience. The gentle tension…

A Comprehensive Guide To Cosmetic Expiration Dates 1
A Comprehensive Guide to Cosmetic Expiration Dates

Every beauty enthusiast knows the thrill of discovering that perfect lipstick shade or foundation match – but as their collection grows, so too does their question of how long these beauty treasures should remain safe to enjoy. In this extensive investigation into cosmetic expiration dates we reveal their mysteries by exploring their science, factors and importance – providing clarity into when your cosmetics expire and the necessary steps needed for safe storage. Chapter 1: Expiration Dates Explained Formula ComplexityCosmetics contain multiple ingredients with their own chemical makeup. Together these contribute to texture, color, efficacy and shelf life – it is therefore crucial that one understands these formulations so as to properly predict expiration dates for products formulated using them. Preservatives and Stability Enhancers Cosmetic products often incorporate preservatives as an extra safeguard. These compounds inhibit bacteria and fungi growth to ensure its integrity; however, over time these preservatives may become less effective, leaving your product susceptible to contamination. Chapter 2: Factors Affecting Cosmetic Shelf Life Air and Light ExposureCosmetic storage environments play a pivotal role in their shelf lives. Direct exposure to air and light may result in oxidation that damages its color and consistency over time, so packaging that limits air contact or blocks UV rays helps preserve cosmetics for as long as possible. Temperature and HumidityChanges in both temperature and humidity play an integral part in degrading cosmetic formulations, with high temperatures potentially melting or separate products and excessive humidity encouraging mold or bacteria growth – proper storage practices must therefore be in place in order to mitigate such risks. Chapter 3 : Understanding Expiration Dates Skin Health ConcernsExposing yourself to expired cosmetics poses potential threats to skin health. Bacterial contamination could result in irritation, redness or even infections; and its delicate balance disrupted, potentially impairing its performance and potentially leading to harm. As cosmetics age, their efficacy diminishes over time, which may impair performance and leave users unhappy with results. Foundation may no longer meet your desired coverage expectations, mascara might clump more often and skincare-infused products may lose some or all of their intended benefits – therefore being aware of signs of expiration ensures the optimal product performance is reached. Chapter 4: Deciding Which Expiry Dates Apply, on Different Products Skincare Products Many skincare items, including creams, serums and cleansers, feature expiration dates that ensure maximum skincare benefits are realized over time. Antioxidants and retinoids in particular deplete their potency with time; adhering to timelines ensures maximum benefits are gained from skincare items purchased over time. Eye ProductsDue to the sensitive eye area, mascaras, eyeliners and eyeshadows have shorter shelf lives and should be changed out regularly in order to minimise risks of infection and ensure good eye health. Regular replacement, even of products which appear unopened is crucial for good vision health. Chapter 5: Dispelling Myths About Makeup Perpetually: Addressing Common Misconceptions Certain Makeup Products Are Long-LastingPowders and lipsticks have the tendency to last indefinitely; though longer shelf lives than liquid products exist. Color changes, texture shifts or scent fluctuations should prompt prompt their disposal as soon…

Hair Loss Prevention: Strategies For Strong And Healthy Hair
Hair Loss Prevention: Strategies for Strong and Healthy Hair

Hair loss can be a distressing experience for both men and women, impacting self-confidence and overall well-being. While some degree of hair shedding is normal, excessive hair loss may be a sign of an underlying issue that needs attention. Fortunately, there are several effective strategies to prevent hair loss and promote the growth of strong, healthy hair. In this comprehensive guide, we will explore the causes of hair loss, lifestyle factors that contribute to it, and actionable steps to prevent hair loss and maintain luscious locks. Understanding Hair Loss and Its Causes Hair loss, also known as alopecia, can occur for various reasons. Some common causes include: Genetics: Family history plays a significant role in determining the likelihood of hair loss. If you have a family history of hair thinning or baldness, you may be more susceptible to it. Hormonal Changes: Hormonal imbalances, such as those experienced during pregnancy, menopause, or conditions like polycystic ovary syndrome (PCOS), can lead to hair loss. Medical Conditions: Certain medical conditions, including thyroid disorders, scalp infections, and autoimmune diseases, can contribute to hair loss. Stress and Trauma: Physical and emotional stress can lead to temporary hair loss. A sudden shock, surgery, or extreme weight loss can trigger a condition known as telogen effluvium, causing hair to enter a resting phase and shed. Nutritional Deficiencies: A lack of essential nutrients, such as iron, zinc, biotin, and vitamin D, can negatively impact hair health and growth. Hairstyles and Hair Treatments: Excessive hairstyling, tight hairstyles, and the use of harsh hair treatments can cause hair breakage and damage. Preventive Measures for Hair Loss Maintain a Healthy DietA balanced and nutrient-rich diet is crucial for healthy hair growth. Incorporate the following foods into your diet to support strong and vibrant hair: a. Protein-Rich Foods: Hair is primarily composed of protein, so ensure your diet includes sources like lean meats, fish, eggs, and plant-based proteins like legumes and quinoa. b. Iron-Rich Foods: Iron is essential for healthy hair growth. Consume iron-rich foods such as spinach, lentils, and fortified cereals. c. Omega-3 Fatty Acids: Omega-3 fatty acids, found in fish, walnuts, and flaxseeds, promote hair health by reducing inflammation and supporting scalp health. d. Biotin-Rich Foods: Biotin, also known as vitamin B7, is vital for hair growth. Include foods like eggs, almonds, and sweet potatoes in your diet to get an adequate amount of biotin. e. Vitamin C: Vitamin C aids in collagen production, which supports hair structure. Citrus fruits, strawberries, and bell peppers are excellent sources of vitamin C. Take Hair Supplements (Under Medical Supervision)If you suspect a deficiency of specific nutrients that may be contributing to hair loss, consult a healthcare professional before taking supplements. Overconsumption of certain vitamins and minerals can have adverse effects, so it’s essential to get personalized recommendations based on your individual needs. Practice Good Hair CareProper hair care can help prevent damage and minimize hair loss: a. Gentle Shampooing: Use a mild shampoo and avoid washing hair too frequently, as excessive shampooing can strip the scalp of natural oils. b. Condition Regularly: Conditioning helps keep…

Achieving A Brighter Smile: The Most Effective Ways To Whiten Your Teeth
Achieving a Brighter Smile: The Most Effective Ways to Whiten Your Teeth

A bright, white smile is something that many people desire. However, it’s not always easy to achieve. There are many factors that can cause teeth to become discolored, such as aging, smoking, consuming certain foods and drinks, and poor dental hygiene. Fortunately, there are several effective ways to whiten your teeth and achieve the smile of your dreams. In this article, we’ll explore the most effective ways to whiten your teeth, including both professional and at-home options. Professional Teeth Whitening If you’re looking for the most effective way to whiten your teeth, professional teeth whitening is a great option. This is typically done in a dental office, and involves the use of high-concentration whitening agents. There are two main types of professional teeth whitening: In-Office Whitening: This involves the use of a high-concentration whitening gel, which is applied to your teeth by a dental professional. The gel is then activated using a special light or laser. This type of whitening treatment typically takes around an hour, and can whiten your teeth by several shades. Take-Home Whitening Kits: These kits are prescribed by a dentist and typically include a custom-made tray and a whitening gel. You’ll need to wear the tray for a certain amount of time each day, typically for several weeks. Take-home whitening kits are less expensive than in-office treatments, but they take longer to produce results. Both of these professional teeth whitening options are effective at removing stains and discoloration from your teeth. However, they can be quite expensive, with in-office treatments typically costing several hundred dollars and take-home kits costing around $100-$200. At-Home Teeth Whitening If you’re looking for a more affordable way to whiten your teeth, at-home teeth whitening options are a great choice. There are many different types of at-home whitening products available, including: Whitening Toothpaste: This type of toothpaste contains special abrasives and chemicals that can help to remove surface stains from your teeth. However, they are not effective at removing deeper stains. Whitening Strips: These are thin, flexible strips that are coated with a whitening gel. You’ll need to apply the strips to your teeth for a certain amount of time each day, typically for several weeks. Whitening strips are a relatively affordable option, with most kits costing around $20-$50. Whitening Trays: These are similar to the trays used in professional take-home whitening kits. You’ll need to fill the tray with a whitening gel and wear it for a certain amount of time each day, typically for several weeks. Whitening trays can be purchased over-the-counter or prescribed by a dentist. Whitening Pens: These are small, portable pens that contain a whitening gel. You can apply the gel directly to your teeth using the pen’s brush. Whitening pens are a convenient option, but they may not be as effective as other at-home whitening products. While at-home teeth whitening products are generally less expensive than professional treatments, they may not be as effective. They also take longer to produce results, and you may need to use them for several weeks before seeing a noticeable improvement in the…

What Is Microblading Transform Your Eyebrows From Sparse To Gorgeous (1)
What is microblading? Transform Your Eyebrows from Sparse to Gorgeous

Microblading is a transformative beauty procedure that meticulously enhances the appearance of your eyebrows, offering a semi-permanent solution for those seeking fuller, more defined brows. This technique involves the manual insertion of pigment into the upper layers of skin to create the appearance of natural eyebrow hairs. However, achieving the best possible results requires more than just booking an appointment; it involves thorough preparation, understanding the process, and proper aftercare. Choosing the Right Microblading Technician The first step in your Microblading journey is to choose a skilled and certified aesthetician. Researching your options is crucial. Look for a salon that showcases an extensive portfolio of before and after photos, demonstrating their ability to produce the kind of results that captivate you. It’s essential that your chosen technician not only possesses the necessary certification but also has a wealth of experience, reflected in their hours of education and practical application. Remember, the quality of your results depends heavily on the skill and precision of the technician. State Regulations and Technician Licensing Be aware that each state has its own set of rules and regulations governing microblading. Before proceeding, verify the licensing requirements in your area and ensure your technician meets these standards. This step is crucial for both your safety and the legality of the procedure. Preparing for Your Microblading Session Proper preparation can significantly enhance the outcome of your Microblading procedure. Here are some essential tips to ensure you’re fully prepared: Understanding the Microblading Procedure Microblading is typically completed in three key steps: Preparation Initially, your aesthetician will apply a topical numbing cream to your eyebrow area to minimize discomfort. This preparation is vital for both your comfort and the steadiness of the microblading process. The Procedure Experience Pain tolerance varies from person to person. Some may only feel a slight scratching sensation, while others might experience a bit more discomfort. However, most find the procedure to be bearable, with the numbing cream significantly reducing any pain. Post-Procedure Care Immediately after your session, it’s normal for your eyebrows to appear darker and more pronounced than expected. This intensity will fade as they heal, usually within a week, resulting in a more natural look. It’s advised to avoid water exposure, including long showers and baths, during the initial healing phase to prevent the pigment from washing out prematurely. Post-Microblading Care To ensure the best healing and color retention, follow these aftercare tips: Potential Risks and How to Mitigate Them While microblading is generally safe, being informed about potential risks is crucial: Allergic Reactions Though rare, it’s possible to have an allergic reaction to the pigment used. Discuss any known allergies with your technician beforehand. Infection Infections can occur if the procedure is done with non-sterile equipment. Ensure your salon follows strict hygiene practices. Semi-Permanence Microblading results are semi-permanent. If you’re unhappy with the results, corrections or removal can be more challenging. Give yourself time to consider if microblading is right for you and choose a technician who can offer a result you’re confident you’ll be happy with. Microblading can significantly enhance your facial…