DIY Lip Balm: Simple Ingredients for Beautiful Lips

The allure of lips transcends mere aesthetics, playing a pivotal role in our expressions and the vibrancy of our smiles, thereby influencing our self-esteem and how we are perceived. Our lips, devoid of oil-producing glands, are exposed to the merciless whims of the environment, be it the biting chill, arid conditions, or the relentless sun. This exposure necessitates a dedicated regimen for lip care, elevating it from a mere aspect of our beauty routines to a critical necessity.
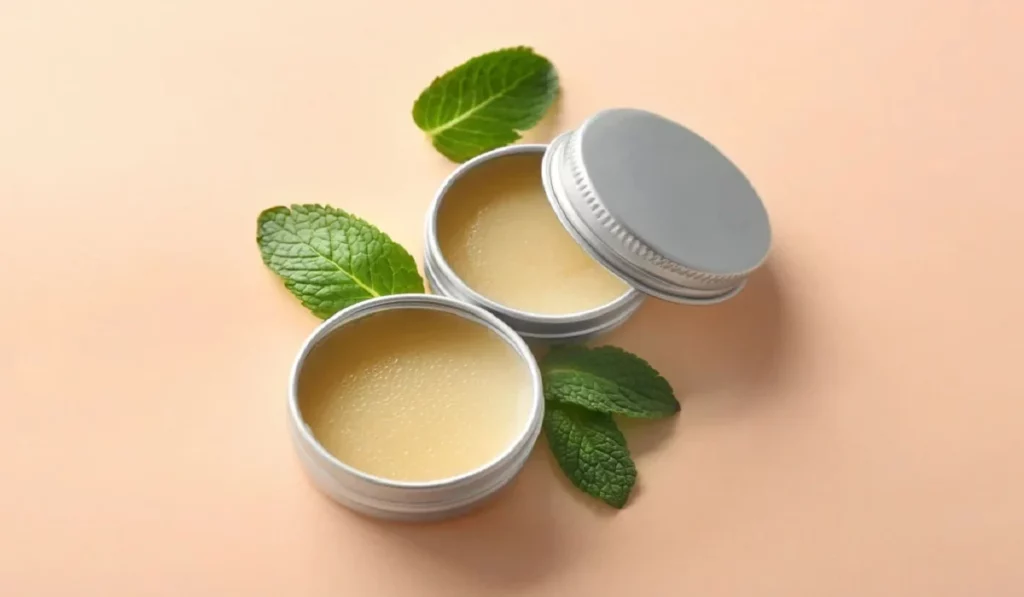
Diy Lip Balm Simple Ingredients For Beautiful Lips


Advantages of Crafting Your Own Lip Balm

Efficiency and Uncomplicated Nature: The allure of concocting your own lip balm lies in its straightforwardness and cost-effectiveness. A modest investment in simple ingredients yields a bountiful supply, sufficient for months. This approach is not only economical but also opens a playground for experimentation with flavors and ingredients, all without denting your wallet.

Mastery Over Composition: The commercial lip balm aisle is a maze of complex formulations, some containing elements that might not sit well with everyone. Venturing into homemade lip balm creation bestows upon you the power to curate your ingredients, ensuring a concoction that is as natural as it is benign, especially for those with a penchant for sensitivities.

Tailoring to Taste: The realm of DIY lip balm is rife with customization opportunities. From the fragrance and taste to the hue, you can tweak your creation to reflect your personal style and preferences. This bespoke approach not only personalizes your lip care but also transforms homemade lip balms into intimate, thoughtful presents for loved ones.

Sustainability: Opting to craft your own lip balm is a nod to environmental consciousness. By favoring natural constituents and repurposable packaging, you contribute to the reduction of plastic waste and the dissemination of harmful chemicals into our planet.

Curating Natural Components for Your Lip Balm

Foundation Elements for Consistency and Hydration: The cornerstone of any exemplary lip balm lies in its base components – beeswax, shea butter, cocoa butter, and coconut oil. These ingredients are pivotal for achieving the desired consistency that solidifies at room temperature yet melts upon contact with the lips, providing moisture and shielding them from the elements.

Oils for Enrichment and Moisturization: Incorporating oils like argan, jojoba, and sweet almond enriches the lip balm with moisturizing virtues. These oils, brimming with vitamins and fatty acids, are instrumental in the rejuvenation and healing of the lips’ delicate dermis.

Essential Oils for Fragrance and Added Benefits: Essential oils infuse the lip balm with enticing aromas while endowing it with additional benefits. For instance, peppermint oil imparts a refreshing coolness, whereas lavender oil is celebrated for its soothing properties. It’s crucial to employ these potent oils judiciously to prevent irritation.

Additional Components for Restoration and Defense: Ingredients such as honey, vitamin E oil, and aloe vera gel introduce extra layers of healing and protection. Honey acts as a natural humectant, attracting moisture to the skin. Vitamin E oil is a powerhouse of antioxidants that aid in cellular restoration, and aloe vera gel offers solace to irritated lips, alongside a cooling sensation.

Recipes for Crafting Custom Lip Balm

Concocting Your Lip Elixir: The creation process is a delightful blend of art and simplicity. By melting the foundational ingredients, incorporating your chosen oils, and decanting the amalgam into receptacles to solidify, you can fashion an array of lip balms that cater to your specific desires and needs.

  • Base Components: Beeswax, shea butter, cocoa butter, and coconut oil form the quintessential mix for your lip balm, ensuring hydration and a silky texture.
  • Oils for Augmentation: Argan, sweet almond, jojoba, and grape seed oil enhance the balm with additional moisturizing properties and vital nutrients.
  • Aromatic Essential Oils: Employ lavender, peppermint, rose, and vanilla essential oils for their therapeutic fragrances and properties.
  • Supplementary Elements: Honey, vitamin E oil, and aloe vera enrich the balm with their antimicrobial and soothing capabilities.
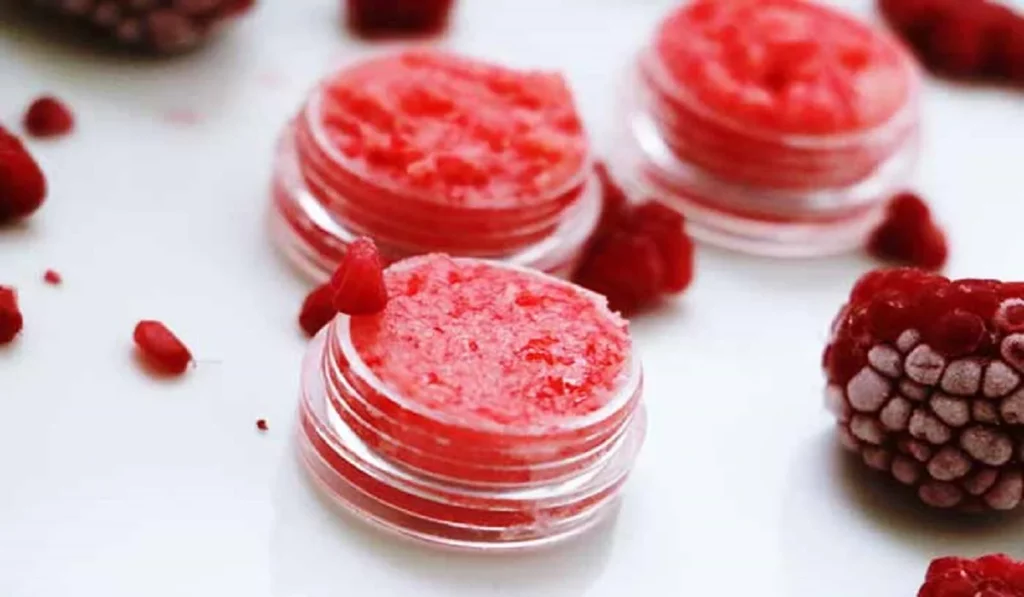
Diy Lip Balm Simple Ingredientsfor Beautiful Lips


Detailed Homemade Lip Balm Recipes:

  • Rose Lip Balm: Fuse 1 teaspoon of beeswax with 1 tablespoon each of castor oil and cocoa butter, and 3 tablespoons of rose oil. Integrate 1 teaspoon of powdered rose petals for a tint. Decant into molds and refrigerate.
  • Honey Lip Balm: Blend 10 grams each of cocoa butter and beeswax with 15 grams of shea butter. Introduce 4 teaspoons of sweet almond oil and 2 teaspoons of honey. Add 1 teaspoon of vanilla extract for flavoring, pour, and allow to set.
  • Shea Butter Lip Balm: Combine 1 tablespoon each of shea butter, beeswax, and coconut oil. Incorporate 1 teaspoon of raw honey, mix, pour, and let it cool.
  • Peppermint Oil Lip Balm: Melt 1 tablespoon of beeswax with 1 teaspoon each of coconut oil and sweet almond oil. Mix in three drops of peppermint oil, and pour to cool.

The Verdict on Homemade Lip Balm

Engaging in the creation of your own lip balm is not only an act of self-care but a statement of mindfulness towards health and the environment. With minimal effort and natural ingredients, you can craft a product that is both personal and beneficial, offering a tangible connection to the beauty regimen. Whether for yourself or as a gesture of care for others, homemade lip balms stand out as heartfelt, health-conscious choices in our daily lives.

Crafting the Perfect Lip Balm: Selecting Natural Ingredients for Optimal Care

1. The Premier Natural Oils for Crafting Homemade Lip Balm The hydration and nourishment of your lips are paramount, and selecting the ideal natural oils for your DIY lip balm is essential. Opt for coconut oil to deeply hydrate, almond oil for its rich vitamin A and E content, jojoba oil to mirror the lip’s natural sebum, and avocado oil for its superior moisturizing and skin-regenerative properties. These oils offer a customizable foundation for your lip care routine, catering to various needs and preferences.

2. Determining the Ideal Butter for Your Lip Balm Recipe The choice of butter in your lip balm recipe is crucial for achieving the desired consistency and therapeutic benefits. For softening and anti-inflammatory effects, shea butter stands out. Cocoa butter, on the other hand, forms a protective layer while delighting the senses with its chocolate aroma. Mango butter, rich in antioxidants and vitamins, offers a lighter alternative. Your selection should align with your specific lip care goals, whether it’s intense hydration, protection, or restoration.

3. Vegan Beeswax Substitutes for Eco-Conscious Crafters Vegan crafters seeking beeswax alternatives have excellent options in candelilla wax and carnauba wax. Candelilla wax mimics the textural and protective qualities of beeswax, while carnauba wax, known for its glossy finish and robust melting point, is ideal for lip balm formulations. These plant-based substitutes support sustainable practices and vegan principles without sacrificing product efficacy.

4. Incorporating Essential Oils for Enhanced Lip Balm Benefits Integrating essential oils into your DIY lip balm can provide therapeutic effects and aromatic pleasures. It’s crucial to use them judiciously and confirm their suitability for lip application. Peppermint offers a refreshing coolness, lavender calms, and sweet orange uplifts. Conduct a skin patch test prior to using new essential oils, particularly for those with sensitive skin, to ensure compatibility and safety.

5. Boosting Lip Balm Moisturization Enhancing your lip balm’s moisturizing capabilities can be achieved by adding vitamin E oil for its protective and nourishing properties, and honey, renowned for its healing and hydrating benefits. Adjusting the oil and butter ratios in your mixture can further intensify moisturization. Experimentation with various ingredient combinations will help you discover the perfect formula for your lips.


6. Utilizing Natural Colorants for a Pop of Color Introducing natural colorants into your lip balm not only imbues it with beautiful hues but also imparts additional lip care benefits. Beetroot and alkanet root powders create lovely pink to red tints, cocoa powder offers a subtle brown, and turmeric powder yields a golden color. These colorants bring antioxidant and anti-inflammatory advantages to your lip balm, enhancing its overall efficacy.

7. Maximizing DIY Lip Balm Shelf Life Ensuring an extended shelf life for your homemade lip balm involves avoiding water in the formulation to prevent bacterial proliferation. Employ clean, sterilized containers for your balm, and consider natural preservatives like vitamin E oil to prolong its usability. Storing your lip balm in a cool, dry environment away from sunlight is crucial for maintaining its quality and performance.

Through careful selection of ingredients and adherence to best practices, you can formulate a DIY lip balm that not only enhances the beauty of your lips but also provides them with profound nourishment and care.

The journey toward crafting your own lip care solutions is both empowering and enlightening, fostering a deepened connection to personal well-being and environmental stewardship. Through understanding the critical role of natural ingredients and mastering the art of lip balm creation, you unlock the door to a world where your lips are not only nourished and protected but are a testament to your commitment to a healthier, more sustainable way of living. Whether embraced for personal indulgence or shared as tokens of affection, homemade lip balms epitomize the heartwarming intersection of utility and personal expression in the realm of beauty care.


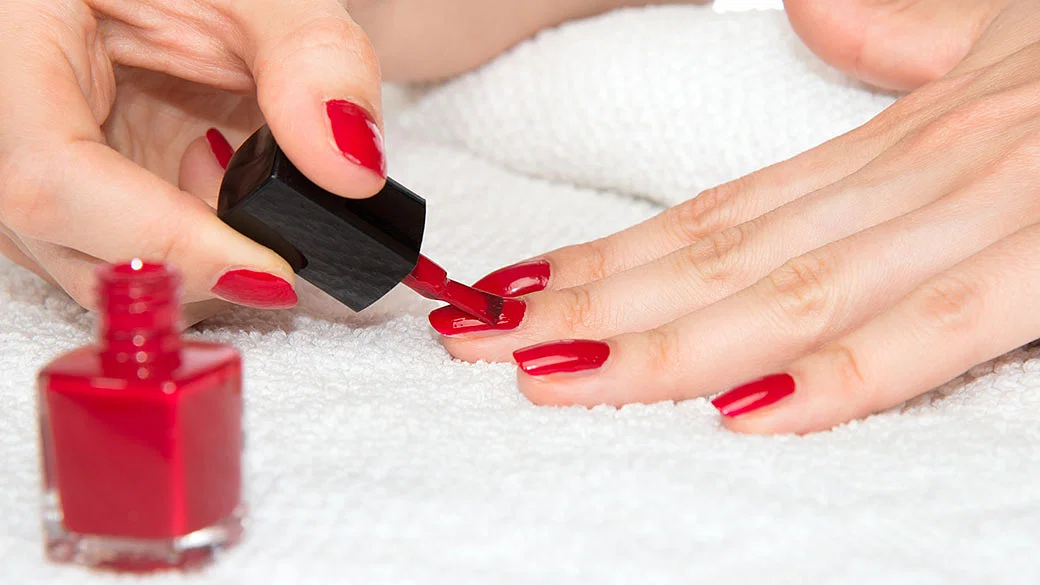
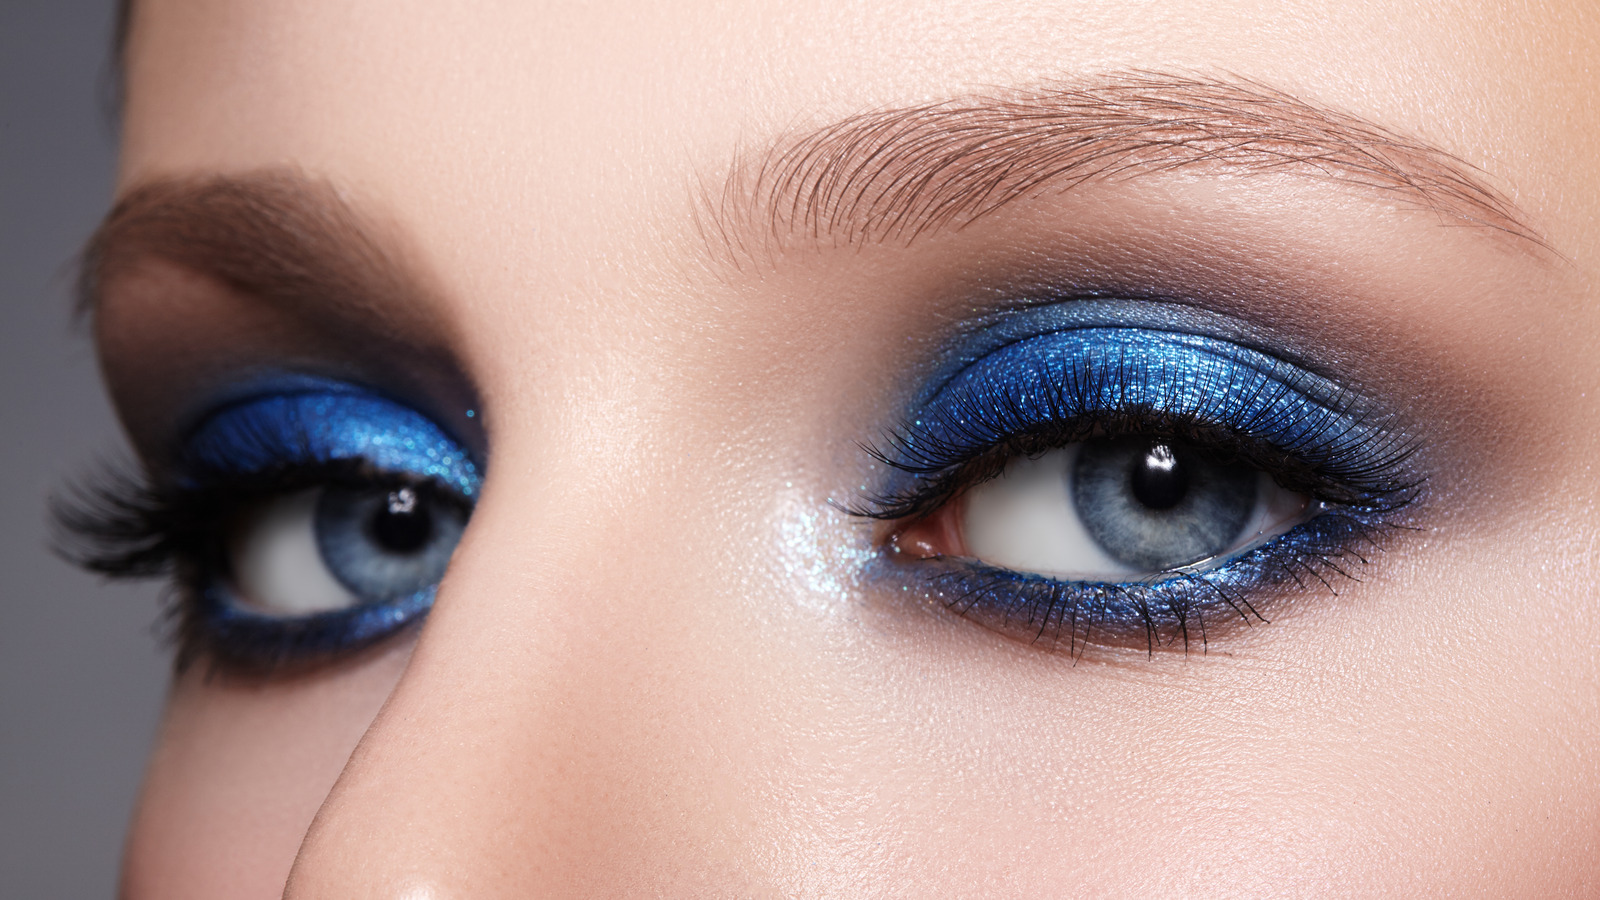
Dewy Vs. Matte Foundation
Moist Foundation or Matte Foundation? The Ultimate Guide to Choosing the Right Foundation for Your Skin

When it comes to makeup, foundation acts as the canvas for your entire look. However, with the myriad options available, selecting the right foundation can be daunting. Among the various choices, moist and matte foundations stand out for their unique benefits and finishes. This comprehensive guide dives deep into the world of foundations, helping you decide whether moist foundation or matte foundation is the ideal choice for your skin type and aesthetic preferences. Understanding Foundation Types What is Moist Foundation?Moist foundation, often referred to as hydrating or dewy foundation, is designed to offer a luminous finish. Infused with hydrating ingredients, it aims to provide a healthy glow, making it an excellent option for those with dry or dull skin. What is Matte Foundation?Matte foundation offers a flat, non-shiny finish that controls oil and minimizes the appearance of pores. It’s favored by individuals with oily skin or those looking for long-lasting coverage without a glossy look. Key Differences Between Moist and Matte Foundations Benefits of Moist Foundation Benefits of Matte Foundation How to Choose the Right Foundation for Your Skin Type Application Tips for Moist Foundation Application Tips for Matte Foundation Combining Moist and Matte Foundations Popular Moist Foundation Brands Discover brands that offer top-rated moist foundations, praised for their hydrating formulas and natural finish. Popular Matte Foundation Brands Explore the favorites among matte foundation brands, known for their oil-control capabilities and flawless coverage. Expert Tips for Foundation Application How to Transition Between Foundation Types The Role of Foundation in Makeup Routine Caring for Your Skin with Foundation Future Trends in Foundation Moist Foundation or Matte Foundation? Deciding between moist and matte foundation ultimately depends on your skin type, desired finish, and personal preference. Understanding the nuances of each can empower you to make the best choice for your makeup routine, ensuring that your foundation enhances rather than detracts from your natural beauty. Whether you opt for a moist foundation to achieve a dewy glow or a matte foundation for a shine-free finish, the key is to choose a product that complements your skin type and meets your beauty goals. By considering the factors outlined in this guide, you can select a foundation that not only looks great but also feels comfortable and enhances your overall makeup look. Remember, the right foundation is the cornerstone of any successful makeup routine, setting the stage for a flawless, confidence-boosting appearance. FAQs What is the best foundation for oily skin?Can you mix moist and matte foundations?How do I know if a foundation is right for my skin type?Is it necessary to use a primer with foundation?How can I make my foundation last longer throughout the day?What should I do if my foundation causes breakouts?

Nourishing Solutions For Dry And Damaged Hair: A Comprehensive Guide To Effective Treatment And The Role Of Hair Primers
Nourishing Solutions for Dry and Damaged Hair: A Comprehensive Guide to Effective Treatment and the Role of Hair Primers

Dry and damaged hair can be a source of frustration and can significantly impact our self-confidence. However, with the right care and attention, it is possible to revive and restore the health and vitality of your hair. This comprehensive guide aims to provide you with valuable insights and practical tips to effectively treat dry and damaged hair. Additionally, we will explore the benefits and proper usage of hair primers, an essential tool in your hair care arsenal. Understanding Dry and Damaged HairBefore diving into treatment options, it is important to understand the underlying causes and characteristics of dry and damaged hair. Factors such as excessive heat styling, chemical treatments, environmental exposure, improper hair care routines, and nutritional deficiencies can all contribute to dryness and damage. Dry hair lacks moisture, appearing dull, brittle, and prone to frizz. Damaged hair, on the other hand, has structural impairments, such as split ends, breakage, and rough texture. Building a Hair Care RoutineDeveloping a consistent and tailored hair care routine is crucial for improving the condition of dry and damaged hair. This section will outline the essential steps to incorporate into your regimen, including cleansing, conditioning, and treatments. We will discuss the importance of using sulfate-free shampoos, moisturizing conditioners, and deep conditioning masks enriched with nourishing ingredients such as keratin, argan oil, shea butter, and vitamin E. Furthermore, we will explore the benefits of incorporating natural remedies like coconut oil and aloe vera into your routine. Nourishing Treatments for Dry and Damaged Hair In addition to a comprehensive hair care routine, targeted treatments can help restore moisture and repair damaged strands. We will discuss various treatments, such as protein treatments, hair masks, leave-in conditioners, and serums that can provide intensive hydration and repair. We will also touch upon the significance of regular trims to remove split ends and promote healthy hair growth. Introduction to Hair PrimersHair primers have gained popularity in recent years as a preparatory step in the hair care routine. This section will explain the purpose and benefits of using hair primers. Primers create a protective barrier between your hair and styling tools, minimizing heat damage and reducing the risk of breakage. They also provide a smooth base for styling products and help prolong the longevity of your desired hairstyle. Hair primers can come in various forms, including sprays, creams, and serums, each offering unique benefits. Utilizing Hair Primers for Optimal Results To maximize the effectiveness of hair primers, it is crucial to understand their proper usage. This section will provide a step-by-step guide on how to use hair primers correctly. We will discuss the ideal application techniques, the amount of product to use, and how to distribute it evenly throughout your hair. Additionally, we will explore the compatibility of hair primers with other styling products, such as heat protectants, volumizers, and smoothing serums. Choosing the Right Hair Primer for Your Needs Selecting the most suitable hair primer for your specific hair type and concerns is essential. This section will highlight key factors to consider when choosing a hair primer, including ingredients, formulation, and the…

Treating Fungal Facial Acne: Causes, Symptoms, And Effective Remedies
Treating Fungal Facial Acne: Causes, Symptoms, and Effective Remedies

Fungal facial acne, frequently confused with its bacterial counterpart, originates from an excessive proliferation of yeast, notably the Malassezia species, on the skin’s surface. This yeast finds a conducive environment in oily areas, setting fungal acne apart from traditional acne. This guide aims to demystify the condition, exploring its roots, identification methods, and effective treatment options. Root Causes of Fungal Acne The imbalance in the skin’s microbiome, prompted by factors such as intense perspiration, high humidity, constrictive apparel, and the application of oil-based skincare products, paves the way for yeast overgrowth. Recognizing these triggers is fundamental to both the management and prevention of fungal acne flare-ups. Symptom Recognition Characterized by small, consistent bumps that often itch, fungal acne predominantly appears in oily or sweaty zones like the forehead, chin, and chest. Its resistance to conventional acne remedies serves as a significant distinguishing feature. Diagnosing Fungal Acne Seeking a dermatologist’s expertise is advisable for accurately distinguishing fungal acne from other dermatological issues, possibly involving skin inspections or more intricate procedures like cultures or biopsies. Home Treatment Strategies Natural Remedies Skincare Regimen Adopting a skincare routine that eschews heavy oils, favoring non-comedogenic alternatives, and includes washing with a gentle cleanser twice daily is crucial to averting yeast accumulation. Medical Intervention for Fungal Acne Prescribed Solutions Dermatologists may prescribe antifungal creams or oral medications, with ketoconazole or clotrimazole being common choices to address yeast overgrowth. Over-the-Counter Options Consultation with a healthcare provider is recommended when choosing over-the-counter antifungal treatments to ensure their efficacy. Dietary Role in Management A diet low in sugars and refined carbs can curb internal yeast proliferation. Including antifungal foods like garlic and coconut oil may further aid in combating the condition. Skincare Product Selection Recommended Products Seek out oil-free, non-comedogenic products that do not feed the yeast. Ingredients such as zinc pyrithione can be effective in reducing skin yeast levels. Ingredients to AvoidSteer clear of skincare items containing ingredients like fatty acids, esters, and oils that Malassezia yeast thrives on, as they can worsen the condition. Preventive MeasuresWearing breathable clothing, adhering to a balanced diet, and judiciously selecting skincare products are key preventive steps. Additionally, regularly changing bedding and minimizing sweating can thwart fungal acne development.Effectively tackling fungal facial acne necessitates a holistic approach that includes accurate diagnosis, lifestyle modifications, and careful product selection. With an informed understanding of its causes and dedicated application of suitable remedies, achieving and maintaining healthy skin is attainable.

Perms: A Comprehensive Guide To The Timeless Hair Transformation
Perms: A Comprehensive Guide to the Timeless Hair Transformation

Perms, short for “permanent waves,” have been a popular hair transformation technique for decades, offering individuals a way to achieve beautiful, long-lasting curls or waves. This chemical hair treatment involves altering the natural structure of the hair to create texture and curl patterns that can last for several months. Perms have seen various trends and evolutions over the years, making them a timeless choice for those seeking to change their hairstyle. In this comprehensive guide, we will delve into the world of perms, exploring the different types, the process involved, aftercare tips, and the factors to consider before taking the plunge. What is a Perm? A perm is a chemical hair treatment that involves altering the hair’s internal structure to create curls or waves. It works by breaking and reshaping the disulfide bonds present in the hair, followed by setting the hair in the desired shape. The result is a semi-permanent transformation, with the curls or waves typically lasting for several months, gradually loosening as the hair grows. Perms are highly versatile and can be tailored to achieve various curl patterns, from loose beach waves to tight spiral curls. They offer a low-maintenance option for those looking to add volume, texture, and style to their hair without the need for daily heat styling. The Evolution of Perms The concept of perming hair has been around for centuries, but it gained significant popularity during the 20th century. The modern perm, as we know it today, was developed in the 1930s by Arnold F. Willatt, a British hairdresser. The process initially involved using harsh chemicals and heat, resulting in damage to the hair and an unnatural appearance. Over time, advancements in hair technology and the development of more gentle and effective perm formulations led to the evolution of perms. In the 1970s and 1980s, big, voluminous curls became the trend, and perms were a common choice to achieve this look. However, as the concept of “wash-and-go” hairstyles gained popularity, the demand for perms declined. In recent years, the perm has experienced a resurgence, with a focus on more natural and soft curl patterns. Beachy waves, loose curls, and textured hairstyles have become trendy, and perms have once again become a sought-after hair transformation option. Types of Perms The digital perm is a modern variation of the traditional perm, known for creating soft, natural-looking curls. It involves the use of digitally controlled rods to create consistent and uniform curls. Digital perms are ideal for those seeking a more relaxed, wavy look rather than tight and uniform curls. The beach wave perm is designed to create effortless, beachy waves that mimic the look of naturally tousled hair after a day at the beach. It produces loose, relaxed curls with subtle volume, making it a popular choice among those looking for a low-maintenance, carefree hairstyle. The spiral perm is characterized by tight, springy curls that create a dramatic and voluminous effect. It involves wrapping the hair around small rods in a spiral pattern, resulting in long-lasting, defined curls. Spiral perms are suitable for those seeking a bold…

Face Tonic: The Unsung Hero Of Skincare – What It Is And How To Make It Shine
Face Tonic: The Unsung Hero of Skincare – What It Is and How to Make It Shine

In the ever-expanding world of skincare, one product often overshadowed by its more glamorous counterparts is the humble face tonic. While cleansers, moisturizers, and serums bask in the limelight, face tonics quietly work behind the scenes to balance, hydrate, and rejuvenate the skin. In this comprehensive guide, we will unveil the secrets of face tonics, exploring what they are, their essential components, their benefits for different skin types, and, most importantly, how to use them effectively to achieve a radiant complexion. Whether you’re a skincare novice or an enthusiast, understanding face tonics can be the key to unlocking the full potential of your skincare routine. Chapter 1: Demystifying Face Tonics We’ll start by demystifying face tonics, shedding light on: Chapter 2: The Key Components of Face Tonics Face tonics often consist of a variety of ingredients that provide different benefits to the skin. In this chapter, we’ll explore: Chapter 3: Benefits of Using Face Tonics Face tonics offer a range of benefits for the skin. We’ll delve into these advantages, including: Chapter 4: Choosing the Right Face Tonic for Your Skin Type Not all face tonics are created equal, and choosing the right one for your skin type is essential. We’ll provide guidance on selecting the perfect tonic for: Chapter 5: Incorporating Face Tonic into Your Skincare Routine Using a face tonic effectively requires proper integration into your skincare routine. We’ll cover: Chapter 6: DIY Face Tonics: Crafting Your Customized Elixir For those who enjoy a more personalized touch, we’ll explore the world of DIY face tonics. We’ll discuss: Chapter 7: Face Tonics for Specialized Concerns Certain face tonics cater to specific skincare concerns. We’ll look at tonics designed for: Chapter 8: Common Myths and Misconceptions About Face Tonics In this chapter, we’ll debunk some common myths and misconceptions surrounding face tonics, such as: Chapter 9: The Future of Face Tonics As the skincare industry continues to innovate, we’ll speculate on the future of face tonics and potential advancements in their formulation and application. Chapter 10: Conclusion We’ll wrap up our journey through the world of face tonics by summarizing the key takeaways and emphasizing the significance of this often-overlooked skincare product. Whether you’re seeking balance, hydration, clarity, or simply an extra layer of care for your skin, a well-chosen face tonic can be a game-changer in your skincare routine. By understanding their benefits and how to use them effectively, you’ll be on your way to achieving a radiant, healthy complexion with the support of this unsung hero of skincare.

Nurturing Sensitive Skin Essential Considerations For Allergy Prone Skin Care
Nurturing Sensitive Skin: Essential Considerations for Allergy-Prone Skin Care

For individuals with allergies, maintaining a skincare routine that caters to their specific needs is crucial. Allergic reactions can range from mild irritation to more severe symptoms, making it essential to be mindful of the products and ingredients used on the skin. In this article, we will explore the key considerations for people with allergies when it comes to skincare. From understanding common allergens to identifying hypoallergenic products and adopting a gentle skincare routine, we will provide valuable insights to help you nurture your sensitive skin and minimize the risk of adverse reactions. Know Your Allergens:The first step in managing allergies is to identify the substances that trigger your reactions. Common allergens in skincare products include fragrances, preservatives, dyes, certain plant extracts, and ingredients derived from nuts or gluten. Keep a record of the products that have caused reactions in the past, and consult with a dermatologist or allergist to determine specific allergens to avoid. Read Ingredient Labels:When selecting skincare products, it’s crucial to read and understand the ingredient labels. Look for products that clearly list their ingredients, and familiarize yourself with potential allergens. Avoid products that contain known allergens or substances that you have reacted to in the past. Opt for products labeled as hypoallergenic or suitable for sensitive skin, as they are formulated to minimize the risk of triggering allergic reactions. Patch Test New Products:Before incorporating a new skincare product into your routine, perform a patch test. Apply a small amount of the product to a small area of your skin, such as the inner forearm, and observe for any signs of irritation or allergic reactions over the next 24 to 48 hours. If redness, itching, or swelling occurs, refrain from using the product on your face or body. Choose Hypoallergenic Products:Hypoallergenic products are formulated to minimize the risk of causing allergic reactions. Look for products that are specifically labeled as hypoallergenic, as they are typically free from common allergens and undergo rigorous testing to ensure their safety. These products are designed to be gentle on sensitive skin and reduce the likelihood of triggering an allergic response. Avoid Fragrances and Irritants:Fragrances are a common allergen and can be found in many skincare products. Opt for fragrance-free or unscented products, as they are less likely to cause allergic reactions. Additionally, avoid skincare products that contain known irritants such as alcohol, sulfates, parabens, and harsh chemical ingredients. These substances can strip the skin of its natural moisture barrier and increase the risk of sensitivity and irritation. Moisturize Regularly:Keeping the skin well-hydrated is essential for individuals with allergies. Moisturizers help maintain the skin’s moisture barrier, preventing dryness and minimizing the risk of irritation. Choose gentle, fragrance-free moisturizers that are formulated for sensitive skin. Look for products that contain hydrating ingredients such as hyaluronic acid, ceramides, and natural oils to nourish and protect your skin. Adopt a Gentle Skincare Routine:Simplicity is key when it comes to skincare for allergy-prone skin. Avoid using multiple products with complex ingredient lists, as this increases the likelihood of encountering allergens. Opt for a gentle cleanser that is free…

Master The Art Of Bronzing Pro Tips For A Flawless Glow
Master the Art of Bronzing: Pro Tips for a Flawless Glow

Mastering the art of bronzing can elevate your beauty regimen by infusing your complexion with warmth, depth, and a vibrant, healthy radiance. Unlike the sculpting effects of contouring or the luminosity added by highlighting, bronzing recreates the natural warmth of sunlight on the skin, ensuring a look that’s both natural and glowing. This comprehensive guide will equip you with the knowledge to use your bronzer brush with the finesse of an expert artist. Choosing Your Ideal Bronzer Embarking on the journey to find the quintessential bronzer involves navigating through the varieties of powder, cream, and liquid forms. Each type offers distinct advantages, suited to different skin types and personal preferences. Powder bronzers excel for those with oily skin and facilitate straightforward application, cream bronzers provide a moist finish ideal for dry skin, and liquid bronzers deliver an unparalleled natural effect suitable for every skin type. The cornerstone of a flawless selection is picking a hue one or two shades deeper than your skin, ensuring a blend that’s both seamless and devoid of an unnatural, muddy, or orange cast. Essential Application Tools The transformative power of bronzer is not solely in the product but also in the technique of application. Essential for achieving a perfect finish, the right tools are indispensable. A plush, angled brush is the best match for powder bronzers, offering a soft, widespread application, while a stippling brush is most effective for creams and liquids, providing the blendability and precision needed. Maintaining these tools through regular cleansing is vital to prevent buildup and guarantee a smooth application every time. Skin Preparation for Bronzer The foundation of a stellar bronzer application lies in the initial skin preparation. A regimen that includes a hydrating moisturizer and a smoothing primer sets up the perfect canvas, enhancing both the bronzer’s appearance and its durability. A foundation that mirrors your skin tone acts as a seamless base, facilitating the bronzer’s blendability and ensuring an absence of streaks or uneven areas. Fundamental Application Methods The essence of bronzing is to mimic a genuine sun-kissed effect, as though returning from a seaside getaway. To achieve this, apply the bronzer to areas typically kissed by the sun: your forehead, cheekbones, and jawline, employing a light touch and building intensity gradually to avoid stark lines or patchiness. The mantra “less is more” holds true in the realm of bronzing. Elevated Bronzing Strategies For those aspiring to refine their bronzing skills, utilizing bronzer for subtle contouring and enhancing the natural radiance is a strategy worth exploring. Applying the bronzer in a “3” shape on your face’s sides, blending from the forehead down under the cheekbones and across the jawline, not only adds warmth but also softly contours, imparting definition in a manner far more subdued than traditional contour products. Avoidable Bronzing Faux Pas Over-application ranks high among common bronzing errors, leading to an unnatural appearance. It’s crucial to shake off excess product before application and use a restrained hand. Equally, choosing an incorrect shade can create an undesired orange or muddy look. Opting for a bronzer with a neutral undertone…

Boost Your Smile Top 7 Strategies For Smooth, Hydrated Lips In 2024
Boost Your Smile: Top 7 Strategies for Smooth, Hydrated Lips in 2024

Achieving a soft, plump, and healthy look for your lips is paramount, necessitating the removal of dead skin cells to unveil the underlying smooth texture. This practice not only refines the feel and look of your lips but also maximizes the absorption and effectiveness of lip care products. Our discussion will cover the essentials for attaining perfectly exfoliated lips, including its significance, correct methods, and the finest products and techniques for superior outcomes. The Essence of Lip Exfoliation Far from being merely cosmetic, lip exfoliation is a critical health regimen. Given their constant exposure to environmental factors like the sun, wind, and cold, lips are susceptible to dryness and peeling. The absence of oil glands in the lips means they lack natural moisturization, a gap filled by the benefits of exfoliation, which facilitates dead skin removal and encourages cellular renewal. The Underlying Science of Lip Exfoliation The principle of lip exfoliation lies in the gentle removal of dead surface cells, averting dryness and promoting a richer blood supply for a fuller and more radiant appearance. Consistent exfoliation also wards off early signs of aging around the lips. Selecting an Appropriate Lip Exfoliator The choice of lip exfoliator should be informed by your skin type and sensitivities, ranging from homemade concoctions to commercial exfoliating balms. Ingredients such as sugar, honey, and coconut oil are mild yet effective, matching the performance of many off-the-shelf products. Homemade Lip Exfoliation Solutions Crafting your lip scrub is straightforward, allowing for personalization. A basic mix of sugar, coconut oil, and honey offers a hydrating and exfoliating solution, nourishing the lips alongside the removal of dead cells. A Comprehensive Guide to Lip Exfoliation The exfoliation process is quick and efficient. Apply a chosen exfoliant to the lips, massage gently in circles, then rinse off with warm water. Seal in moisture immediately afterward with a hydrating balm. Moisture Retention Post-Exfoliation Post-exfoliation hydration is vital. Opt for lip balms enriched with shea butter, vitamin E, and hyaluronic acid to maintain moisture and elasticity. Seasonal Lip Care Adjustments Adapt your lip care to seasonal changes, increasing exfoliation and hydration during winter and ensuring UV protection during summer. Mitigating Common Lip Issues Through Exfoliation Regular exfoliation addresses various lip concerns like discoloration, uneven texture, and aging signs, enhancing both the look and health of your lips through dead skin removal and improved circulation. Evaluating Lip Exfoliation Merchandise The vast market selection makes choosing the right product daunting. Base your decision on specific needs and preferences, evaluating ingredients, textures, and consumer reviews. Achieving Luscious, Healthy Lips Incorporating lip exfoliation into your skincare routine is crucial for soft, well-maintained lips. By selecting appropriate exfoliators, maintaining hydration, and adjusting care with the seasons, you pave the way for a radiant, healthy smile, transcending mere aesthetics to embody genuine lip care.