How to Use an Eyelash Curler

Transforming your lashes with an eyelash curler can dramatically enhance your look, creating an illusion of wider, more vibrant eyes that captivate and allure. While the prospect of using an eyelash curler may seem intimidating to some, this guide is designed to demystify the process, guiding you to safely and effectively achieve the perfect lash curl.
How To Use An Eyelashcurler

Understanding Eyelash Curlers: A Primer

Diverse Eyelash Curler Options

The realm of eyelash curlers is filled with options to suit every need. The traditional manual curler, known for its simplicity and effectiveness, stands as the go-to choice. For those in pursuit of a more enduring curl, heated eyelash curlers gently warm lashes into shape. Precision curlers, on the other hand, are engineered to meticulously curl lashes at the eye’s corners or shorter lashes with exactitude.

Lash Preparation: The Foundation for Curling

Ensuring Lashes are Clean and Dry

The cornerstone of a successful curl lies in beginning with lashes that are both clean and dry. Residues from makeup or oils can impede the curling process. A gentle cleanse followed by careful drying not only primes your lashes but also safeguards them against potential damage inflicted by the curler.

The Mascara Dilemma: Before or After Curling?

A common query revolves around the optimal timing for mascara application relative to curling. Applying mascara before curling can result in clumped lashes and potential damage, as the wet mascara may cause the curler to adhere to the lashes. It is advisable, therefore, to first curl your lashes and subsequently apply mascara, thus enhancing and preserving the curl.

Mastering the Eyelash Curler: A Step-by-Step Tutorial

Choosing the Ideal Curler

Selecting an eyelash curler that complements your eye shape and lash length is critical. Wide-eyed individuals might favor a broader curler, while those with smaller eyes might find a narrower one more fitting. A flatter curve is often recommended for those with straighter lashes.

Executing the Perfect Curl

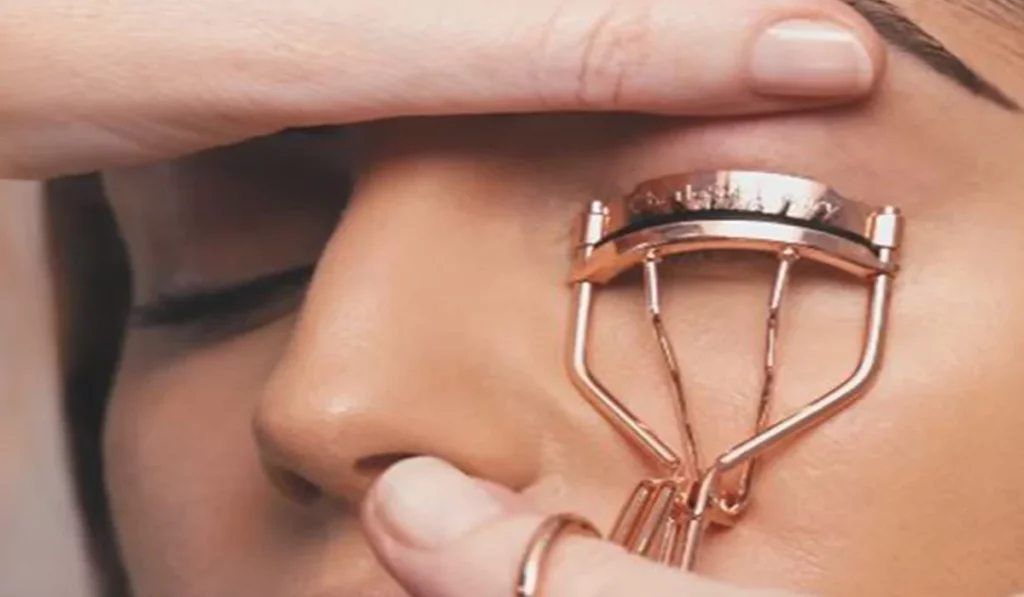
  1. Curler Positioning: Open the curler and gently encase your lashes between the pads, aiming to get as close to the lash base as possible without pinching your skin.
  2. The Curling Action: With a gentle pressure, squeeze the curler for approximately 10-20 seconds, ensuring you do not pull or tug to avoid lash loss.
  3. Maintaining the Curl: Slowly release the curler to unveil a gorgeously curled lash.

Enhancing Curl Longevity

Employing heating techniques, such as a lightly warmed hairdryer on the curler (testing to ensure it’s not excessively hot), can significantly bolster the curl’s endurance. Alternatively, specialized heated curlers offer a secure way to achieve a more pronounced, lasting curl.

Navigating Common Pitfalls

Steer clear of over-curling to avoid lashes that look unnaturally bent or risking lash damage. Regularly cleaning your curler to remove any mascara residue is also essential to prevent lash sticking and pulling.
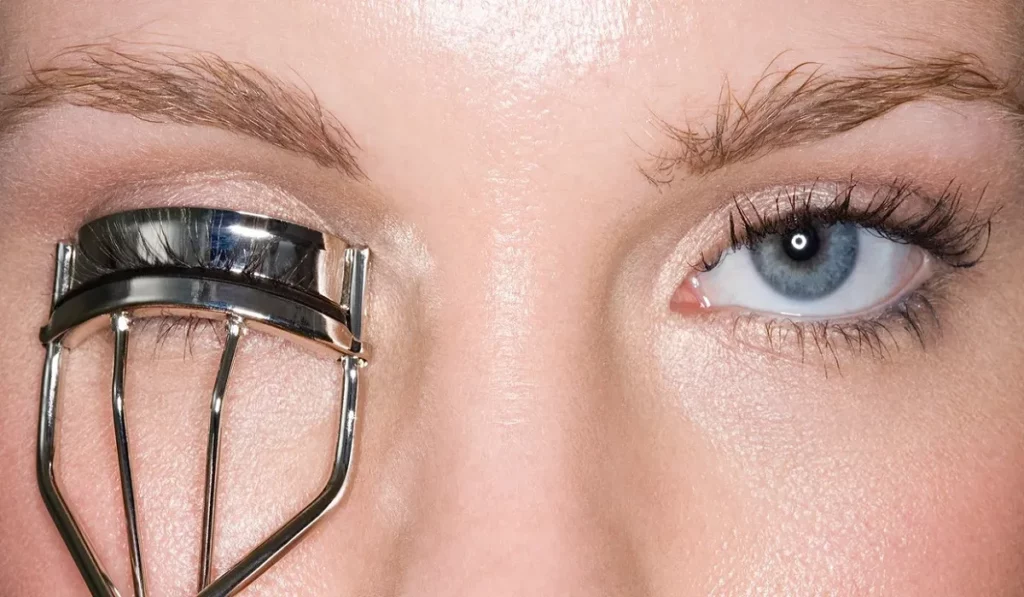
How To Use An Eyelash Curler


Eyelash Curler Upkeep

Recognizing When to Replace Your Curler

Regularly inspect your curler for wear signs, like damaged pads or diminished tension, and replace as necessary to maintain effectiveness and safety.

Maintaining a Clean Curler

Frequent cleaning with a gentle soap and thorough drying are paramount to prevent bacterial accumulation and ensure optimal performance.

Exploring Advanced Techniques

Experimenting with varying curl intensities, from a subtle uplift to a dramatic curl, and utilizing additional tools like eyelash combs can refine your results for a flawless look.

  • Duration: Aim for a 10-20 second hold, adjusting as needed for heated curlers.
  • Eyelash Extensions: Traditional curlers are generally not recommended for extensions. Seek advice from a lash technician for suitable alternatives.
  • Safety with Heated Curlers: Ensure the curler is comfortably warm, not hot, to prevent burns.
  • Pad Replacement: Change the pad every 3-6 months or upon noticing wear.
  • Potential Damage from Over-Curling: Use the correct technique and avoid excessive curling to prevent lash damage.
  • Mascara Application Timing: Curl lashes before applying mascara to prevent clumps and curler damage.

With diligent practice and adherence to the right techniques, mastering the eyelash curler can significantly enhance your makeup routine, drawing attention to your eyes with a natural, captivating allure. Perfect curls are within reach, ensuring your gaze remains compellingly beautiful.

Sleep Your Way To Beautiful Skin Beauty Sleep Nighttime Rituals For Beautiful Skin
Sleep Your Way to Beautiful Skin: Beauty Sleep: Nighttime Rituals for Beautiful Skin

Welcome to the best guide to beauty sleep! In this post, we discuss just how adequate sleep is crucial for perfect, glowing skin. From sleep science to nighttime skin care tips, you will discover ways to harness sleep for radiant skin. Why Beauty Sleep Is Important Beauty sleep is not a conspiracy – it is a part of an appropriate skin care regime. We discuss why getting adequate quality sleep is vital for gorgeous and glowing skin. Skin Repair & Regeneration: While you are asleep, your skin fixes and also regenerates from environmental stresses and also induces cellular turnover for a brilliant complexion.Reduction of Stress: Quality sleep reduces stress – resulting in breakouts, sagging, and premature aging. A renewed complexion appears smoother, shinier and younger.Hormonal Balance: Proper sleep supports hormone control, including cortisol. Balanced hormones make skin more clear and healthier and might also avoid hormonal pimples along with various other skin issues. The Effects of Sleep Deprivation on Skin We might not be getting plenty of sleep — and it is effecting our skin. What exactly are the symptoms of sleep deprivation and exactly how they are able to impact your skin. Sleep Deprivation Symptoms: Insufficient sleep is able to appear on your skin in several ways – dullness, puffiness, dark circles, fatigue, itchiness and reduced production of collagen – every one of which contributes to early aging. Rituals of Nighttime Skincare For best beauty sleep, you should enjoy a consistent nighttime skincare routine. What you should know regarding nighttime skin care regimes for glowing skin. Selecting the Right Products Deciding on the best skincare products is essential for an excellent nighttime routine. What exactly are some must have items in your regimen: Cleansers & Makeup Removers: Begin by cleaning away makeup, day-old toxins, and dirt.Treatments & Serums: Include targeted serums and therapies for particular skin concerns as fine lines, wrinkles, acne and hyperpigmentation.Moisturizers & Night Creams: Lotion your skin with a rich, moisturizing cream or nighttime mask to retain moisture and facilitate skin repair.Eye Creams & Treatments: And of course the fragile skin surrounding your eyes! To minimize dark circles, puffy eyes and fine lines, use a hydrating eye cream or therapy. Proper Application Methods Just as crucial as the products themselves is exactly how you apply your skincare products. Use these application techniques to your benefit: Cleansing and Double Cleaning: Scrub your skin properly in gently upward movements to eliminate impurities without stripping skin oils. Consider double cleaning in case you are using make up or sunscreen.Layering Products: Put on skincare products from thinst to thickest consistency, letting each one to absorb prior to using the following.Gua Sha and Facial Massage: Add skin massage or perhaps a gua sha instrument to promote lymph drainage, circulation and product absorption.Night Masks & Treatments: Try soaking your skin in a overnight treatment or mask 3-4 times per week for intensive hydration, renewal and repair while asleep. How to Improve Beauty Sleep A proper slumber environment & healthy way of life could likewise promote beauty sleep. Here are some slumber hygiene hacks: Making…

Mastering The Art Of Henna Hair Dye
Mastering the Art of Contouring: Tips and Tricks

The art of contouring has taken the beauty world by storm, offering a technique to enhance and define facial features like never before. This guide breaks down the steps, tips, and tricks to master contouring, transforming your makeup routine and elevating your look to new heights. The Basics of Contouring What is Contouring? Contouring is a makeup technique used to define, enhance, and sculpt the natural features of the face through strategic application of makeup. Tools You Will Need Discover the essential tools for contouring, including brushes, sponges, and the types of makeup best suited for the task. Understanding Face Shapes Identifying Your Face Shape Learn how to identify your face shape to tailor your contouring technique for the most flattering results. Contouring for Each Face Shape Detailed tips on contouring for round, oval, square, heart, and diamond-shaped faces, ensuring every reader can achieve their best look. Step-by-Step Guide to Contouring Preparing Your Skin The importance of a clean, moisturized base for seamless makeup application. Mapping Your Face Guidance on how to map the areas of your face for contouring, highlighting the regions that will help achieve a balanced and defined look. Blending Techniques Techniques and tips for blending contour makeup flawlessly, avoiding harsh lines for a natural finish. Highlighting: The Perfect Pair to Contouring Areas to Highlight Identify the areas of your face that should be highlighted to complement your contouring, enhancing your facial structure effectively. Choosing Highlighter Advice on selecting the right highlighter shade and formula for your skin tone and type. Contouring with Different Products Cream vs. Powder Contour Pros and cons of cream and powder contour products, helping you decide which is best for your skin type and desired finish. How to Choose Tips on choosing the right shades and formulas for your specific contouring needs. Advanced Contouring Techniques Nose Contouring Step-by-step guide to contouring your nose, making it appear slimmer or more defined. Jawline and Neck Contouring How to contour the jawline and neck for a more sculpted and defined appearance. Common Contouring Mistakes and How to Avoid Them Too Dark or Too Light How to select contour shades that match your skin tone to avoid a muddy or overly dramatic look. Mismatched Undertones Understanding the importance of matching the undertone of your contour product to your skin to ensure a natural look. Tips and Tricks for a Natural Contour Blending is Key Emphasize the importance of blending for a seamless, natural contour that enhances rather than overshadows your natural beauty. Less is More Advice on starting with a light hand and building up product gradually to avoid over-contouring. Maintaining Your Contour Throughout the Day Setting Your Contour Recommendations for setting sprays and powders to keep your contour in place all day. Touch-up Tips Quick fixes and touch-up tips for maintaining your contour, even on the go. Mastering the art of contouring can dramatically enhance your makeup routine, offering a sculpted, polished look that highlights your best features. With practice, the right tools, and a bit of creativity, anyone can become proficient in this transformative makeup technique….

10 Tips For Concealing Under Eye Bags Like A Pro
10 Tips for Concealing Under-Eye Bags Like a Pro

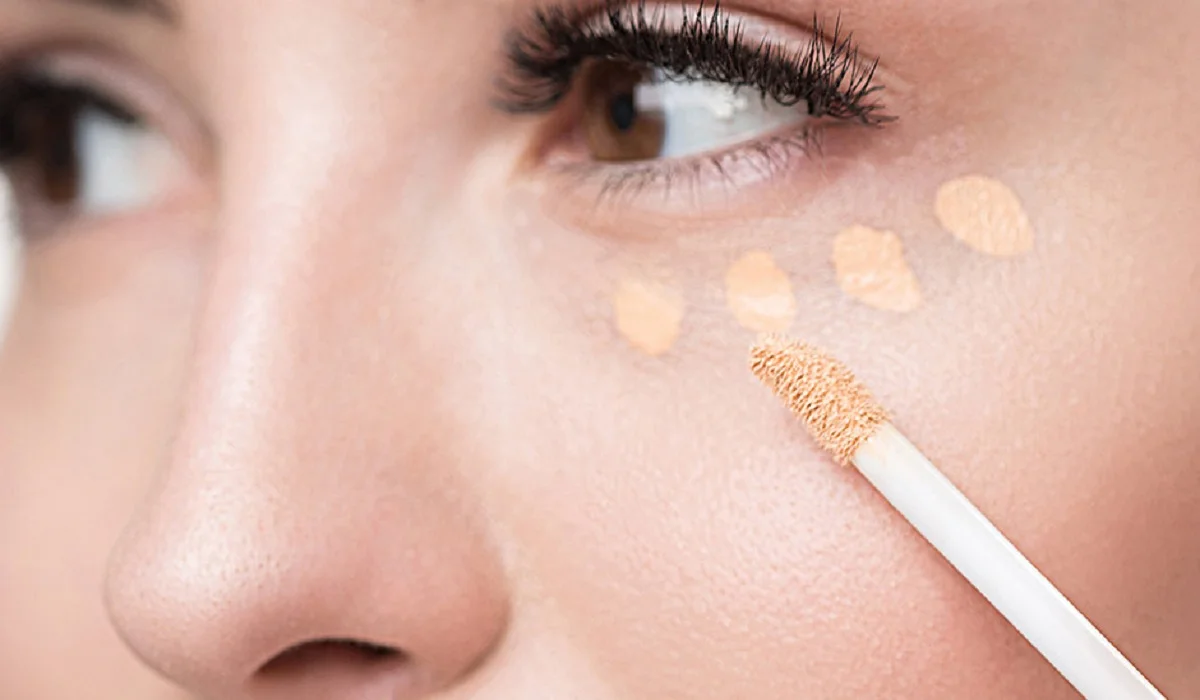
Under-eye bags are a common problem for many people, whether it’s due to genetics, lack of sleep, or aging. These bags can make you look tired and older than you actually are. Luckily, there are many ways to conceal under-eye bags and make your eyes look brighter and more youthful. In this article, we will share 10 tips for concealing under-eye bags like a pro. Use a Color CorrectorIf you have dark circles under your eyes, a color corrector can help neutralize the discoloration. Look for a peach or orange color corrector, depending on your skin tone. Apply it gently to the under-eye area using your ring finger. Be careful not to tug or pull on the delicate skin around your eyes. Use a Concealer with a Yellow or Peach UndertoneAfter applying a color corrector, use a concealer that has a yellow or peach undertone. This will help brighten your under-eye area and make you look more awake. Use a small, fluffy brush to apply the concealer in a triangle shape under your eyes, then blend it in with a damp beauty sponge. Use a Hydrating Eye CreamDry skin can make under-eye bags look worse. Make sure to use a hydrating eye cream before applying any makeup. Look for an eye cream that contains hyaluronic acid, which helps to plump and hydrate the skin. Apply a Cooling Eye GelIf you’re dealing with puffiness under your eyes, try applying a cooling eye gel. Keep the eye gel in the fridge for a few minutes before applying it to your under-eye area. The coolness will help reduce inflammation and puffiness. Use a Light-Reflecting PowderAfter applying your concealer, use a light-reflecting powder to set it. This will help brighten your under-eye area even more and prevent creasing. Use a fluffy brush to apply the powder lightly under your eyes. Use a Matte BronzerIf you have under-eye bags that are more prominent, you can use a matte bronzer to create a shadow effect. Apply the bronzer lightly in the hollows under your cheekbones and around your temples. This will help to create the illusion of depth and make your under-eye bags less noticeable. Apply Mascara and EyelinerApplying mascara and eyeliner can help draw attention away from your under-eye bags. Curl your lashes and apply mascara to open up your eyes. Use a thin line of eyeliner along your lash line to define your eyes further. Use a Bright LipstickIf you’re still feeling self-conscious about your under-eye bags, try wearing a bright lipstick. A bold lip color will draw attention away from your under-eye area and make you feel more confident. Use a Makeup Setting SprayTo make sure your makeup stays in place all day, use a makeup setting spray. This will also help prevent your under-eye area from getting oily and causing your makeup to smudge. Get Plenty of Sleep and Drink WaterWhile these tips can help conceal under-eye bags, the best way to get rid of them is to get plenty of sleep and drink water. Aim for at least 7-8 hours of sleep each…

How To Clean A Beauty Blender
How to Clean a Beauty Blender?

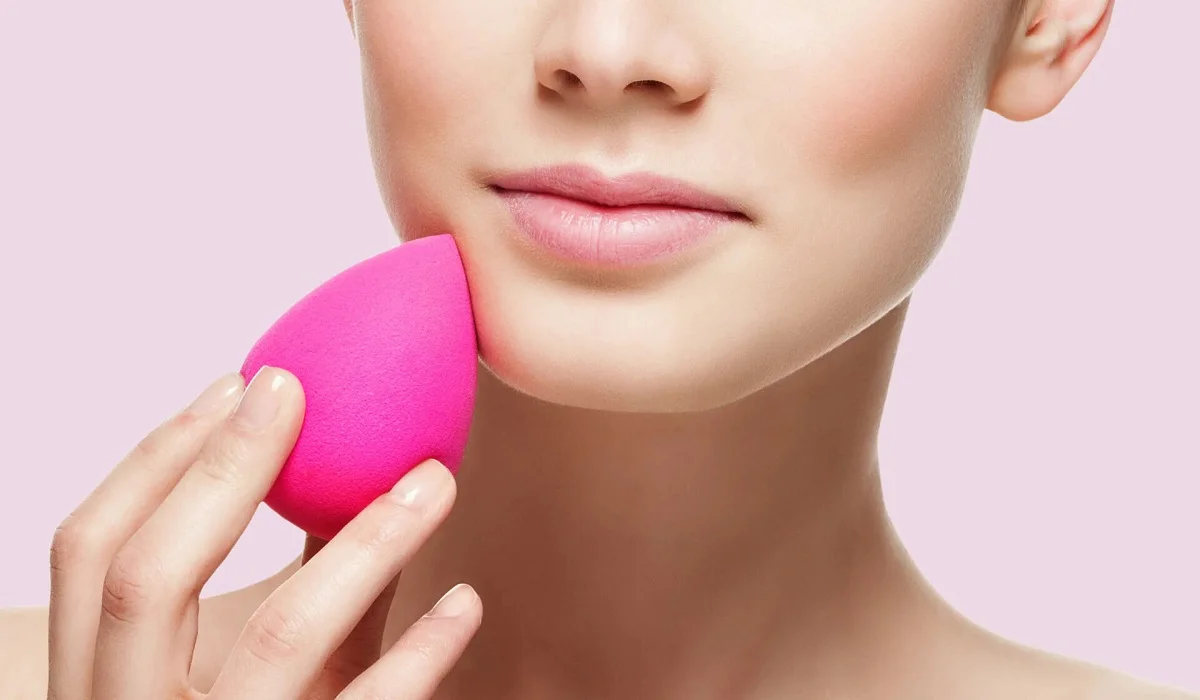
Beauty blenders have revolutionized the way we apply makeup, offering a flawless finish that brushes and fingers simply cannot match. Made from hydrophilic foam, they’re designed to absorb water, allowing makeup to sit on the surface and blend seamlessly into the skin. However, this same feature that makes them so effective also makes them a breeding ground for bacteria if not cleaned properly. Preparation for Cleaning Before diving into the cleaning process, you’ll need a few essentials: mild soap (liquid or bar), warm water, a clean towel, and a drying area. Start by wetting your beauty blender under warm running water, squeezing it several times to ensure it’s fully saturated. Daily Cleaning Techniques For daily cleaning, a quick rinse under warm water with a bit of soap will do. Gently work the soap into the sponge with your fingers, rinse thoroughly until the water runs clear, and then squeeze out any excess water. This daily ritual can significantly extend the life of your beauty blender and prevent the buildup of harmful bacteria. Deep Cleaning Methods Every week, your beauty blender deserves a deep clean. Fill a bowl with warm water and a squirt of gentle soap, submerge your beauty blender, and let it soak for a few hours. After soaking, gently massage the sponge to release trapped makeup and rinse thoroughly. For stubborn stains, olive oil mixed with dish soap can work wonders. Natural and Eco-Friendly Cleaning Options If you prefer a more natural approach, consider using a mixture of baking soda and water to form a paste. This natural abrasive can help remove stubborn stains without damaging the sponge. Rinse thoroughly after application to remove any residue. Drying and Storage Tips After cleaning, it’s crucial to dry your beauty blender properly to prevent mold growth. Squeeze out any excess water with a clean towel and leave it in a well-ventilated area away from direct sunlight. Avoid storing it in airtight containers while it’s still damp. Troubleshooting Common Issues Stains and odors can be persistent problems, but soaking your beauty blender in a vinegar and water solution can help neutralize odors and loosen stains. Regular cleaning and proper storage are key to preventing these issues. How to Clean a Beauty Blender This consolidated guide emphasizes the importance of both daily and deep cleaning routines, utilizing both commercial and natural cleaning agents, and following proper drying and storage protocols to maintain your beauty blender’s effectiveness and longevity. Maintaining a clean beauty blender is crucial for flawless makeup application and skin health. By incorporating these cleaning methods into your beauty routine, you can ensure that your beauty blender remains in top condition, providing the perfect blend every time. How often should I clean my Beauty Blender? To ensure your Beauty Blender remains hygienic and performs at its best, it’s recommended to clean it after every use. Daily cleaning removes makeup residue, oils, and bacteria, preventing skin irritations or breakouts. For a thorough deep clean, aim to do so once a week. This routine helps maintain the sponge’s integrity and extends its usability. Can I…

Micellar Water: A Gentle And Effective Way To Cleanse Your Skin
Micellar Water: A Gentle and Effective Way to Cleanse Your Skin

Micellar water has become a popular skincare product in recent years, and for good reason. This gentle and effective cleansing solution is perfect for removing dirt, oil, and makeup without the need for harsh chemicals or excessive rubbing. In this article, we will explore the benefits of using micellar water and why it has become a must-have in many people’s skincare routines. What is Micellar Water? Micellar water is a gentle and effective cleansing solution that is made up of tiny micelles, which are clusters of fatty acid esters. These micelles are attracted to dirt, oil, and makeup, and can easily lift and remove them from the skin’s surface. The solution is usually water-based, making it suitable for all skin types, including sensitive skin. Benefits of Using Micellar Water Cleanses the SkinMicellar water is a great way to cleanse your skin, as it can remove dirt, oil, and makeup without the need for harsh chemicals or excessive rubbing. The micelles in the solution act like magnets, attracting and lifting away impurities from the skin’s surface. This gentle cleansing method can help prevent irritation and breakouts, making it a great choice for those with sensitive skin. Hydrates the SkinMicellar water contains hydrating ingredients, such as glycerin and panthenol, which can help to moisturize and soothe the skin. Unlike traditional cleansers, which can strip the skin of its natural oils, micellar water can help to maintain the skin’s moisture balance, leaving it feeling soft and supple. Helps to Remove MakeupMicellar water is an effective way to remove makeup, as the micelles can easily lift away even waterproof mascara and long-wearing foundation. This gentle cleansing method can help to prevent damage to the delicate skin around the eyes and can reduce the risk of irritation or redness. Can be Used as a TonerMicellar water can also act as a toner, helping to balance the skin’s pH levels and prepare it for further skincare products. This is because the solution is water-based and does not contain any alcohol, which can be drying and irritating to the skin. Using micellar water as a toner can help to leave your skin feeling clean, refreshed, and balanced. Convenient to UseMicellar water is incredibly easy to use, making it a convenient addition to any skincare routine. Simply soak a cotton pad in the solution and gently wipe it over your face to remove dirt, oil, and makeup. There is no need for rinsing, which can be especially helpful when you are on-the-go or traveling. How to Use Micellar Water Using micellar water is incredibly easy. Here’s how to do it: Start by choosing a micellar water that is suited to your skin type. Soak a cotton pad in the solution and gently wipe it over your face, taking care to avoid the delicate skin around your eyes. Repeat until all dirt, oil, and makeup have been removed. There is no need to rinse, but if you prefer, you can follow up with a gentle cleanser or toner. Use micellar water in the morning and evening as part of your regular…

The Trending Hair Colors 2
The Trending Hair Colors You’re About to See Everywhere

In the ever-evolving world of beauty, hair color trends serve as a dynamic reflection of creativity, individuality, and cultural shifts. This year, we’re seeing an exciting mix of bold, bright colors alongside natural, reimagined tones. Whether you’re contemplating a drastic change or a subtle update, understanding these trends can guide you to your next hair transformation. The Rise of Bold and Bright Neon hues: A splash of vibrancy Gone are the days of playing it safe with hair color. Neon greens, electric blues, and vibrant pinks are taking center stage, offering a bold statement for those looking to stand out. This trend isn’t just about shock value; it’s a celebration of individuality and self-expression. Pastel perfection: Soft and subtle shades On the other end of the spectrum, pastel colors continue to enchant with their fairy-tale vibes. Lavender, mint green, and baby pink offer a softer approach to color experimentation, proving that boldness can also be found in subtlety. Natural Tones Reimagined Ashy blondes and brunettes: A cooler palette Ashy tones are redefining traditional blondes and brunettes, bringing a modern twist to natural colors. These cooler shades add depth and sophistication, making them perfect for those seeking a change without venturing into the realm of fantasy colors. Rich auburns and chestnuts: Warmth and depth Warm auburns and deep chestnuts are emerging as favorites for adding richness to hair. These colors are flattering for a wide range of skin tones and offer a timeless elegance that transcends seasonal trends. High-Tech Hair Colors Holographic hair: Futuristic shimmer The future is here with holographic hair colors that shift and sparkle under different lights. This trend uses a blend of metallic shades to create a multidimensional effect reminiscent of a hologram. Color-changing dyes: Mood-ring for your hair Imagine a hair color that changes with your environment or temperature. Color-changing dyes make this a reality, offering a playful and ever-evolving hair color experience. Sustainable and Healthy Hair Color Options Organic and vegan dyes: Eco-friendly choices As awareness of environmental and health impacts grows, so does the demand for organic and vegan hair dyes. These options promise less harm to your hair and the planet, without compromising on vivid colors. Ammonia-free colors: Gentle on your locks Ammonia-free dyes are gaining popularity for their gentler approach to hair coloring. They provide an alternative for those concerned about damage, offering vibrant colors with less risk. Global Inspirations Taking Center Stage K-pop influence: Bright and bold from Korea The global influence of K-pop cannot be overstated, with its stars often sporting daring hair colors that quickly become worldwide trends. This has introduced a boldness and playfulness into hair color choices. Scandinavian minimalism: Natural and understated In contrast, the Scandinavian preference for natural, understated hair colors offers a serene and sophisticated aesthetic. This trend emphasizes the beauty of simplicity and natural hues. Celebrity Influences on Hair Color Trends Red carpet trends: What the stars are wearing Celebrity hair colors on the red carpet often predict the next big trends. From daring transformations to subtle shifts, stars play a significant role in shaping popular…

Beauty And Wellness Benefits Of Hair Oils
Beauty and Wellness Benefits of Hair Oils

Hair has long been seen as a symbol of beauty and cultural importance; well-maintained long or short locks can bring tremendous confidence while improving appearance. Hair oils have long been revered across cultures due to their many uses; for centuries this nourishing elixir was revered due to its incredible benefits; in this guide we discuss them; including stimulating hair growth, improving overall hair health benefits as well as luxurious self-care rituals. Hair Oils Are Replete with History Understanding the significance of hair oils requires exploring their history. We will delve into ancient civilisations like Egypt and India to see how their people understood its use to maintain beautiful locks with natural oils like olive, castor and coconut oils – we will also delve into any traditions or rituals which have played an impactful role throughout time. Understanding Hair Oils and Their Science Behind them This article will delve into the science of hair oils, exploring their interactions with both hair strands and sebaceous glands of the scalp as well as examining penetration into hair shafts while simultaneously feeding sebaceous glands of scalps – knowledge in this regard is key for unlocking their full potential! Hair Oils: Benefits and Utilization Hair oils offer many advantages to all types of hair. They can promote growth, prevent loss and strengthen texture as well as shine & strength; we will explore their ability to treat problems such as dryness frizz dandruff. Hair oils come in numerous varieties Uncover all types of hair oils! From essentials such as lavender and rosemary essential oil blends to carrier oils like argan, almond and jojoba oils – discover them all. How to Use Hair Oils?In order to maximize the potential of hair oils, they must be properly utilized. We offer step-by-step guidance on how to massage and apply oils directly onto your scalp and hair; additionally we give tips for creating personalized blends tailored specifically for you and their use as part of everyday haircare practices. As part of an indulgent self-care routine, hair oils offer an indulgent self-care solution. Hair oiling can be a pleasurable and rejuvenating self-care routine that provides both physical and psychological revitalization. Applying it provides an eye-opening sensory experience which feeds both hair and mind alike – we will offer some ideas to create an inviting space in which to practice this ritual of pampering yourself! Modern haircare includes oil treatments as an essential way of maintaining healthier locks. They have multiple advantages. Hair oils have grown beyond cultural tradition to become an indispensable element of modern haircare. In this piece we explore how beauty companies have leveraged hair oils as an ingredient to develop innovative serums and leave-in treatments containing oil-infused formulas; additionally we consider any potential negative repercussions these trends might be having. Hair oils have long been part of beauty tradition; therefore this guide seeks to demonstrate their many beauty and health advantages by teaching how they can fit into your routine and reap their many rewards. Oils are proven to promote lush locks – be they longer with thicker locks, improved…

Nurturing Sensitive Skin Essential Considerations For Allergy Prone Skin Care
Nurturing Sensitive Skin: Essential Considerations for Allergy-Prone Skin Care

For individuals with allergies, maintaining a skincare routine that caters to their specific needs is crucial. Allergic reactions can range from mild irritation to more severe symptoms, making it essential to be mindful of the products and ingredients used on the skin. In this article, we will explore the key considerations for people with allergies when it comes to skincare. From understanding common allergens to identifying hypoallergenic products and adopting a gentle skincare routine, we will provide valuable insights to help you nurture your sensitive skin and minimize the risk of adverse reactions. Know Your Allergens:The first step in managing allergies is to identify the substances that trigger your reactions. Common allergens in skincare products include fragrances, preservatives, dyes, certain plant extracts, and ingredients derived from nuts or gluten. Keep a record of the products that have caused reactions in the past, and consult with a dermatologist or allergist to determine specific allergens to avoid. Read Ingredient Labels:When selecting skincare products, it’s crucial to read and understand the ingredient labels. Look for products that clearly list their ingredients, and familiarize yourself with potential allergens. Avoid products that contain known allergens or substances that you have reacted to in the past. Opt for products labeled as hypoallergenic or suitable for sensitive skin, as they are formulated to minimize the risk of triggering allergic reactions. Patch Test New Products:Before incorporating a new skincare product into your routine, perform a patch test. Apply a small amount of the product to a small area of your skin, such as the inner forearm, and observe for any signs of irritation or allergic reactions over the next 24 to 48 hours. If redness, itching, or swelling occurs, refrain from using the product on your face or body. Choose Hypoallergenic Products:Hypoallergenic products are formulated to minimize the risk of causing allergic reactions. Look for products that are specifically labeled as hypoallergenic, as they are typically free from common allergens and undergo rigorous testing to ensure their safety. These products are designed to be gentle on sensitive skin and reduce the likelihood of triggering an allergic response. Avoid Fragrances and Irritants:Fragrances are a common allergen and can be found in many skincare products. Opt for fragrance-free or unscented products, as they are less likely to cause allergic reactions. Additionally, avoid skincare products that contain known irritants such as alcohol, sulfates, parabens, and harsh chemical ingredients. These substances can strip the skin of its natural moisture barrier and increase the risk of sensitivity and irritation. Moisturize Regularly:Keeping the skin well-hydrated is essential for individuals with allergies. Moisturizers help maintain the skin’s moisture barrier, preventing dryness and minimizing the risk of irritation. Choose gentle, fragrance-free moisturizers that are formulated for sensitive skin. Look for products that contain hydrating ingredients such as hyaluronic acid, ceramides, and natural oils to nourish and protect your skin. Adopt a Gentle Skincare Routine:Simplicity is key when it comes to skincare for allergy-prone skin. Avoid using multiple products with complex ingredient lists, as this increases the likelihood of encountering allergens. Opt for a gentle cleanser that is free…