The Allure of Sea Salt Hairspray

Within the expansive realm of haircare solutions, Sea Salt Hairspray stands out as a cherished selection, rivaling the essential dry shampoo in popularity. Its acclaim is well-deserved; this miraculous concoction bestows upon your hair an enviable vitality and volume, solidifying its position as a staple in daily hairstyling routines. However, the magic of Sea Salt Hairspray extends beyond mere volume enhancement. This guide aims to enlighten you on its comprehensive benefits, optimal usage techniques, and the simplicity of crafting your personalized version at home.

The Allure Of Sea Salt Hairspray


Unraveling the Mystique of Sea Salt Hairspray

Esteemed among hairstyling aficionados and homegrown experts, Sea Salt Hairspray is celebrated for its ability to texture hair, closely replicating the effect saltwater has on our tresses. Contrary to what its name might suggest, it forgoes a potent fragrance, presenting itself as an inclusive solution for anyone eager to amplify their hair’s natural charm. Regardless of whether your hair is curly and seeks definition, or straight and yearns for added volume, this spray stands as your quintessential ally in sculpting the ideal hairstyle.

Maximizing the Efficacy of Sea Salt Hairspray

To achieve unparalleled results, initiate the process on clean, slightly moist hair. Prior to application, ensure your hair is devoid of tangles and remnants of other styling products, then proceed to evenly distribute the spray from the mid-lengths to the tips. Employing a subtle scrunch or twist will further define waves or curls. Embrace the essence of a naturally windswept, beachy appearance by allowing your hair to air dry, steering clear of towel drying to avert frizz and potential damage.

Sea Salt Spray’s Adaptability Across Hair Varieties

Sea Salt Hairspray exhibits no prejudice, offering a spectrum of advantages to all hair types:

  • For lustrous, yet texture-deficient hair: It introduces effortless waves and texture.
  • For voluminous, curly hair: It accentuates curls and minimizes frizz.
  • For sleek, fine hair: It bestows volume and a carefree tousled aesthetic.

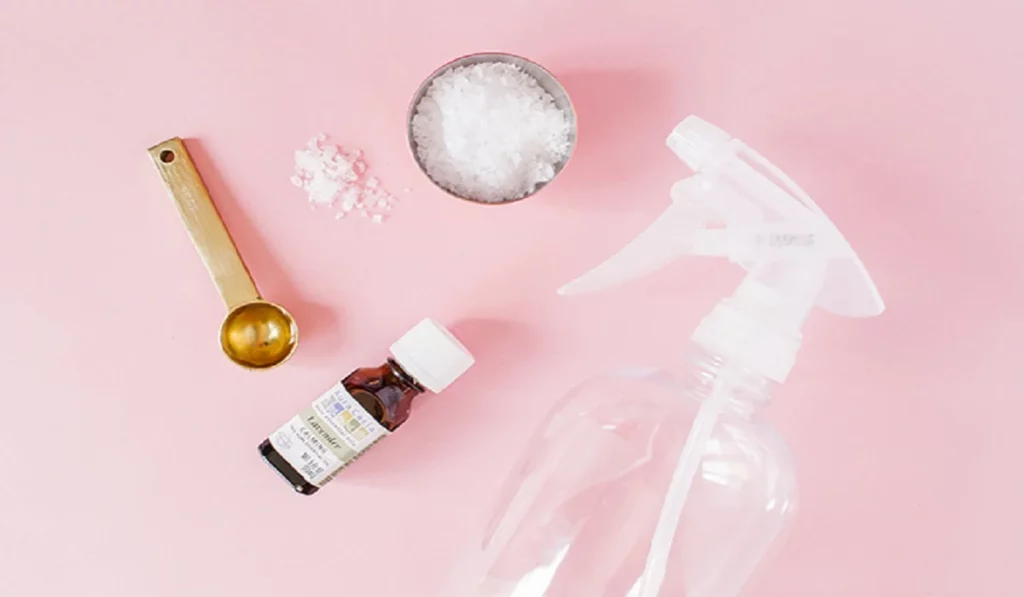
Crafting Your Own Sea Salt Hairspray: Formulas Catered to Specific Hair Needs

For Curly Hair: A concoction blending sea salt and heated water until dissolved, enriched with melted coconut oil and a hint of leave-in conditioner for a moisturizing effect.

For Dry Hair: A mix of sea salt and warm water, enhanced with Epsom salt and macadamia oil to hydrate while texturizing.

For Thin Hair: A solution of sea salt in warm water, amalgamated with avocado oil and a selection of essential oils for fragrance and additional moisture.
The Allure Of Sea Salthairspray


Poised for a Textural Revolution?

Armed with this knowledge and the tools for creation, you stand ready to leverage the transformative power of Sea Salt Hairspray. Whether you’re experimenting with crafting your blend or honing your application technique, the allure of voluminous, textured hair is now within your grasp. Which homemade recipe will you venture to explore first?:

  • Application on colored hair: Sea salt spray is deemed safe for colored tresses, though opting for a moisture-rich formula is advisable to safeguard the color and vitality of your hair.
  • Frequency of use: Although daily application is generally safe, it’s crucial to moderate use to prevent drying, particularly for hair prone to dryness or brittleness.
  • Replacement for traditional hairspray: While sea salt spray provides texture and hold, it doesn’t mirror the firm hold of conventional hairspray, rendering it ideal for relaxed, beach-inspired styles rather than intricate hairstyles.
  • Risk of overuse: Yes, excessive application can lead to dryness. Attuning to your hair’s needs and adjusting usage is recommended.
  • Impact on hair growth: While no direct correlation to hair growth exists, sea salt spray can enhance scalp health by emulating the cleansing properties of seawater.
  • Effectiveness across hair lengths: Indeed, sea salt spray is versatile, catering to short, medium, and long hair alike, offering texture and volume irrespective of length.

Sea Salt Hairspray transcends the ordinary, positioning itself as more than just a styling aid; it is a portal to achieving the coveted, effortless beachy waves. With its universal appeal across hair types and the feasibility of DIY variations, it becomes an indispensable component in the hair care repertoire of those in pursuit of a natural, textured look. Yield to the allure of sea salt and witness your hair flourish with unprecedented volume and dynamism.

Can I use sea salt spray on colored hair? Utilizing sea salt spray on color-treated hair is permissible, provided that the selected product is specifically designed to be gentle on such hair. It is advisable to opt for sea salt sprays that are fortified with UV shields, moisturizing oils, and antioxidants to safeguard the hair color’s brilliance and mitigate fading. To enhance color preservation, applying a leave-in conditioner prior to the sea salt spray is recommended. This strategy aids in maintaining the hair color while simultaneously imparting additional moisture to offset potential desiccation attributed to the salt.

How often should I use sea salt spray? The recommended frequency of sea salt spray application is contingent upon the individual’s hair type and condition. For the majority of hair types, a 2-3 times weekly application suffices to attain the sought-after texture without compromising hair hydration. Individuals with dry or fragile hair should consider limiting usage to once weekly, integrating deep conditioning treatments to their care regimen. It’s crucial to strike a balance, as while sea salt spray can enhance texture and volume, the overarching goal should be hair health maintenance.

Can sea salt spray replace my hairspray? Distinguishing between sea salt spray and hairspray is essential, as they fulfill distinct roles. Sea salt spray is crafted to impart texture and volume, facilitating an effortlessly tousled appearance, whereas hairspray’s primary function is to secure hairstyles. For a flexible, natural look, sea salt spray is the preferred choice. Conversely, for hairstyles necessitating robust hold, such as updos or sleek ponytails, hairspray is the optimal solution. Utilizing both products—sea salt spray for texture and a minimal application of hairspray for style fixation—is a viable approach.

Is it possible to overuse sea salt spray? Overutilization of sea salt spray can precipitate dryness, particularly in hair predisposed to moisture deficiency. To avert this, monitoring the hair’s condition and adjusting usage accordingly is vital. Regular employment of hydrating conditioners or hair masks is advantageous for moisture replenishment and hair health preservation.

Can sea salt spray promote hair growth? Although sea salt spray does not directly stimulate hair growth, it can foster a healthier scalp milieu, thereby supporting hair growth. The salt’s inherent cleansing and exfoliating properties aid in the elimination of dead skin cells and the unclogging of hair follicles. A healthy scalp lays the groundwork for robust hair growth. Nonetheless, for optimal hair growth, adherence to a balanced diet, meticulous hair care, and the avoidance of excessive heat and chemical treatments are paramount.

Does sea salt spray work on all hair lengths?

Sea salt spray is versatile, suitable for all hair lengths. Its impact varies across different lengths—short hair can achieve added volume and texture, medium hair can benefit from accentuated waves or curls, and long hair can attain the desirable beachy wave effect. The key lies in adjusting the product quantity based on hair length and desired outcome, with shorter hair necessitating less product to prevent heaviness, and longer hair requiring more for even texture distribution.

By grasping these intricate details surrounding the use of Sea Salt Hairspray, one can optimize its advantages while ensuring the hair remains healthy and lustrous.

Mastering Eyebrow Stabilizers And Primer For Flawless Makeup Application
Mastering Eyebrow Stabilizers and Primer for Flawless Makeup Application

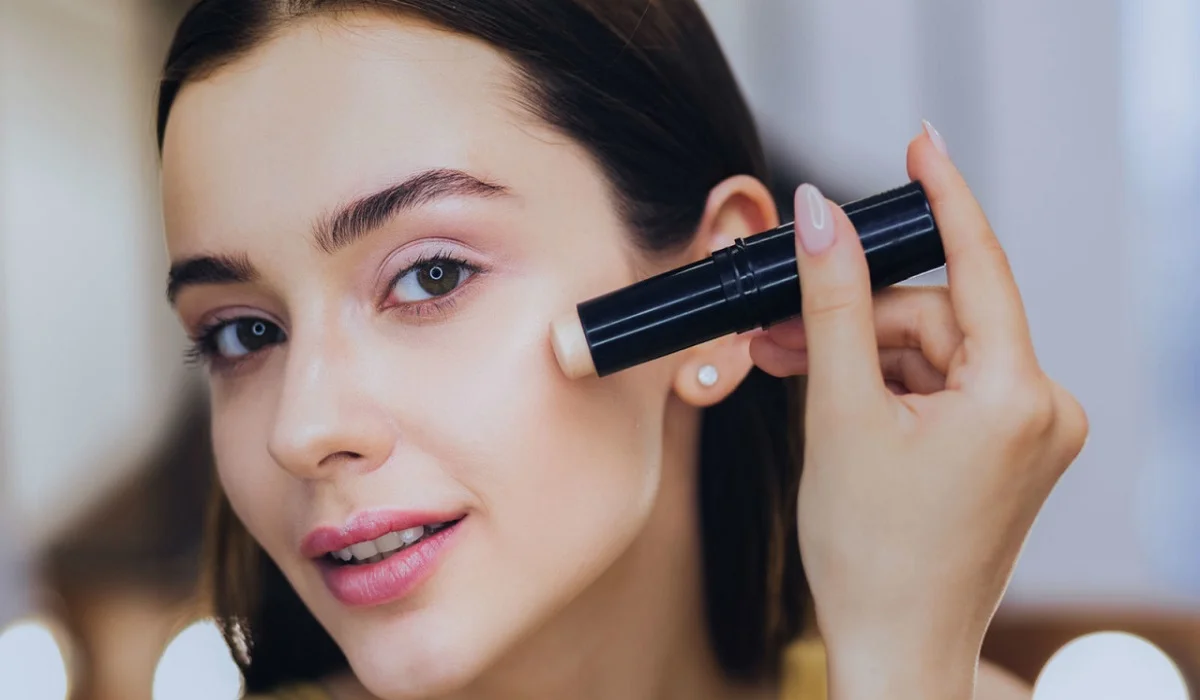
Eyebrow stabilizers and primers are essential tools in the world of makeup, helping to create a polished and long-lasting look. Eyebrow stabilizers, also known as brow gels or pomades, are designed to keep your eyebrows in place, providing definition and structure. Primers, on the other hand, are products that create a smooth canvas for makeup application, enhancing its longevity and improving overall coverage. In this guide, we will delve into the world of eyebrow stabilizers and primers, exploring their benefits and providing step-by-step instructions on how to use them effectively. Section 1: Understanding Eyebrow StabilizersEyebrow stabilizers come in various forms, such as gels, waxes, and pomades, and are available in a range of shades to match different hair colors. These products offer several benefits, including: Shape and Definition: Eyebrow stabilizers help tame unruly hairs and provide control to shape and define your brows. They offer a solution for those with sparse or overgrown eyebrows, allowing you to create a more precise and polished look. Long-lasting Hold: By setting your eyebrows in place, stabilizers ensure that your desired shape stays intact throughout the day, resisting smudging or fading caused by natural oils or sweat. Section 2: How to Use Eyebrow StabilizersUsing an eyebrow stabilizer is a straightforward process that requires a few simple steps: Prep and Cleanse: Start by cleansing your face and removing any residual makeup or oils from your eyebrows. This ensures better adherence and longevity of the product. Choose the Right Shade: Select an eyebrow stabilizer that matches your hair color or is slightly lighter for a more natural effect. Application: Using a small, angled brush or a spoolie, lightly dip it into the product and remove any excess. Begin applying the stabilizer in short, feathery strokes following the natural shape of your brows. Fill in any sparse areas and gradually build up the intensity until you achieve your desired look. Blending and Setting: After applying the stabilizer, use a clean spoolie or a brow brush to blend the product evenly through your eyebrows. This step helps create a seamless, natural finish. Finally, set your brows with a clear brow gel or a transparent mascara to ensure the longevity of the stabilizer throughout the day. Section 3: Unveiling the Power of PrimersPrimers act as a crucial step in your makeup routine, serving as a base to even out the skin’s texture and improve the longevity of your makeup. Their benefits include: Smoothing and Pore Minimizing: Primers fill in fine lines, pores, and other imperfections, creating a smooth canvas for foundation application. Enhanced Makeup Adherence: Primers help makeup products, such as foundation and concealer, adhere better to the skin, ensuring a flawless and long-lasting finish. Section 4: How to Use PrimersUsing a primer is an essential step for achieving a flawless makeup look. Here’s how to apply it effectively: Cleanse and Moisturize: Begin by cleansing your face and applying a lightweight moisturizer suitable for your skin type. Allow the moisturizer to fully absorb before moving on to the primer. Choose the Right Primer: Select a primer that suits your specific needs,…

A Radiant Glow: Mastering Blush Application For Round Face Shapes
A Radiant Glow: Mastering Blush Application for Round Face Shapes

Blush is a makeup essential that can transform your look from dull to radiant, adding a healthy flush to your cheeks and enhancing your facial features. When it comes to applying blush, one size does not fit all, as different face shapes require specific techniques to achieve the most flattering results. If you have a round face shape, this guide is tailored to help you unlock the secrets of applying blush to accentuate your natural beauty. In this comprehensive guide, we’ll explore step-by-step instructions and valuable tips to ensure that your blush application complements your round face shape impeccably. Understanding the Round Face Shape Before delving into the tips for blush application, it’s crucial to understand the characteristics of a round face shape. A round face typically has soft, curved lines with a width and height that are approximately equal. The goal when applying blush to a round face is to create the illusion of more definition and angles, enhancing the natural bone structure. Choosing the Right Blush Shade Selecting the right blush shade is the first step towards achieving a flawless look. For a round face shape, opt for shades that offer a warm, natural glow. Peach, coral, and rosy tones work wonderfully as they provide a subtle radiance while imparting a hint of color. Avoid shades that are too dark or overly intense, as they can make your face appear even rounder. Prep and Prime Before you start applying blush, ensure that your skin is well-prepped and primed. Cleanse your face, apply a moisturizer suitable for your skin type, and follow up with a primer to create a smooth canvas for makeup application. This ensures that your blush adheres evenly and lasts longer throughout the day. Blush Application Steps Choose the Right Brush: Opt for a fluffy, angled blush brush for the best application. The angled shape helps you apply the blush precisely to the apples of your cheeks while blending seamlessly. Smile and Locate the Apples: Smile to identify the apples of your cheeks – the round, slightly raised areas that pop up when you smile. This is where you’ll focus your blush application. Light Hand for Building Color: Start with a small amount of blush on your brush. It’s easier to build up the color gradually rather than trying to tone it down if you apply too much at once. Apply in a Diagonal Line: Begin applying the blush in a diagonal line from the apples of your cheeks towards your temples. This technique adds a gentle lift to your face, creating the illusion of higher cheekbones. Blend, Blend, Blend: Blending is key to achieving a natural, seamless look. Use gentle, upward strokes to blend the blush into your skin. Make sure there are no visible lines, and the color diffuses evenly. Focus on the High Points: Concentrate the majority of the blush color on the apples of your cheeks, and then lightly sweep the remaining product along your cheekbones towards your hairline. Less is More for Round Faces: Remember, less is more when applying blush to a…

The Ultimate Guide To Cleaning Your Makeup Brushes: Tips, Tricks, And Techniques
The Ultimate Guide to Cleaning Your Makeup Brushes: Tips, Tricks, and Techniques

Makeup brushes are an essential tool in any beauty routine. They help us achieve flawless and effortless makeup looks, whether we’re going for a natural or dramatic look. However, it’s important to note that these brushes need to be cleaned regularly to maintain their performance and longevity. Dirty brushes can harbor bacteria, oil, dirt, and dead skin cells that can cause breakouts and other skin problems. Cleaning your makeup brushes may seem like a daunting task, but it’s actually quite simple and easy to do. With the right tools and techniques, you can keep your brushes clean and in good condition for years to come. In this article, we’ll walk you through the step-by-step process of cleaning your makeup brushes, as well as some tips and tricks to make the process even easier. Step 1: Gather Your Supplies Before you start cleaning your makeup brushes, you’ll need to gather some supplies. Here are the things you’ll need: Gentle liquid soap or brush cleaner: You can use any gentle liquid soap or brush cleaner to clean your brushes. Avoid using harsh soaps or detergents as they can damage the bristles. Bowl or sink: You’ll need a bowl or sink to clean your brushes in. Make sure it’s clean and free from any dirt or debris. Towel: You’ll need a clean towel to dry your brushes on. Brush cleaning mat or glove (optional): A brush cleaning mat or glove can help you get a deeper clean on your brushes by helping to remove dirt and makeup residue. Step 2: Wet Your Brushes To start cleaning your makeup brushes, wet the bristles under running water. Make sure the water is lukewarm and not too hot or too cold. Hold the brush under the water with the bristles facing down, and avoid getting water on the metal part of the brush as it can loosen the glue that holds the bristles in place. Step 3: Clean Your Brushes Once your brushes are wet, it’s time to clean them. You can use a gentle liquid soap or brush cleaner for this step. Put a small amount of soap or cleaner into your palm or onto a brush cleaning mat or glove. Swirl the brush into the soap or cleaner, making sure to cover all the bristles. Gently massage the bristles with your fingers, working the soap or cleaner into the brush. If you’re using a brush cleaning mat or glove, use the textured surface to help remove any dirt or makeup residue. Step 4: Rinse Your Brushes After you’ve cleaned your brushes, rinse them thoroughly under running water. Make sure all the soap or cleaner is rinsed out of the bristles. Keep rinsing the brushes until the water runs clear. Step 5: Dry Your Brushes Once you’ve rinsed your brushes, it’s time to dry them. Gently squeeze the excess water out of the bristles, then reshape the bristles with your fingers. Lay the brushes flat on a clean towel and let them air dry. Avoid drying your brushes upright as the water can seep down into the…

The Power And Benefits Of Vitamin C Serums 2
The Power and Benefits of Vitamin C Serums

Vitamin C serums have become an invaluable addition to many skincare routines and have earned much praise. Vitamin C’s numerous advantages make this ingredient one of the key players for attaining radiant complexions, so we will explore why adding one into your routine could make a big difference for long-term skin health. In this comprehensive guide we’ll also look into its science as well as all its possible applications – be that brightening, protecting or rejuvenating. Chapter 1 – Vitamin C Chemistry and Applications Understanding the effects of vitamin C serums requires delving deeper into their science. We will do just that here: Ascorbic Acid: the purest form of vitamin C, revered for its potent antioxidative capabilities and role in collagen synthesis. Stability Issues: Vitamin C’s fragile nature poses difficulties when applied in skincare formulations, making stability maintenance an ongoing battleground. Derivatives of Vitamin C: Stable forms such as sodium ascorbyl phosphate and ascorbyl glucoside that offer effective alternatives. Chapter 2: Benefits of Vitamin C Serums Vitamin C serums provide numerous skincare advantages and should be an indispensable addition. Brightening: How vitamin C effectively combats hyperpigmentation, evens out skin tone and imparts a radiant radiance to give a glowing appearance to skin. Antioxidant Protection: Vitamin C’s role as an antioxidant protector lies in neutralizing free radicals, shielding our bodies from environmental harm, and delaying premature aging. Collagen Synthesis: Vitamin C stimulates collagen synthesis for improved skin elasticity and to decrease fine lines and wrinkles, ultimately contributing to reduced fine lines and wrinkles. Chapter 3 : Selecting an Appropriate Vitamin C Serum Not all vitamin C serums are created equal, so selecting one specifically tailored to your skin’s needs is of vital importance. We will discuss: Concentration: An optimal concentration of vitamin C serums should provide effective results without leading to irritation. Formulation: When considering formulation, texture and additional ingredients to suit the skin type you have, make sure they match. Packaging: Opaque packaging plays an essential part in maintaining vitamin C’s shelf life and protecting its stability. Chapter 4: Integrating Vitamin C Serums Into Your Routine Implementing a vitamin C serum into your skincare routine takes careful planning. Application Tips: Learn the proper way to utilize vitamin C serums by layering them up with other products in your routine and applying when and how often. Frequency: Finding an optimal combination and frequency of application that allows maximum benefits without overburdening skin is the goal. Pair with Other Actives: How can vitamin C and other skincare ingredients, such as retinol and hyaluronic acid, work in concert for maximum effect? Chapter 5: Addressing Common Issues Vitamin C serums provide numerous advantages, yet users may encounter certain concerns about them. Let us address them here: Potential Irritation: How to minimize potential irritation for those with sensitive skin and the value of patch testing are two topics we cover here. Storage Guidelines for Vitamin C Serums: Follow these best practices when storing vitamin C serums to preserve their efficacy and avoid oxidization. Chapter 6 : Home-Made Vitamin C Serums For those who enjoy taking an interactive…

What Is Niacinamide And How To Use It 2
What Is Niacinamide And How To Use It?

Niacinamide (Vitamin B3) stands out in skincare as one of its standout performers; this comprehensive guide seeks to decode its many mysteries while exploring its origins, scientific basis and practical tips for using it effectively in skincare regimens to unlock all its full potential. Chapter 1 : Understanding Niacinamide Niacinamide DefinedNiacinamide, the water-soluble form of Vitamin B3, is an amazing ingredient with numerous advantages for skin health and appearance. Unlike its predecessor niacin, which could irritate sensitive skin types, niacinamide offers many non-irritant benefits that could make this powerhouse ingredient ideal for all kinds of complexions. Sources of NiacinamideNiacinamide can be obtained in numerous natural and synthetic sources, from meat, fish, nuts and green vegetables to skincare formulations. Natural sources typically consist of meat and fish while its synthetic form can often be seen used for skincare formulations. Chapter 2 : Science Behind Niacinamide Niacinamide’s Mode of Action Understanding how niacinamide functions at its molecular core is crucial to comprehend its impact on skin. Niacinamide acts as an intermediary in activating essential coenzymes such as NAD and NADP which play an integral role in energy production and repair mechanisms in cells. Benefits to Skin Barrier Niacinamide has earned widespread renown for its ability to strengthen skin’s natural barrier function by stimulating ceramide production and supporting an adequate lipid profile, effectively helping prevent moisture loss while keeping its integrity. Chapter 3: Niacinamide Offers Multiple Advantages Niacinamide’s brightening effects cannot be overstated: from hyperpigmentation and uneven skin tone issues to melanin production suppression resulting in brighter complexions. Niacinamide’s Anti-Aging Properties Niacinamide acts as an antioxidant to fight off free radical damage to skin from environmental elements and help smoother, younger-looking skin by combatting oxidative stress. Furthermore, it assists in the reduction of fine lines and wrinkles to promote smoother and younger-looking complexion. Niacinamide Can Help Manage Acne Niacinamide’s anti-inflammatory properties make niacinamide an invaluable weapon when dealing with acne concerns, helping regulate sebum production while decreasing excess oiliness and avoiding pore blockages – contributing greatly towards its use for acne management. Chapter 4: Selecting an Appropriate Niacinamide Product Niacinamide comes in different concentrations to meet specific skin care needs; selecting one depends on individual preferences. Lower concentrations (around 2-5%) may be suitable for newcomers while higher doses (10% or greater) could address more targeted concerns. Niacinamide comes in various formulations from serums to creams; lightweight serums work great for layering while rich creams offer nourishment for those with dry skin. Chapter 5: Integrating Niacinamide Into Your Skincare Routine Understanding Layering Techniques Niacinamide should play an integral part of your skincare regime, typically after cleansing and before heavier creams or sunscreens are applied. Pairing it with complementary ingredients enhances its effectiveness further. Niacinamide can easily fit into daily skin care regimes. Integrating it both morning and evening routines ensures consistent benefits, whether your goal is brighter skin or treating specific concerns. Chapter 6: Addressing Concerns and Misconceptions Niacinamide is generally well tolerated; however, some individuals may experience mild irritation. Patch testing a new product and gradually adding it into your routine is one effective strategy…

7 Expert Tips For Clear And Glowing Skin
7 Expert Tips for Clear and Glowing Skin

The pursuit of radiant and healthy skin transcends mere aesthetics; it is indicative of our overall health and vitality. This guide delves into the myriad of approaches to attain that sought-after glow, emphasizing the importance of understanding your skin’s unique needs and adopting a skincare regimen that enhances its natural beauty. Fundamentals of Skincare: Recognizing Your Skin Type The cornerstone of any effective skincare strategy is accurately identifying your skin type—be it dry, oily, combination, or sensitive. Tailoring your skincare approach to your specific type ensures that the products and routines you choose are in harmony with your skin’s inherent characteristics. Essential Daily Skincare Practices for Luminous Skin Maintaining radiant skin requires a steadfast daily regimen. Key components include: Dietary Influence on Skin Vitality Nutrition plays a crucial role in skin health. Consuming foods rich in antioxidants, vitamins C and E, and omega-3s fosters skin radiance, while diets high in sugars and fats may dull the skin and promote breakouts. The Significance of Hydration for Skin Clarity Adequate water intake is vital for clear skin, aiding in detoxification and maintaining the skin’s elasticity. Strive for a minimum of 8 glasses of water daily to nurture your skin from within. The Connection Between Sleep and Skin Wellness Dubbed “beauty sleep,” adequate rest is essential for skin regeneration and repair. Aiming for 7-9 hours of sleep each night supports these crucial functions. Mitigating Stress for Enhanced Skin Health Stress can have adverse effects on your skin, leading to issues like breakouts. Implementing stress-relief practices such as meditation, physical exercise, or yoga can markedly improve your skin’s condition. Advantages of Professional Skin Care Treatments For those seeking an additional edge, professional treatments like facials, chemical peels, or laser therapy can target specific skin concerns and augment your skin’s natural luminosity. Leveraging Natural Skincare Solutions Time-honored natural remedies such as aloe vera, honey, and turmeric offer gentle, effective skin care, harnessing centuries of wisdom. Navigating Common Skincare Pitfalls Avoid skincare missteps such as over-cleansing or using unsuitable products by listening to your skin and adjusting your care regimen as needed. The Critical Role of Skincare Consistency Adhering to your skincare routine consistently is the key to achieving lasting results. Pathways to Clear and Radiant Skin In sum, clear and radiant skin is attainable through informed care, healthy habits, and a holistic approach encompassing diet, hydration, stress management, and adequate rest. By comprehending your skin type and committing to a personalized skincare routine, you can reveal the luminous, healthy skin you aspire to. Securing clear and glowing skin is a comprehensive endeavor that extends beyond skincare products to include nutrition, hydration, stress reduction, and sleep. Understanding your skin type and maintaining a consistent skincare regimen are foundational to unveiling your skin’s inherent radiance and health.

Unlocking The Secrets Key Ingredients In Hair Growth Shampoos 2
Unlocking the Secrets: Key Ingredients in Hair Growth Shampoos

Introduction: Unlocking the Secrets to Beautiful Locks As individuals strive for luxurious locks, many turn to shampoos designed specifically to stimulate growth. In this comprehensive examination of such treatments, specialized shampoos will be examined along their key ingredients and their potential impact in helping transform tresses. Chapter 1 : Understanding Hair Growth Shampoos (PDF Download). Before engaging in hair growth shampoo research, it is crucial to gain an understanding of the natural hair growth cycle. Anagen, catagen and telogen phases make up this natural cycle which governs its development as it transitions and rests periods; hair shampoos aim to accelerate anagen phase hair growth to promote active development. Dihydrotestosterone, or DHT for short, has long been suspected as being linked with hair loss and certain shampoos use DHT reduction agents as preventive measures against further hair thinning or loss. Dihydrotestosterone (DHT), one of the key molecules involved in hair biology, plays an integral part. While DHT plays an integral part in normal bodily processes and in dealing with issues related to hair health issues such as hair thinning or loss. Understanding its subtle impact is crucial when trying to find solutions. DHT, or dihydrotestosterone (DHT for short), is a derivative of testosterone hormone found both men and women at varying concentrations. While DHT plays an essential part during puberty in contributing to male secondary sexual characteristics development, its relationship with hair follicles can prove both rewarding and hinderful at once. The hair growth cycle comprises three distinct phases: anagen (growth), catagen (transition), and telogen (resting). Each hair follicle undergoes this cycle independently to ensure continual renewal process – however when DHT enters the picture it can disrupt this natural cycle, and lead to its disruption. Problems occur when hair follicles are genetically predisposed to respond negatively to DHT, leading to exposure leading to miniaturization; which involves gradual shrinkage of follicles over successive hair cycles and eventually leading to cessation in new hair production. DHT can contribute to both miniaturization and inflammation within the scalp, leading to conditions like androgenetic alopecia – commonly referred to as male-pattern or female-pattern baldness – through its effects on hair follicle health resulting in faster hair loss rates. These reactions further compromise follicle health leading to further hair follicle decline thereby hastening hair loss further. Understanding DHT’s place in hair growth becomes critical when searching for solutions to its effects. Hair growth shampoos typically contain ingredients designed to counteract its influence; compounds like saw palmetto extract may even inhibit DHT production – providing another avenue against hair loss or at least slowing its rate of decline. Acknowledging DHT’s role can provide us with the ability to take an individualized approach towards treating specific concerns about hair health and maintenance. From DHT-blocking ingredients to comprehensive regimens, understanding its impact opens doors for tailored solutions designed to restore and nourish tresses with exceptional health and shine. Chapter 2: Essential Components in Hair Growth Shampoos Key Ingredients in Hair Growth Shampoos: Nourishing the Scalp for Lush Locks Individuals looking for lush locks often turn to hair growth shampoos in search…