5 Essential Tips to Enhance Your Eye Shadow Skills

Eye shadow can dramatically transform your look, adding depth, dimension, and a pop of color to your eyes. Whether you’re aiming for a subtle enhancement or a bold statement, mastering the art of eye shadow application is key. In this comprehensive guide, we’ll delve into five pivotal tips that will elevate your eye shadow game, ensuring your makeup not only looks stunning but also lasts longer.
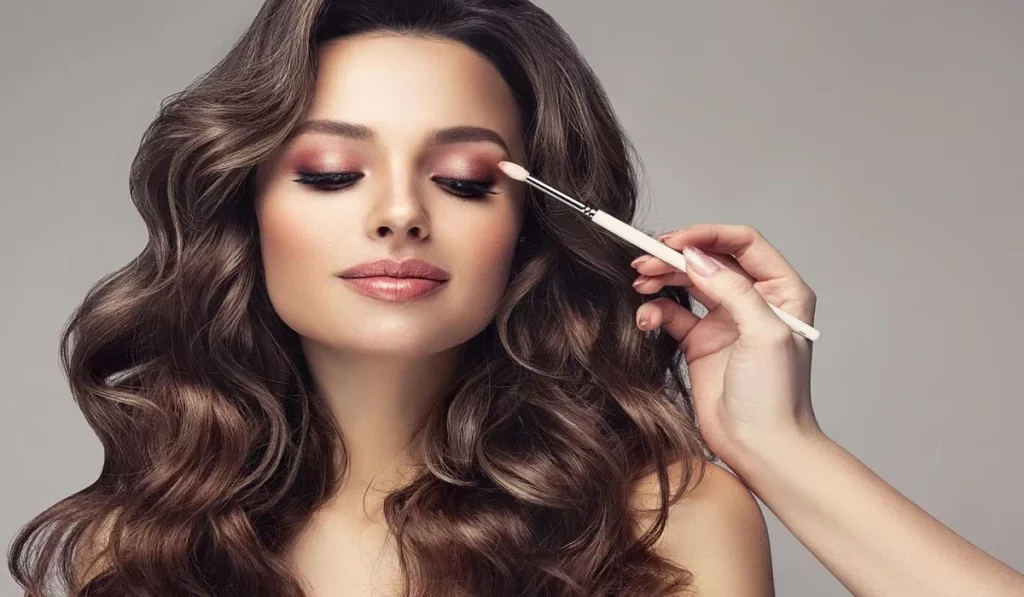
5 Essential Tips To Enhance Your Eye Shadow Skills


Prime Your Eyes

Before diving into colors and techniques, it’s crucial to start with a clean canvas. Priming your eyelids is the first step towards ensuring your eye shadow adheres better and stays put for hours. A good eye primer prevents creasing and fading, making it indispensable for both daily wear and special occasions. You can opt for a dedicated eye primer or a versatile option that suits both your face and eyelids. The key is to apply a thin, even layer across your eyelid to create the perfect base for your eye shadow.

Understand Your Eye Shape

Eye shadow isn’t a one-size-fits-all affair; your application technique should be tailored to your unique eye shape. Whether you have almond, round, hooded, or monolid eyes, each shape has specific strategies to enhance and define its natural beauty. By recognizing your eye shape, you can apply eye shadow in a way that accentuates your best features, from lifting droopy lids to making small eyes appear larger. This personalization ensures your eye makeup complements your overall look.

Select the Right Eye Shadow Type

The type of eye shadow you choose plays a significant role in the final look. Cream eye shadows work wonders as a base color, offering a smooth application. However, for versatility and ease of blending, pressed powder eye shadows are generally preferred. They come in a wide range of finishes, from matte to shimmer, allowing you to create depth and dimension on your eyelids. When selecting eye shadows, consider the occasion, your skin type, and the look you’re aiming for.

Invest in Quality Brushes

The right tools can make all the difference in eye shadow application. A comprehensive set of brushes allows for precise application and seamless blending. Essentials include a large, fluffy brush for applying a base color, a smaller, denser brush for adding depth to the crease, and a blending brush to ensure there are no harsh lines. Additionally, a pencil brush is great for detailed work, like defining the lower lash line or inner corners. Quality brushes offer better control and can help you achieve a more professional finish.

Choose Eye Shadow Colors That Complement Your Eye Color

The colors you choose should enhance your natural eye color, making your eyes the focal point of your face. Here’s a quick guide:

  • Blue Eyes: Opt for warm tones like peach, coral, and bronze to contrast and highlight the blue.
  • Gray Eyes: Silver, blue, and charcoal shades can intensify the natural sparkle of gray eyes.
  • Green Eyes: Embrace purples and warm browns to make green eyes pop.
  • Hazel Eyes: Golds, greens, and browns can accentuate the multifaceted colors of hazel eyes.
  • Brown Eyes: Versatile brown eyes can pull off almost any color, but rich golds, bronzes, and purples especially complement their warmth.
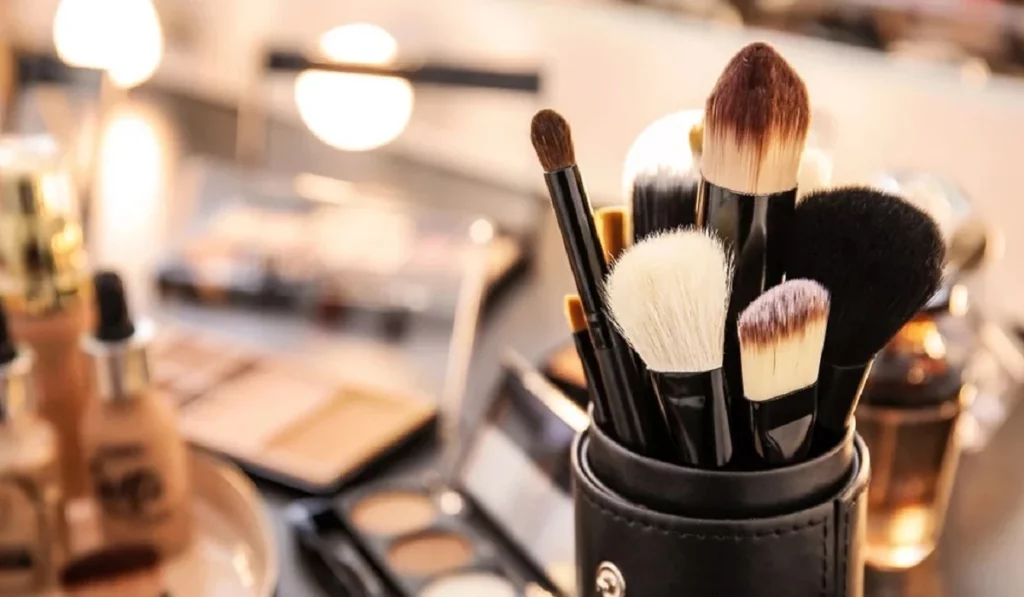
5 Essential Tips To Enhance Your Eye Shadowskills


By incorporating these tips into your makeup routine, you’ll notice a significant improvement in your eye shadow application. Remember, practice makes perfect, and experimenting with different colors and techniques is part of the fun. Embrace your creativity, and let your eyes shine!

Mastering eye shadow application is an art that enhances your natural beauty and allows for creative expression. By following these five tips, you’ll not only improve your skills but also enjoy a flawless eye makeup look that lasts all day. Remember, the key to perfect eye shadow is practice, experimentation, and fun!

What is the best way to prevent eye shadow from creasing? To prevent creasing, always start with an eye primer. It creates a smooth base that helps the eye shadow adhere better and stay put without settling into fine lines.

Can I use my fingers to apply eye shadow? Yes, fingers can be used for applying cream eye shadows or for a quick application of powder eye shadows. However, for precision and blending, brushes are recommended.

How do I choose the right eye shadow for my eye color? Select shades that contrast with your natural eye color to make them stand out. Warm shades for cool-colored eyes and vice versa can create a striking effect.

How often should I replace my eye shadow? Powder eye shadows can last up to two years if stored properly, while cream eye shadows should be replaced every 12 months to prevent bacterial growth.

Can eye shadow be used as eyeliner? Absolutely! A dark eye shadow applied with a wet angled brush can serve as a soft eyeliner for a more blended look.

How do I make my eye shadow last all day? Using a primer is key to longevity. Additionally, setting your eye shadow with a matching or translucent powder can help lock it in place.



Exploring The Revolution Of Magnetic Lashes A Guide To Elevating Your Aesthetic Appeal
Exploring the Revolution of Magnetic Lashes: A Guide to Elevating Your Aesthetic Appeal

Magnetic lashes have emerged as a groundbreaking solution in the realm of cosmetics, providing a novel method for attaining voluminous, striking eyelashes minus the complications and clutter associated with traditional glue-on extensions. Utilizing minuscule magnets for attachment directly above the natural lash line, these lashes offer a sturdy, comfortable, and reusable option, diverging from the conventional false eyelash approach. This piece explores the essence of magnetic lashes, elucidates their advantages, and demonstrates how they can be seamlessly integrated into your cosmetic regimen to achieve captivating outcomes. Deciphering Magnetic Lashes Standing at the forefront of eye makeup innovation, magnetic lashes dispense with the need for adhesive, instead employing diminutive magnets that cling to a magnetic eyeliner or to each other, enveloping the natural lashes. This mechanism guarantees a firm fit for the entire day, obviating the mess associated with traditional adhesives. Magnetic lashes come in a plethora of forms, including full strips and individual clusters, accommodating a wide array of tastes and aesthetics. Advantages of Magnetic Lashes Magnetic lashes boast several merits. Their simplicity of application renders them suitable for novices. The aspect of reusability stands out, permitting multiple uses from a single pair, thus ensuring economic efficiency. By eliminating the need for lash glue, these lashes reduce the likelihood of allergic reactions, offering a safer and more pleasant usage experience. Furthermore, their diversity in styles provides ample room for creative makeup expressions. Application Technique for Magnetic Lashes The application of magnetic lashes is uncomplicated and becomes intuitive with practice. It generally involves the application of magnetic eyeliner along the lash line, followed by attaching the magnetic lashes to the dried liner. For the sandwich-type lashes, precise placement directly on the natural lashes is crucial. Achieving a flawless look requires allowing the magnetic eyeliner to fully dry and employing a lash applicator for enhanced accuracy. Magnetic Versus Traditional Lashes: A Comparative Overview In comparing magnetic to traditional glue-on false lashes, notable distinctions include ease of application and removal for magnetic lashes, mitigating the risk of harming natural lashes. They also tend to provide a more reliable and enduring hold, eliminating concerns over detachment or displacement. Nonetheless, traditional lashes may present a broader selection in terms of materials and designs. Selecting Suitable Magnetic Lashes Choosing appropriate magnetic lashes involves assessing aspects such as length, volume, and design to complement your eye shape and desired appearance optimally. Prioritizing lashes made with superior magnets and materials is crucial for ensuring comfort and longevity. Maintenance and Upkeep of Magnetic Lashes Extending the life of magnetic lashes requires proper maintenance, including gentle cleansing post-use, safe storage in a dedicated case, and avoiding contact with water or makeup removers that could damage the magnets. Addressing Common Challenges with Magnetic Lashes Frequent issues encountered with magnetic lashes, such as application difficulties and discomfort, can typically be resolved through practice, correct placement, and selecting lashes that suit your eye shape. The Underlying Science of Magnetic Lashes The magnetic elements in these lashes are engineered to balance strength for retention and gentleness to avoid discomfort. Safety evaluations confirm that, when utilized correctly,…

Understanding Facial Warts: Causes, Symptoms, Treatment, And Prevention
Understanding Facial Warts: Causes, Symptoms, Treatment, and Prevention

Facial warts are a common skin condition that affects many people around the world. They are small, raised, rough, and often flesh-colored or brownish growths that appear on the face, neck, or other areas of the body. While they are usually harmless, they can be unsightly and can cause embarrassment, especially if they appear on prominent areas of the face. In this article, we will discuss everything you need to know about facial warts, including their causes, symptoms, treatment, and prevention. Causes of Facial Warts: Facial warts are caused by a type of virus called human papillomavirus (HPV). There are more than 100 different strains of HPV, and some of them can cause warts to develop on the skin. HPV is highly contagious and can be spread through direct skin-to-skin contact or by touching surfaces that have come into contact with the virus. People with weakened immune systems are more susceptible to developing warts, including facial warts. Symptoms of Facial Warts: Facial warts are usually small, raised, and rough to the touch. They may appear as a single wart or in clusters, and can range in size from a pinhead to a pea. Facial warts can appear on any part of the face, including the forehead, cheeks, nose, chin, and around the eyes. They may be flesh-colored or brownish in color, and can have a rough or smooth surface. Facial warts may also cause other symptoms, such as itching, bleeding, or pain. If a facial wart becomes irritated, it may bleed or become infected, which can lead to further complications. Treatment of Facial Warts: Facial warts can be treated using a variety of methods, depending on their size, location, and severity. Some of the most common treatments for facial warts include: Topical medications: Over-the-counter creams and ointments containing salicylic acid or other chemicals can be applied directly to the wart to help dissolve it. These medications may take several weeks or months to work, and may cause mild irritation or redness. Cryotherapy: This involves freezing the wart with liquid nitrogen. This causes the wart to blister and eventually fall off. Cryotherapy is usually performed by a dermatologist and may require several treatments. Laser treatment: This involves using a laser to destroy the wart tissue. Laser treatment is usually reserved for larger or more stubborn warts, and may require local anesthesia. Surgery: In rare cases, surgery may be necessary to remove a facial wart. This is usually only recommended for large or painful warts that do not respond to other treatments. Prevention of Facial Warts: Preventing facial warts involves taking steps to reduce your risk of being exposed to the HPV virus. Some of the most effective ways to prevent facial warts include: Practice good hygiene: Wash your hands regularly, especially after touching surfaces that may be contaminated with the virus. Avoid touching your face: This can help reduce your risk of spreading the virus to your face. Avoid sharing personal items: Do not share towels, razors, or other personal items that may be contaminated with the virus. Wear shoes in public places:…

What You Need To Know About Putting Lotion On Yourface
What You Need to Know About Putting Lotion on Your Face

In the quest for radiant, healthy skin, moisturizing plays a pivotal role, especially when it comes to facial care. With the vast array of lotions available, understanding how to choose and apply them effectively is crucial. This guide will navigate you through everything you need to know about putting lotion on your face, blending scientific insights with practical tips. Understanding the importance of facial moisturization is the first step towards achieving a glowing complexion. The skin on our faces is more exposed to environmental factors and tends to be more sensitive, making targeted care essential. Moisturizing helps maintain the skin’s barrier, preventing dehydration and protecting against irritants. Choosing the Right Facial Lotion Identifying Your Skin Type Knowing whether your skin is oily, dry, combination, or sensitive is crucial in selecting a lotion that complements your skin’s needs without causing adverse reactions. Ingredients to Look for and Avoid Opt for lotions with hyaluronic acid, glycerin, and ceramides for hydration. Steer clear of harsh ingredients like alcohol and fragrances if you have sensitive skin. SPF-Infused Lotions for Daytime Use A lotion with SPF protection is essential for daytime use to shield your skin from harmful UV rays, preventing premature aging and skin cancer. The Correct Way to Apply Facial Lotion Step-by-Step Guide Applying lotion correctly enhances its effectiveness. Start with a cleansed face, apply a pea-sized amount, and gently massage it in an upward, circular motion. Common Application Mistakes to Avoid Over-application and neglecting the neck and décolletage are common mistakes that can lead to clogged pores and missed areas of care. The Role of Lotion in Your Skincare Routine Morning vs. Night: Tailoring Your Approach Your morning lotion should be lightweight and contain SPF, while your nighttime lotion can be richer, focusing on repair and hydration. Synergy with Other Skincare Products Understanding how to layer products correctly ensures that your skin receives the full benefits of each. Special Considerations for Sensitive Skin Hypoallergenic and Fragrance-Free Options For sensitive skin, hypoallergenic and fragrance-free lotions minimize the risk of irritation. Patch Testing for Safety Always perform a patch test with a new lotion to ensure it doesn’t provoke a reaction on your sensitive skin. The Impact of Seasons on Facial Moisturization Adjusting Your Lotion for Winter and Summer Your skin’s needs change with the seasons; opt for a heavier moisturizer in winter and a lighter one in summer. Tips for Maintaining Skin Hydration Staying hydrated, using humidifiers, and avoiding overly hot showers can help maintain your skin’s moisture balance. Understanding Facial Lotions and Acne Non-Comedogenic Formulas Choose non-comedogenic lotions to prevent pore blockages and acne flare-ups. Balancing Moisture without Exacerbating Acne Even oily and acne-prone skin needs moisturization to balance oil production and maintain skin health. Anti-Aging and Facial Lotions Ingredients That Fight Signs of Aging Look for lotions with retinol, peptides, and antioxidants that help reduce the appearance of fine lines and wrinkles. Incorporating Retinoids and Antioxidants Using lotions with these ingredients at night can significantly improve skin texture and tone over time. The Evolution of Facial Lotions From Traditional Creams to Modern Serums…

7 Vital Insights On Suntan Cream From Selection To Application Mastery
7 Vital Insights on Suntan Cream: From Selection to Application Mastery

As the sun climbs higher and the days stretch out, the quest for the perfect suntan cream becomes more than a mere seasonal ritual—it becomes a journey towards safeguarding our skin’s health and radiance. This comprehensive guide demystifies suntan cream, blending science with practical wisdom to navigate the vast seas of options, benefits, and application techniques. Prepare to transform your sun protection strategy from a chore into an art form. Embarking on the Suntan Cream Voyage At the heart of our sun care arsenal lies suntan cream, a formidable ally against the sun’s relentless rays. Far beyond a tool for achieving a sun-kissed glow, suntan cream stands as our first line of defense in the battle against UV damage. Its essence combines advanced scientific formulations with the age-old desire to commune with the sun safely. Deciphering Suntan Cream Varieties The Chemical versus Physical Dilemma Dive into the realm of chemical sunscreens, where UV filters absorb rays, converting them into harmless heat. Contrastingly, physical (mineral) sunscreens erect a reflective shield on your skin, bouncing UV rays back into the ether. The choice between them? It hinges on your skin’s dialogue with these formulations. The Hybrid Frontier In the pursuit of universal protection, hybrid sunscreens emerge, marrying the best of both worlds. They cater to those seeking comprehensive coverage without compromising on skin comfort or efficacy. The Boons of Diligent Suntan Cream Use A Shield Against the Invisible Assault UV rays, those unseen adversaries, meet their match in suntan cream. It’s not just about dodging sunburn; it’s a long-term investment in a future free from photoaging and skin health adversities. A Fortress for Your Future Self Regular application lays the groundwork for a defense system that minimizes the risk of skin cancers and keeps the telltale signs of aging at bay. Think of suntan cream as the guardian of your skin’s tomorrow. Mastering the Selection Saga SPF: Decoding the Numbers SPF isn’t just a game of higher numbers. It’s about finding the level of protection that resonates with your lifestyle, your skin’s needs, and the intensity of your sun exposure. Skin Type: The Personalization Principle Your skin’s unique narrative—be it oily, dry, or sensitive—dictates the texture and formulation of the suntan cream it will most harmoniously embrace. Water’s Call: The Resilient Types For those drawn to water’s embrace or who wear their workout sweat with pride, water-resistant formulas ensure that protection doesn’t dissolve away. The Art of Suntan Cream Application Generosity and Precision: The Dual Keys Lavish your skin with suntan cream, leaving no nook unexplored, no crevice overlooked. Mastery lies in the balance of thorough coverage and mindful reapplication. The Common Oversights The tale of forgotten ears, neglected toes, or the illusion that a dab is enough—these are the pitfalls that diminish the shield we work so hard to erect. Tailoring to the Tapestry of Skin Types The Delicate Balance for Sensitive Souls For the sensitive-skinned, mineral sunscreens offer a gentle caress, free from the sting of irritation that chemical filters might provoke. The Matte Finish for the Oil-Prone Those navigating the oily…

How Tocreate A Simple Makeup Look
How to Create a Simple Makeup Look

Embarking upon the path to perfecting an effortless makeup look necessitates a profound comprehension of your skin’s unique characteristics and a dedication to the minimalist ethos in beauty. This methodology transcends the mere reduction of cosmetic items; it’s centered on optimizing the impact of each selected product. Identifying whether your skin is oily, dry, or a combination thereof is fundamental. This knowledge shapes the selection of cosmetics that will most effectively highlight your features, maintaining a delicate balance without overburdening your skin. Rooted in the principle that “less is indeed more,” this approach seeks to amplify your innate allure rather than conceal it, aiming for an appearance that exudes an easy elegance, underscored by the use of premium products that provide a subtle enhancement and durability. Priming Your Canvas The preliminary step, devoid of any color application, is essential: skin preparation. A smooth and hydrated base not only elevates the appearance of your makeup but also extends its longevity. Begin with a mild cleanser to eliminate impurities, followed by a moisturizer tailored to your skin type to ensure hydration. Should your plans involve outdoor activities, applying sunscreen is imperative for shielding your skin from the detrimental effects of UV exposure. This regimen not only prepares your skin for cosmetic application but also promotes its long-term health. Curating a Fundamental Makeup Collection Assembling a foundational makeup kit need not be daunting or costly. Concentrate on securing versatile, high-quality staples that fulfill multiple roles. A BB cream or tinted moisturizer, offering light coverage while nurturing your skin, acts as both a foundation and a skincare solution. Essentials for daily use include a neutral eyeshadow palette, a mascara that both lengthens and volumizes, a blush in natural tones, and a lip color that flatters your skin tone. The significance of quality tools—a set of precise application brushes and a blending sponge—cannot be overstated, as they significantly enhance the makeup application experience. A Stepwise Tutorial for a Minimalist Makeup Look Commence with a Pristine Foundation: Post-skincare, a light primer application will smooth any imperfections, setting the stage for even coverage. Opt for a BB cream or tinted moisturizer for sheer, breathable coverage, complemented by a concealer for discreet blemish and under-eye circle camouflage, seamlessly blended with a moist beauty sponge. Subtly Defined Eyes: Choose neutral or nude shadows for a gentle color sweep across the lids. A slender eyeliner application on the upper lash line, paired with a single mascara coat, can brighten and enlarge the eyes, enhancing their sparkle. Cheek Color Enhancement: Apply a blush, cream or powder, to the cheeks’ apples, blending upwards toward the temples for a radiant, lifted look. Lip Color Refinement: Select a lip shade marginally deeper than your natural lip color for subtle emphasis. A tinted lip balm or gloss can impart a splash of color while maintaining lip hydration. Longevity Tips for a Minimalist Look For enduring makeup, a setting spray application post-makeup is advisable. For those with oily skin, a translucent powder’s light application in the T-zone can mitigate shine without heaviness. Compact powder or blotting paper touch-ups…

Which Makeup Tool Is Right For You The Ultimate Guide To Makeuptools
Which Makeup Tool is Right for You? The Ultimate Guide to Makeup Tools

The artistry of makeup significantly benefits from the choice of tools, akin to how an artist’s masterpiece is influenced by their selected instruments. For novices embarking on their makeup voyage or professionals seeking to polish their skills, comprehending the vast array of makeup tools is paramount. Our objective is to clarify the makeup tool landscape, enabling you to choose wisely for your distinct beauty practices. Key Makeup Instruments A Comparison of Brushes and Sponges The decision between utilizing brushes or sponges for foundation is a prevalent quandary. Brushes are lauded for their precise application, excelling in the blending of both liquid and powder forms, whereas sponges are celebrated for delivering a flawless, airbrushed look, particularly with liquid foundations. Foundation Application Instruments A Spectrum from Brushes to Fingers A deep dive into foundation application tools unveils a plethora of choices, each with unique advantages. From the natural warmth of fingers facilitating blending, the precision afforded by foundation brushes, to the dewy sheen offered by sponges, every method brings something distinct to the table. Specialty Makeup Implements Eyeshadow and Eyeliner Tools The transformation of eyeshadow application lies in the appropriate selection of brushes. Ranging from soft, fluffy brushes for blending to precise pencil brushes, each is designed for crafting diverse eyelid looks. Eyeliner tools also vary, with pencils creating a smudged effect, and liquid liners providing a crisp, defined edge, each tool offering a path to achieve your envisioned eye makeup style. Innovative Makeup Implements From Silicone Sponges to Beauty Blenders Silicone sponges have emerged as a sanitary, easy-to-maintain choice for foundation application, minimizing product wastage while ensuring a smooth coverage. Beauty blenders, on the other hand, have transformed the application of foundation and concealer, ensuring an even, blended coverage. Their unique design facilitates precise application in challenging spots. Makeup Tools for Enhancing the Eyes Mascara Wands and Eyelash Curlers The design of a mascara wand is pivotal in achieving the desired lash effect, whether it’s for volume or length. Recognizing the various wand shapes is essential in picking the mascara that aligns with your goals. Eyelash curlers are indispensable for creating an uplifted, open-eyed appearance, with the trick lying in finding a curler that comfortably conforms to your eye shape. Facial Makeup Tools Contouring and Highlighting Brushes Contouring brushes, with their angled bristles, are engineered to replicate the face’s natural shadows, accentuating features like cheekbones and the jawline. Highlighting brushes aim to deposit shimmer on the face’s high points, such as cheekbones and brow bones, enhancing your glow. Lip Makeup Tools Brushes and Liners for Precision A lip brush is vital for exact lipstick or gloss application, offering edge control and the option to intensify color. Lip liners outline the lips and prevent color bleed, facilitating a precise lip edge or a blended look. Maintaining and Storing Makeup Tools Maintaining the cleanliness of your makeup tools is crucial for avoiding skin irritation and breakouts. This guide will discuss optimal practices for tool maintenance. Additionally, proper storage not only organizes your tools but also prolongs their lifespan, with innovative solutions ensuring cleanliness and accessibility….

Achieving A Flawless At Home Manicure: Tips And Tricks For Beautiful Nails
Achieving a Flawless At-Home Manicure: Tips and Tricks for Beautiful Nails

A well-manicured set of nails can enhance your overall appearance and boost your confidence. While visiting a salon for a professional manicure is a popular option, there are times when an at-home manicure is more convenient and cost-effective. With the right techniques and tools, you can achieve salon-quality results from the comfort of your own home. In this article, we will explore a variety of tips and tricks to help you achieve a flawless at-home manicure, ensuring beautiful and well-groomed nails. Prepping Your Nails:The key to a flawless manicure lies in the preparation of your nails. Start by removing any existing nail polish using an acetone-based remover. Trim your nails to the desired length and file them to shape. Gently push back your cuticles using a cuticle pusher or an orangewood stick, being careful not to damage or cut them. Soaking and Exfoliating:For an added pampering step, soak your nails in warm, soapy water for a few minutes. This softens the cuticles and makes them easier to push back or remove. After soaking, use a gentle exfoliating scrub or a soft toothbrush to gently scrub your hands and nails, removing any dead skin cells and leaving your skin feeling smooth and rejuvenated. Choosing the Right Nail Polish:Selecting the right nail polish is crucial for a flawless manicure. Look for polishes that have a smooth and even consistency, as this will make the application process easier. Opt for high-quality brands that offer a wide range of colors and finishes. If you’re new to doing your own manicures, consider starting with a classic shade that is forgiving and easier to apply evenly. Proper Application Techniques:When applying nail polish, use thin and even coats to achieve a smooth and streak-free finish. Begin with a base coat, which helps protect your nails and prevents staining. Apply two coats of your chosen nail polish color, allowing each coat to dry completely before applying the next. Finish off with a top coat to seal the color and add shine. Ensure that you cover the entire nail surface, including the tips, for maximum longevity and a polished look. Cleaning Up Mistakes:No matter how careful you are, it’s common to make small mistakes during the nail polish application process. To clean up any smudges or excess polish around the edges, dip a small brush or an angled eyeliner brush into nail polish remover and carefully clean up the mistakes. Alternatively, you can use a cotton swab dipped in nail polish remover to remove any stray polish. Drying Time:Patience is key when it comes to allowing your nails to dry. Wait for each coat of polish to dry completely before proceeding with the next layer or any activities that may risk smudging your nails. To speed up the drying process, you can use a quick-dry top coat or apply a nail polish drying spray. Hydrating and Nourishing:After your manicure is complete, it’s important to hydrate and nourish your nails and cuticles. Massage a cuticle oil or a moisturizing hand cream into your nails and cuticles to keep them healthy and prevent…

Brow Perfection At Home The Comprehensive Guide To Diy Brow Lamination
Brow Perfection at Home: The Comprehensive Guide to DIY Brow Lamination

In the realm of beauty, eyebrows are a pivotal feature, framing the face and highlighting one’s eyes. Brow lamination, a groundbreaking beauty trend, offers a solution for those seeking fuller, more defined eyebrows without daily makeup. This treatment has traditionally been a salon-exclusive, but with the right guidance, achieving salon-quality results at home is within reach. This expanded guide dives into the nuances of DIY brow lamination, covering everything from the initial prep work to the crucial aftercare, ensuring you can safely achieve and maintain impeccable brows. Deep Dive into Brow Lamination Brow lamination works by restructuring the brow hairs, giving them a uniform, desired direction and appearance. It’s particularly beneficial for those with unruly, sparse, or downward-growing hairs, providing a fuller and more even look. This section explores the technique’s origins, its rise to prominence, and how it has become a beloved alternative to more permanent treatments like microblading, offering insight into why it’s worth considering for your brow grooming routine. Advantages of Going DIY with Brow Lamination Choosing to laminate your brows at home comes with a plethora of benefits, including cost-efficiency, the comfort of your own home, and the ability to tailor the process to your specific brow needs. Here, we’ll outline the key advantages of DIY brow lamination, from the personal satisfaction of self-care to the convenience of touch-ups on your schedule, highlighting why many beauty enthusiasts are opting to take their brow treatments into their own hands. Essential Tools for At-Home Brow Lamination Successful DIY brow lamination hinges on having the right tools and products. This comprehensive checklist ensures you’re well-prepared, listing everything from reputable brow lamination kits to the specific cleansers, brushes, and aftercare serums that will make the process smooth and effective. We also include tips for selecting quality products that are safe and reliable, ensuring your DIY endeavor leads to beautiful, healthy brows. Step-by-Step Guide: Achieving Professional-Quality Lamination With the right preparation, DIY brow lamination can be straightforward and rewarding. This detailed, step-by-step guide walks you through the entire process, from conducting a patch test to applying the lamination solution, shaping, and setting your brows. Each step is broken down with precision, incorporating professional tips and visual aids to ensure clarity and ease, empowering you to achieve professional-quality results at home. Navigating Aftercare for Lasting Results The longevity and quality of your brow lamination significantly depend on proper aftercare. This section delves into the dos and don’ts following your treatment, advising on everything from how to avoid water and makeup in the initial hours to the best practices for nourishing and maintaining your newly laminated brows. Tailored advice on extending the durability of your lamination, including recommended products and routines, ensures your brows remain flawless for as long as possible. Common Pitfalls and How to Avoid Them Even with careful planning, DIY treatments can encounter hiccups. This segment addresses the most common issues encountered during home brow lamination, such as uneven application, overprocessing, or irritation, and provides expert solutions. Learning how to anticipate and remedy these challenges will bolster your confidence, ensuring a smooth…