Gua Sha: The Traditional Chinese Technique Revolutionizing Skincare

Gua Sha has recently become a buzzword in the world of social media and the beauty industry, boasting compatibility with all skin types and the potential to achieve flawless skin contouring. If you’re looking to indulge in a skin treatment and update your skincare arsenal, continue reading to learn how to utilize Gua Sha.
Gua Sha The Traditional Chinese Technique Revolutionizing Skin Care


What Is Gua Sha?

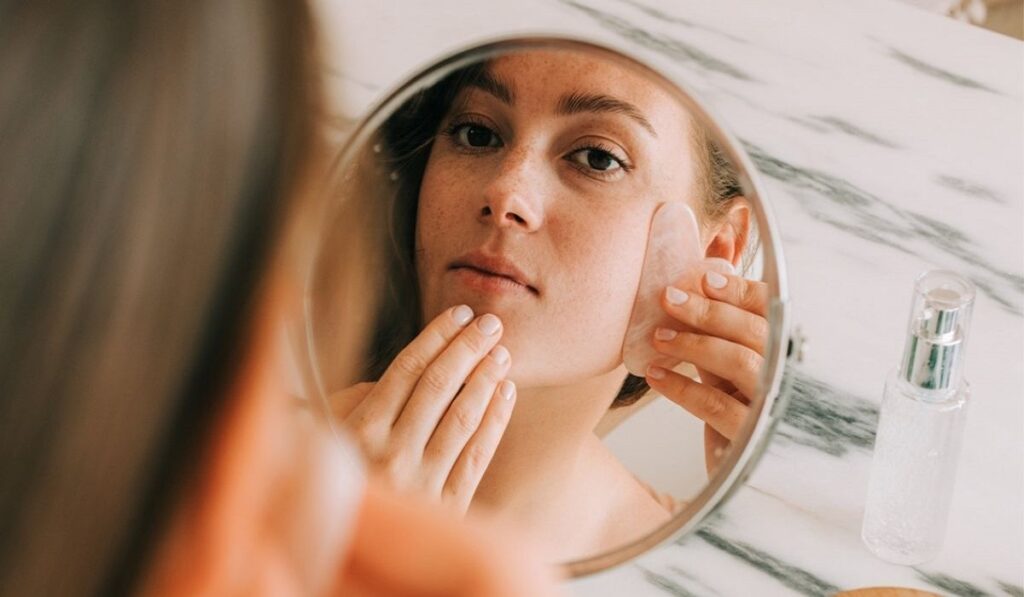
Gua Sha is a flat, uniquely shaped tool reminiscent of a heart or cloud, crafted from semi-precious stones for use on the face and neck. Though its popularity online is a recent phenomenon, its roots stretch back to ancient China. The term Gua Sha combines “Gua” (scraping) and “Sha” (redness), referring to the technique’s ability to promote the skin’s self-healing by encouraging blood circulation through scraping.

How Did It Become Popular in the Beauty Industry?

In the past two to three years, Gua Sha has exploded on social media. Beauty experts and estheticians alike have praised tools such as jade rollers, skin rollers, and Gua Sha, creating a significant buzz, particularly among fans of K-beauty (Korean beauty).

The Skin Benefits of Gua Sha

Gua Sha offers numerous benefits, including lymphatic drainage for reducing swelling and puffiness, improving blood circulation to fade acne scars, rejuvenating dull and dark skin tones, diminishing fine lines and wrinkles, and sculpting the jawline for more defined facial features.

Step-by-Step Gua Sha Application Guide

Before starting your Gua Sha session, ensure both your skincare tool and your skin are clean. For an added cooling effect, place your Gua Sha in the refrigerator for two hours before use.

A Detailed Guide to Applying Gua Sha:

  1. Neck: Use the curved edge of the tool under your neck, massaging upwards towards the jawline without dragging the skin downwards.
  2. Throat: For this sensitive area, use the top edge of your tool to apply lighter pressure, moving upwards along the curve of your neck.
  3. Jawline: Position the tool sideways and use the heart-shaped end along your jawline, starting from the chin and moving towards the ear with firm pressure.
  4. Cheeks: Employ the longest edge of the Gua Sha to cover your cheeks or cheekbones, starting from the nose and pulling upwards towards the hairline with care.
  5. Under the Eyes: Use the long curve of the tool under your eye, applying gentle pressure and moving outwards towards the hairline. If the tool is too large for this area, consider a smaller size.
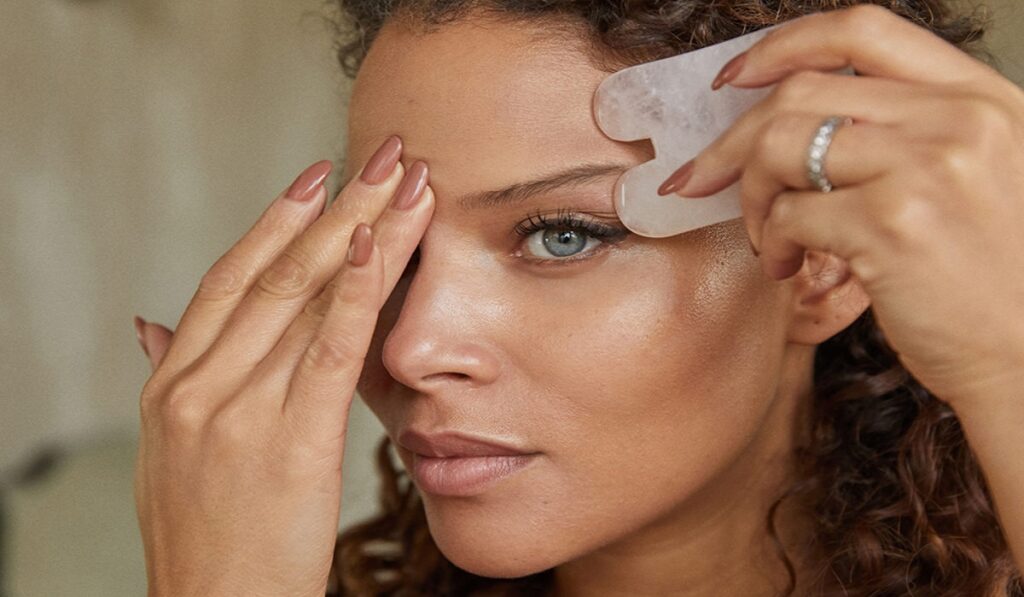
  6. Forehead: Lastly, use the long side of your Gua Sha, moving the tool upwards from just above your eyebrows towards the top of your head.
Gua Sha The Traditional Chinese Technique Revolutionizing Skincare


Frequency of Use:

Skincare experts recommend using the Gua Sha technique at least three times a week for optimal results. Most find performing this ritual at night before sleep to be the ideal timing.

Always clean your tool after each use to avoid skin issues like pimples or acne. Wash it with hot soapy water and dry with a towel.

Gua Sha promises clear cheekbones, a defined face, and an attractive jawline. This traditional Chinese technique has rightfully earned its place in modern beauty routines.

Here’s an expanded FAQ section on Gua Sha, providing a deeper dive into the most common questions surrounding this popular skincare technique.

What is Gua Sha?
Gua Sha is a traditional Chinese healing technique that involves scraping your skin with a massage tool to improve circulation. This ancient practice is known for its unique approach to enhancing skin health and is believed to have healing properties. The tools are typically made from semi-precious stones like jade or quartz and are designed to be used on the face and neck to promote lymphatic drainage, reduce puffiness, and improve skin tone and texture.

How does Gua Sha benefit the skin?
Gua Sha offers multiple benefits for the skin, including promoting lymphatic drainage to reduce swelling and puffiness, improving blood circulation to enhance skin vitality, reducing the appearance of fine lines and wrinkles, aiding in the healing of acne and acne scars by encouraging the movement of new blood to the surface of the skin, and providing a sculpted appearance by defining jawlines and cheekbones. Regular use can lead to visibly healthier, more radiant skin.


Can Gua Sha help with acne?
Yes, Gua Sha can help with acne to some extent. By improving blood circulation and promoting lymphatic drainage, it can reduce inflammation and support the skin’s natural healing processes. However, it’s important to use gentle pressure and avoid active acne breakouts to prevent further irritation.

Is Gua Sha suitable for all skin types?
Gua Sha is suitable for most skin types, including sensitive skin. The key is to adjust the pressure applied during the massage to suit your skin’s sensitivity levels. However, individuals with certain skin conditions, such as rosacea, eczema, or psoriasis, should consult with a dermatologist before starting Gua Sha to avoid any potential adverse effects.

How often should you perform Gua Sha?
For optimal results, it’s recommended to perform Gua Sha two to three times a week. This allows the skin to experience the benefits of improved circulation and lymphatic drainage without causing overstimulation or irritation.

Can Gua Sha replace other skincare tools or routines?
While Gua Sha can be a valuable addition to your skincare routine, it should not be viewed as a replacement for other skincare practices. It’s best used in conjunction with a comprehensive skincare regimen that includes cleansing, moisturizing, and sun protection. Gua Sha complements these routines by enhancing skin health and appearance from a different angle.

Are there any risks associated with Gua Sha?
When performed correctly, Gua Sha is generally safe. However, applying too much pressure can lead to bruising or irritation, especially on sensitive skin. It’s crucial to use the tool gently and follow proper techniques. Additionally, those with certain medical conditions or skin infections should avoid Gua Sha or consult with a healthcare professional beforehand.

By incorporating Gua Sha into your skincare routine and following these guidelines, you can enjoy the myriad benefits this traditional technique has to offer, resulting in a healthier, more youthful-looking complexion.


Enhancing Makeup Perfection: Exploring The Power Of Setting Spray And Primer
Enhancing Makeup Perfection: Exploring the Power of Setting Spray and Primer

In the world of cosmetics, setting spray and primer have become essential tools for makeup enthusiasts and professionals alike. These products play a crucial role in achieving a flawless and long-lasting makeup look. In this article, we will explore the purpose and benefits of makeup setting spray, as well as provide guidance on the proper use of primer. By understanding the role of these products and learning effective application techniques, you can take your makeup game to the next level. Part 1: Unveiling the Magic of Makeup Setting Spray Defining Makeup Setting Spray: Makeup setting spray, also known as finishing spray or fixing spray, is a product designed to prolong the wear of makeup and help it stay in place.It typically comes in a spray bottle and contains ingredients that provide a light mist over the face, setting the makeup and creating a protective layer. The Benefits of Makeup Setting Spray: Prolongs Makeup Wear: Setting spray helps to extend the longevity of your makeup, preventing it from smudging or fading throughout the day.Enhances Makeup Appearance: Setting spray can give your makeup a more seamless, airbrushed finish, making it look more natural and blended.Increases Makeup Durability: By creating a protective barrier, setting spray helps to shield your makeup from external factors such as humidity, sweat, and oiliness.Hydrates the Skin: Some setting sprays contain hydrating ingredients that can provide an added boost of moisture to your skin, giving it a fresh and dewy appearance. How to Use Makeup Setting Spray: After completing your makeup application, hold the setting spray bottle about 8-10 inches away from your face.Close your eyes and mist the spray in a circular motion, ensuring that your entire face is covered.Allow the spray to dry naturally without touching or blending it in.If you prefer a more intense hold, you can repeat the process by layering the setting spray.Part 2: Unleashing the Potential of Primer Understanding Primer: Primer is a preparatory product applied before makeup to create a smooth and even canvas for foundation and other cosmetics.It typically comes in a gel, cream, or lotion form and is available in various types such as silicone-based, water-based, color-correcting, or illuminating.The Benefits of Using Primer: Smoothes the Skin: Primer helps to fill in fine lines, wrinkles, and pores, creating a smoother surface for makeup application.Improves Makeup Longevity: By providing a base for makeup to adhere to, primer helps to extend the wear time of your cosmetics.Enhances Makeup Pigmentation: Primer can intensify the color and vibrancy of your makeup, making it appear more vibrant and true to shade.Addresses Specific Skin Concerns: Different types of primers cater to specific skin concerns, such as oil control, hydration, or color correction. How to Apply Primer: Start with a clean and moisturized face.Dispense a small amount of primer onto your fingertips or a makeup brush.Apply the primer onto specific areas of concern, such as the T-zone or areas with visible pores or texture.Gently blend the primer into your skin using upward strokes, ensuring an even and seamless application.Allow the primer to settle for a few minutes before proceeding with…

Skincare Tips Tofight Acne Proneskin
Skincare Tips to Fight Acne-Prone Skin

Acne is a skin condition in which pores become blocked with oil and dead cells, creating whiteheads, blackheads (comedones), or inflamed pimples that block out sunlight from penetrating deep enough. Though acne affects people of all ages, teenage teens seem most prone. Acne is caused by hair follicles becoming blocked with debris known as pores, leading to blockages that contribute to its development. There may be several contributing factors: 1.Sebum: an oily substance produced by our bodies as a protective barrier, however excessive production can clog pore openings and lead to acne formation. 2.Bacteria: Our skin naturally harbors some bacteria. C. acnes is known to flourish in oily environments, proliferating rapidly to cause acne breakouts by multiplying in clogged pores. 3.Dead Skin Cells: Our stratum corneum layer sheds to make room for new cell development; dead cells also play an integral part of pore blockage issues. Factors Contributing to AcneTight clothing such as sports helmets, hats and masks can contribute to acne breakouts. Working in environments which expose you frequently to oil – like restaurants using frying oil for instance – or exposure to high humidity with heavy lotions can also increase acne flare-ups. Stress increases cortisol hormone levels, leading to elevated cortisol hormones that in turn aggravate acne. Certain medications may have acne as a side effect. Squeezing or picking at pimples increases inflammation levels further still while cosmetic products might contribute to acne formation as well. New studies indicate high-glycemic index sugary food products could worsen acne problems further still. Adult Acne: What It Is and How it is Treated Adult acne refers to any acne which persists after age 25 (or begins after this age), whether continuing from its original source or new outbreaks starting after this point. Treatment options similar to adolescent acne may include topical products containing retinoids, benzoyl peroxide, salicylic acid or oral antibiotics including isotretinoin; ultimately however the choice of treatments are made after seeing a dermatologist following examination; factors that influence these decisions include severity of disease type left scars due to presence or absence of pitted scars on patient skin type tolerance tolerance tolerance as well as whether patient plans pregnancy. Can Adult Acne Be Prevented? Research suggests that only some adults suffering from adult acne have hormonal imbalances related to polycystic ovary syndrome gynecological issues which, if present, must be addressed immediately in order to be effective treatments of adult acne. Therefore treating any potential underling conditions is key for treating adult acne successfully. Particularly for acne-prone skin, having a meticulous skincare routine is of vital importance. Proper cleansing should always take precedence – sleeping with makeup on or skipping evening routines increases pore blockage risk leading to acne breakouts; excessive washing disrupts skin barriers leading to redness and increased sensitivity. Cleansing should involve using an effective cleansing gel and lathering it onto skin for 20 seconds before rinsing with warm water at least twice daily, including one application before bed. Cleansers containing salicylic acid have proven particularly helpful at clearing away debris such as excess keratin from pores to minimize acne…

What Is A Hot Rollerhow To Use Hot Rollers For Hair
What Is a Hot Roller? How to Use Hot Rollers for Hair?

In an era where hair styling trends come and go with the seasons, finding a tool that stands the test of time is akin to discovering a hidden gem in the vast beauty landscape. Among the myriad of styling tools, hot rollers have consistently held a place of honor. Not just a nod to vintage glamour or a memory of our mothers’ beauty routines, hot rollers are making a significant comeback, merging old-school charm with modern technology to offer stunning, volumized curls. This guide dives deep into the world of hot rollers, exploring their benefits, how to use them effectively, and tips for selecting the perfect set for your hair. What Are Hot Rollers? Tracing their roots back to the golden age of Hollywood and the everyday elegance of the past generations, hot rollers are a testament to the timeless pursuit of beautiful hair. Unlike their more static predecessors, today’s hot rollers have embraced technological advancements to offer more than just curl setting; they provide heat-induced styling for long-lasting, perfectly sculpted curls. The Mechanism Behind Hot Rollers Hot rollers operate on a simple yet effective principle. These cylindrical tools are heated in a special container before being applied to sections of the hair. Similar to curling irons, but without the need for continuous manual operation, they are left in the hair for a set period to shape and mold the hair into curls or waves, offering a hands-free styling experience. How to Use Hot Rollers The thought of integrating heat into hair styling can seem daunting at first, but using hot rollers is surprisingly straightforward and can yield professional-looking results with a bit of practice. Preparation Is Key Application Tips Choosing the Right Hot Rollers Selecting the ideal hot rollers for your hair type and desired style involves understanding key features and specifications. Temperature Settings Roller Sizes Incorporating Hot Rollers Into Your Styling Routine Hot rollers, with their blend of convenience and efficiency, offer a versatile styling solution. Whether you’re aiming for a bombshell blowout, soft romantic curls, or just adding some extra oomph to your everyday look, hot rollers can achieve it with a touch of vintage flair. Mastering the Use of Hot Rollers for Stunning Curls 1. Is there a risk of hair damage with hot rollers?Indeed, similar to other heated styling devices, hot rollers carry the potential for hair damage if misused or overused. To mitigate such risks, it’s crucial to apply a heat protectant spray before setting the rollers and to steer clear of using them on damp hair. Opting for rollers that offer variable temperature controls can also enable you to adjust the heat to a level that’s gentle on your hair. 2. Optimal duration for keeping hot rollers in place?The ideal time to leave hot rollers in your hair varies, influenced by factors such as your hair’s texture, the intensity of the curl you aim for, and the rollers’ temperature. A general guideline is to wait around 15-20 minutes or until the rollers have fully cooled down, ensuring the curls set properly. Thinner hair may do…

5secrets To Achieving Blackhead Free Skin
5 Secrets to Achieving Blackhead-Free Skin

Blackheads, those frustrating tiny black specks that frequently appear on our most noticeable areas like the nose, chin, and forehead, are a widespread concern for many individuals. Gaining an understanding of blackheads and the reasons behind their occurrence is the initial step towards effectively combating them. This guide is designed to provide you with the essential tools, knowledge, and advice needed to achieve and sustain a complexion free of blackheads, ensuring it remains radiant and healthy. The Underlying Science of Blackheads Known in medical terms as open comedones, blackheads develop when pores are blocked by a mix of sebum (skin oil) and dead skin cells. The exposure of this blockage to air leads to oxidation and turns it black, setting them apart from whiteheads. Grasping the origins of blackheads and the significance of sebum and dead skin cells in their development is key for their prevention and treatment. Fundamental Skincare Practices for Preventing Blackheads Preventing blackheads effectively hinges on a customized skincare routine. Essential steps include daily cleansing, consistent exfoliation, and appropriate moisturization. We will explore how these measures can avert the formation of blackheads and preserve skin vitality. Advanced Treatments for Blackheads For those in search of more profound solutions, advanced treatments like chemical peels, microdermabrasion, and laser therapy present promising outcomes. These procedures are instrumental in deeply purifying pores, eliminating dead skin cells, and diminishing blackheads’ visibility. Over-the-Counter Options A plethora of over-the-counter products are available for tackling blackheads, encompassing products with salicylic acid, retinoids, and masks containing charcoal or clay, each providing distinct advantages in the pursuit of clear skin. Prescription Solutions For cases that are more challenging, dermatologists might suggest prescription medications, including topical retinoids and oral alternatives. Recognizing when to resort to these options can significantly change the game for individuals battling persistent blackheads. Dietary Influence on Skin Health The connection between our diet and the condition and appearance of our skin is undeniable. This segment will delve into how dietary choices influence skin health, spotlighting foods to avoid and nutrients that foster a flawless complexion. Lifestyle Adjustments for Enhanced Skin In addition to skincare products and procedures, lifestyle aspects like hydration, managing stress, and the quality of sleep have substantial impacts on skin condition. Adopting positive lifestyle modifications can lead to remarkable enhancements in skin health. Home-based and Natural Solutions For enthusiasts of natural and home-based methods, alternatives such as tea tree oil and DIY exfoliating scrubs can provide gentle yet effective means to manage blackheads. The Crucial Role of Sun Protection Sun protection is an indispensable aspect of any skincare regime, especially for those prone to blackheads. Selecting the appropriate sunscreen and comprehending its importance in preventing blackheads are crucial measures towards maintaining skin health. Achieving a Complexion Without Blackheads This segment will outline an all-encompassing strategy, detailing the vital products, practices, and tips for securing and keeping a complexion devoid of blackheads, customized to various skin types and issues. Deciphering Your Skin Type Customizing your skincare routine to your specific skin type is essential. This part of the guide will assist in identifying your…

Dewy All Day Tips To Keep Your Makeup Fresh And Glowing
Dewy All Day: Tips to Keep Your Makeup Fresh and Glowing

Dewy makeup has become a popular trend, providing a fresh and radiant glow to the skin. However, maintaining that luminous look throughout the day can be a challenge, especially if you have oily skin or live in a humid climate. In this article, we will share effective tips and techniques to help you keep your dewy makeup going strong from morning to night. From prepping your skin to setting your makeup, we will guide you through the steps necessary to achieve long-lasting, flawless dewy makeup. Prep Your Skin:Proper skincare preparation is essential for achieving long-lasting dewy makeup. Start by cleansing your face to remove any dirt, oil, or impurities. Follow up with a lightweight moisturizer that hydrates your skin without making it greasy. Allow the moisturizer to absorb fully before moving on to the next step. Additionally, applying a primer formulated for dewy finishes can create a smooth canvas for your makeup and help it adhere better throughout the day. Choose the Right Foundation:When aiming for a dewy look, selecting the right foundation is crucial. Opt for foundations with a luminous or dewy finish that provide a natural glow to your skin. Avoid matte or oil-control foundations, as they can give a flat appearance. Consider using lightweight formulas that allow your skin to breathe while still providing coverage. Additionally, look for long-wearing foundations that are designed to stay put and maintain a dewy finish for extended periods. Strategic Powder Application:While powder helps control shine, using it sparingly is key to maintaining a dewy look. Focus on applying powder only to areas prone to excessive oiliness, such as the T-zone. Use a finely milled, translucent powder and a fluffy brush to gently dust the powder onto these areas. Avoid applying powder all over the face, as it can mattify the skin and diminish the dewy effect. The strategic application of powder helps set your makeup without compromising its luminosity. Use Cream or Liquid Highlighters:Highlighters are essential for achieving a dewy look. Opt for cream or liquid highlighters instead of powder formulas, as they blend seamlessly into the skin and provide a more natural-looking glow. Apply the highlighter to the high points of your face, such as the cheekbones, bridge of the nose, and cupid’s bow. Gently blend it in with your fingertips or a damp beauty sponge for a radiant and dewy finish. Set Your Makeup:To ensure your dewy makeup lasts all day, setting it with the right products is crucial. Instead of using a traditional setting powder, opt for a setting spray that provides a dewy or hydrating finish. Mist the setting spray over your entire face after completing your makeup application. This will help lock in your makeup, melt all the products together, and give a luminous boost to your skin. Carry a travel-size setting spray in your bag for touch-ups throughout the day to revive the dewy look. Blotting Papers for Oil Control:If you have oily skin, it’s common for excess oil to interfere with your dewy makeup. Keep blotting papers handy to absorb any excess oil without disturbing your…

How To Achieve The Tiktok Vanilla Girl Makeupaesthetic
How to Achieve the TikTok Vanilla Girl Makeup Aesthetic

In an era where TikTok dictates the pulse of beauty and fashion trends, the Vanilla Girl makeup aesthetic has emerged as a coveted look. It’s a celebration of simplicity and natural beauty, steering away from the bold and dramatic to embrace the understated elegance of minimal makeup. This aesthetic is all about enhancing your natural features in the most subtle way. Whether you’re a seasoned makeup enthusiast or new to the beauty scene, achieving the Vanilla Girl look can be simple with the right approach. This comprehensive guide will walk you through the essential steps to mastering this effortlessly chic look, turning you into a TikTok sensation in no time. Start with a Flawless Base Achieving the Vanilla Girl makeup look begins with perfecting your canvas. Cleanse and moisturize your face to ensure a smooth and hydrated base. Opt for a tinted moisturizer or a lightweight foundation that seamlessly matches your skin tone for that barely-there effect. Application is key; use a damp beauty sponge or a foundation brush for an even and natural finish. A good base not only enhances the makeup but also cares for your skin underneath. Embrace Neutral Shades The essence of the Vanilla Girl aesthetic lies in the palette of neutral tones that complement your natural skin tone. Earthy hues of brown, beige, and nude in matte finishes are your best friends for eyeshadows and blushes. For the lips, a hint of gloss over a nude lipstick or a swipe of tinted lip balm adds the perfect touch of understated glamour. Selecting the right shades is crucial for maintaining the authenticity of the aesthetic while playing up your best features. Illuminate Your Natural Features Highlighting is a game-changer in the Vanilla Girl makeup routine. Use a highlighter that’s just a shade lighter than your skin tone and possesses a subtle shimmer, not glitter. The key areas to focus on are the tops of your cheekbones, the bridge of the nose, and the cupid’s bow. A gentle application will lend you a soft, ethereal glow that defines the Vanilla Girl look. Subtly Defined Eyes For eyes that speak volumes without saying a word, stick to neutral eyeshadows to define the crease and the outer corners. A swipe of brown or black mascara adds definition to your lashes, making your eyes appear wider and more awake. Those seeking a bit more depth can lightly line the waterline with a brown or black pencil. Remember, the goal is to enhance, not overshadow, your natural beauty. Natural Brows Are Key Brows frame the face and play a pivotal role in the Vanilla Girl aesthetic. The focus here is on full, well-groomed brows that look as natural as possible. Fill in sparse areas with a brow pencil or gel, mimicking the natural hair direction. The shade chosen should closely match your hair color to avoid a harsh contrast, keeping the overall look soft and coherent. Seal with a Dewy Finish Lock in your makeup while adding a burst of hydration with a dewy setting spray. A fine mist enriched with glycerin or…

Mastering The Art Of Henna Hair Dye
Mastering the Art of Contouring: Tips and Tricks

The art of contouring has taken the beauty world by storm, offering a technique to enhance and define facial features like never before. This guide breaks down the steps, tips, and tricks to master contouring, transforming your makeup routine and elevating your look to new heights. The Basics of Contouring What is Contouring? Contouring is a makeup technique used to define, enhance, and sculpt the natural features of the face through strategic application of makeup. Tools You Will Need Discover the essential tools for contouring, including brushes, sponges, and the types of makeup best suited for the task. Understanding Face Shapes Identifying Your Face Shape Learn how to identify your face shape to tailor your contouring technique for the most flattering results. Contouring for Each Face Shape Detailed tips on contouring for round, oval, square, heart, and diamond-shaped faces, ensuring every reader can achieve their best look. Step-by-Step Guide to Contouring Preparing Your Skin The importance of a clean, moisturized base for seamless makeup application. Mapping Your Face Guidance on how to map the areas of your face for contouring, highlighting the regions that will help achieve a balanced and defined look. Blending Techniques Techniques and tips for blending contour makeup flawlessly, avoiding harsh lines for a natural finish. Highlighting: The Perfect Pair to Contouring Areas to Highlight Identify the areas of your face that should be highlighted to complement your contouring, enhancing your facial structure effectively. Choosing Highlighter Advice on selecting the right highlighter shade and formula for your skin tone and type. Contouring with Different Products Cream vs. Powder Contour Pros and cons of cream and powder contour products, helping you decide which is best for your skin type and desired finish. How to Choose Tips on choosing the right shades and formulas for your specific contouring needs. Advanced Contouring Techniques Nose Contouring Step-by-step guide to contouring your nose, making it appear slimmer or more defined. Jawline and Neck Contouring How to contour the jawline and neck for a more sculpted and defined appearance. Common Contouring Mistakes and How to Avoid Them Too Dark or Too Light How to select contour shades that match your skin tone to avoid a muddy or overly dramatic look. Mismatched Undertones Understanding the importance of matching the undertone of your contour product to your skin to ensure a natural look. Tips and Tricks for a Natural Contour Blending is Key Emphasize the importance of blending for a seamless, natural contour that enhances rather than overshadows your natural beauty. Less is More Advice on starting with a light hand and building up product gradually to avoid over-contouring. Maintaining Your Contour Throughout the Day Setting Your Contour Recommendations for setting sprays and powders to keep your contour in place all day. Touch-up Tips Quick fixes and touch-up tips for maintaining your contour, even on the go. Mastering the art of contouring can dramatically enhance your makeup routine, offering a sculpted, polished look that highlights your best features. With practice, the right tools, and a bit of creativity, anyone can become proficient in this transformative makeup technique….

The Ultimate Guide To Cleaning Your Makeup Brushes: Tips, Tricks, And Techniques
The Ultimate Guide to Cleaning Your Makeup Brushes: Tips, Tricks, and Techniques

Makeup brushes are an essential tool in any beauty routine. They help us achieve flawless and effortless makeup looks, whether we’re going for a natural or dramatic look. However, it’s important to note that these brushes need to be cleaned regularly to maintain their performance and longevity. Dirty brushes can harbor bacteria, oil, dirt, and dead skin cells that can cause breakouts and other skin problems. Cleaning your makeup brushes may seem like a daunting task, but it’s actually quite simple and easy to do. With the right tools and techniques, you can keep your brushes clean and in good condition for years to come. In this article, we’ll walk you through the step-by-step process of cleaning your makeup brushes, as well as some tips and tricks to make the process even easier. Step 1: Gather Your Supplies Before you start cleaning your makeup brushes, you’ll need to gather some supplies. Here are the things you’ll need: Gentle liquid soap or brush cleaner: You can use any gentle liquid soap or brush cleaner to clean your brushes. Avoid using harsh soaps or detergents as they can damage the bristles. Bowl or sink: You’ll need a bowl or sink to clean your brushes in. Make sure it’s clean and free from any dirt or debris. Towel: You’ll need a clean towel to dry your brushes on. Brush cleaning mat or glove (optional): A brush cleaning mat or glove can help you get a deeper clean on your brushes by helping to remove dirt and makeup residue. Step 2: Wet Your Brushes To start cleaning your makeup brushes, wet the bristles under running water. Make sure the water is lukewarm and not too hot or too cold. Hold the brush under the water with the bristles facing down, and avoid getting water on the metal part of the brush as it can loosen the glue that holds the bristles in place. Step 3: Clean Your Brushes Once your brushes are wet, it’s time to clean them. You can use a gentle liquid soap or brush cleaner for this step. Put a small amount of soap or cleaner into your palm or onto a brush cleaning mat or glove. Swirl the brush into the soap or cleaner, making sure to cover all the bristles. Gently massage the bristles with your fingers, working the soap or cleaner into the brush. If you’re using a brush cleaning mat or glove, use the textured surface to help remove any dirt or makeup residue. Step 4: Rinse Your Brushes After you’ve cleaned your brushes, rinse them thoroughly under running water. Make sure all the soap or cleaner is rinsed out of the bristles. Keep rinsing the brushes until the water runs clear. Step 5: Dry Your Brushes Once you’ve rinsed your brushes, it’s time to dry them. Gently squeeze the excess water out of the bristles, then reshape the bristles with your fingers. Lay the brushes flat on a clean towel and let them air dry. Avoid drying your brushes upright as the water can seep down into the…